
DoltDB is the world’s first fully-versioned relational database. You can branch, merge, diff, push, and pull your relational data in the same ways that Git allows you to work with source code files. If you’re curious what sorts of use cases that enables, check out some of ways we’ve heard customers are using Dolt.
Dolt is a complete, open-source rewrite of MySQL, and is a drop-in replacement for MySQL. That means any tool or library that works with MySQL, works with Dolt! We’ve previously shown how Dolt works with application frameworks like Entity Framework Core, Laravel, and Django, and also with tools like Superset and Metabase. Today we’re going to be focusing on the .NET ecosystem and building an ASP.NET Core web application using Razor Pages and Entity Framework Core to store and load data in a Dolt database. In addition to the basic CRUD operations that any database application needs, we’re also going to show how to use a few of Dolt’s versioning features, such as branching, commit logs, and data diffs, in your .NET web applications.

Running the Sample Application#
The rest of this post walks through all the nitty-gritty details on how we built this ASP.NET Core web app with Dolt as the backing datastore. If you just want to skip ahead and play with the finished project and explore the code locally, you can find all the source code online in the dolthub/dolt-dotnet-webapp-sample GitHub repository. To get the project running locally, following the steps below.
First, make sure you have Microsoft’s .NET Core SDK installed. After installing the .NET Core SDK, open a new terminal window, and you should have ~/.dotnet/tools on your PATH; if not, you can add it manually. Once the dotnet CLI is on your path, install the Entity Framework Core tools by running:
dotnet tool install --global dotnet-ef
Clone the sample application repository:
git clone https://github.com/dolthub/dolt-dotnet-webapp-sample.git
Change into the directory for the sample application:
cd dolt-dotnet-webapp-sample
Make sure you have Dolt installed, then run the commands below to create a new Dolt database named “dolt” and start up a sql-server:
mkdir dolt && cd dolt && dolt initdolt sql-server --port 11229
In a new terminal, from the root of the sample project, apply the project’s database schema to our new database:
dotnet ef database update
Start up the .NET web application:
dotnet restore && dotnet run
Open your web browser and navigate to the URL displayed from dotnet run and explore the sample application. The database is empty initially, so add some movies, then edit and delete some. After that, check out the Dolt Commit Log and Dolt Branches links at the top of the page to see the commit history, create new branches, change which branch is active, and see diffs of the changes being made to your data.
Building the Sample Application#
This sample is based off of Microsoft’s tutorial for Getting Started with Razor Pages in ASP.NET Core. This simple web application demonstrates how to use Entity Framework Core for basic CRUD operations for a site that catalogs movies. This gives us a good starting point for a simple web application, and we’ll be extending it with several Dolt-specific features to show how you can integrate data versioning into your applications.
Creating the Project#
Let’s start by creating a new ASP.NET Core web app project. We’re going to use the dotnet command line tool to create a new Razor Pages application. If you don’t already have the .NET Core SDK installed, you can download it from Microsoft’s .NET website.
dotnet new webapp -o RazorPagesMovieIf you’re using Visual Studio Code to develop, and you’ve installed the Visual Studio Code shell extension, you can open your new project by running code -r RazorPagesMovie.
Next, run these commands to add all the required NuGet packages and development tooling to your project:
dotnet tool uninstall --global dotnet-aspnet-codegenerator
dotnet tool install --global dotnet-aspnet-codegenerator
dotnet tool uninstall --global dotnet-ef
dotnet tool install --global dotnet-ef
dotnet add package Microsoft.EntityFrameworkCore.Design
dotnet add package Microsoft.EntityFrameworkCore.SqlServer
dotnet add package Microsoft.VisualStudio.Web.CodeGeneration.Design
dotnet add package Microsoft.EntityFrameworkCore.Tools
dotnet add package Pomelo.EntityFrameworkCore.MySql --version 8.0.0
Note that this list differs slightly from the official .NET Razor Pages tutorial, since we need slightly different dependencies to work with Dolt. Notably, we’ve removed the SqlLite dependency and added in the Pomelo.EntityFrameworkCore.MySql package.
Adding Models#
Now that we’ve got a project, we need to add a Model class to it. Create a new “Models” folder at the top level of the project and a new file “Movie.cs” within it, then add in this code:
using System.ComponentModel.DataAnnotations;

namespace RazorPagesMovie.Models;

public class Movie
{
    public Movie()
    {
        Id = Guid.NewGuid();
    }

    public Guid Id { get; set; }
    public string? Title { get; set; }
    [DataType(DataType.Date)]
    public DateTime ReleaseDate { get; set; }
    public string? Genre { get; set; }
    public decimal Price { get; set; }
}
Note that instead of using an integer ID, which would be mapped to the database as an auto_increment int, we’re using a Guid and populating a new Guid in the constructor. Preferring a Guid over an auto_increment integer is a good practice, especially if you want to allow decentralized inserts to your database that you later want to merge together.
One of the things I love about the .NET Razor Page development tools is the ability to quickly scaffold boilerplate code. We’ve created our Movie model, and now we can use those scaffolding tools to quickly create the CRUD pages for working with our Movie data. Run this command to create the CRUD pages for the Movie model:
dotnet aspnet-codegenerator razorpage -m Movie -dc RazorPagesMovie.Data.DoltContext -udl -outDir Pages/Movies --referenceScriptLibraries --databaseProvider MySqlAfter running this, you’ll see a new “Data” directory at the top level of the project and a DoltContext.cs file within it. You should also see a new “Movies” folder underneath the top level “Pages” directory with our scaffolded Razor pages in it.
Configuring Dolt#
When we ran the dotnet aspnet-codegenerator command, it also updated the appsettings.json file for our project to include a connection string for the new DoltContext. Open up appsettings.json and let’s fill in the connection string we need to connect to our local Dolt sql-server. Your appsettings.json file should look something like this:
{
  "Logging": {
    "LogLevel": {
      "Default": "Information",
      "Microsoft.AspNetCore": "Warning"
    }
  },
  "AllowedHosts": "*",
  "ConnectionStrings": {
    "DoltContext": "server=localhost;user id=root;database=dolt;port=11229"
  }
}
There’s one more change we need to make in order to finish configuring our application to talk to a Dolt database. Open up your Program.cs file and find the line that calls builder.Services.AddDbContext. By default, the scaffolding tools configure it to use SQL Server, so replace that line with these lines that tell Entity Framework Core that we’re using a MySQL-compatible database:
var connectionString = builder.Configuration.GetConnectionString("DoltContext");
builder.Services.AddDbContext<DoltContext>(options =>
    options.UseMySql(connectionString, ServerVersion.AutoDetect(connectionString)));
Now let’s get our Dolt database set up! Make sure you’ve installed dolt, create a directory named “dolt” in the root of your project and initialize it, then start up a Dolt sql-server on port 11229:
mkdir dolt && cd dolt
dolt init
dolt sql-server --port 11229
Now that our app is configured to talk to our database, and we’ve started up the database sql-server process, let’s bootstrap the database with the schema for our application, using the dotnet ef migrations command to create the initial migration script, and then apply it using the dotnet ef database update command:
dotnet ef migrations add InitialCreate
dotnet ef database update
Let’s log into our database to see the schema that last command bootstrapped for us, and then create a Dolt commit as a starting point for our database commit graph:
mysql -uroot --protocol TCP --port 11234 dolt

-- `dotnet ef database update` created the new Movie table to store our Movie entities, as well as a
-- __EFMigrationsHistory table to track the migrations that have been applied to the database.
mysql> show tables;
+-----------------------+
| Tables_in_dolt        |
+-----------------------+
| Movie                 |
| __EFMigrationsHistory |
+-----------------------+
2 rows in set (0.00 sec)

-- Here we can see how Entity Framework Core is mapping our Movie entities to storage in our database.
mysql> describe Movie;
+-------------+-------------------------------------------------------+------+-----+---------+----------------+
| Field       | Type                                                  | Null | Key | Default | Extra          |
+-------------+-------------------------------------------------------+------+-----+---------+----------------+
| Id          | char(36) CHARACTER SET ascii COLLATE ascii_general_ci | NO   | PRI | NULL    | auto_increment |
| Title       | longtext COLLATE utf8mb4_0900_ai_ci                   | YES  |     | NULL    |                |
| ReleaseDate | datetime(6)                                           | NO   |     | NULL    |                |
| Genre       | longtext COLLATE utf8mb4_0900_ai_ci                   | YES  |     | NULL    |                |
| Price       | decimal(65,30)                                        | NO   |     | NULL    |                |
+-------------+-------------------------------------------------------+------+-----+---------+----------------+
5 rows in set (0.01 sec)

-- Finally, let's create a new Dolt commit to capture the initial state of our database.
mysql> call dolt_commit('-Am', 'Initial database schema created');
+----------------------------------+
| hash                             |
+----------------------------------+
| 5dlc0ilkvdfhaphin7q8f9livqbod7rl |
+----------------------------------+
1 row in set (0.00 sec)
Adding Dolt Commits#
At this point, we’ve got our application wired up to talk to our running Dolt database, but before we test out the application, let’s add one more thing… In Dolt, just like in Git, you control when commits are made to the commit graph. Note that we’re talking about Dolt commits here, which are a little higher level than SQL commits. SQL transaction commits work exactly the same as they do in MySQL, but only a Dolt commit adds an entry to our database’s commit graph (in addition to committing any outstanding SQL transactions). We’d like every change in our application to create a Dolt commit, so that we have a nice history of what’s been going on in our database. To do that, we’re going to make a small change to each of our Page Models to call the dolt_commit() stored procedure after making any data changes.
To make this a little bit easier, we’re going to add a new method called SaveChangesAndCommitAsync() that calls SaveChangesAsync() to write our model changes back to the database, and then it calls the dolt_commit() stored procedure to create a new Dolt commit in our commit graph, which we’ll later be able to see in the commit log. Note that we also added a using block to ensure we are running in a transaction and that our database code inside the using block gets executed with the same session from the connection pool.
    /// <summary>
    /// Method <c>SaveChangesAndCommitAsync</c> is similar to the SaveChangesAsync() method, but in addition to
    /// committing the SQL transaction, it also creates a Dolt commit in the Dolt commit graph for this database.
    /// </summary>
    public async Task SaveChangesAndCommitAsync(string commitMessage) {
        using (var transaction = this.Database.BeginTransaction()) {
            try {
                await this.SaveChangesAsync();
                await this.Database.ExecuteSqlInterpolatedAsync($"call dolt_commit('-Am', {commitMessage});");

                // No need to explicitly commit the SQL transaction, since dolt_commit() will implicitly
                // commit the in-progress transaction as part of creating the Dolt commit.
            } catch (Exception) {
                transaction.Rollback();
                throw;
            }
        }
    }
Now that we’ve got this handy helper function, let’s update our PageModels to use it, instead of calling SaveChangesAsync() directly. You’ll need to make this change to each of the Create, Delete, and Edit PageModels in the Pages/Movies directory. Here’s what it looks like for the Create.cshtml.cs:
    public async Task<IActionResult> OnPostAsync()
    {
        if (!ModelState.IsValid)
        {
            return Page();
        }

        _context.Movie.Add(Movie);
        await _context.SaveChangesAndCommitAsync($"Adding Movie: {Movie.Title}");

        return RedirectToPage("./Index");
    }
Test it out!#
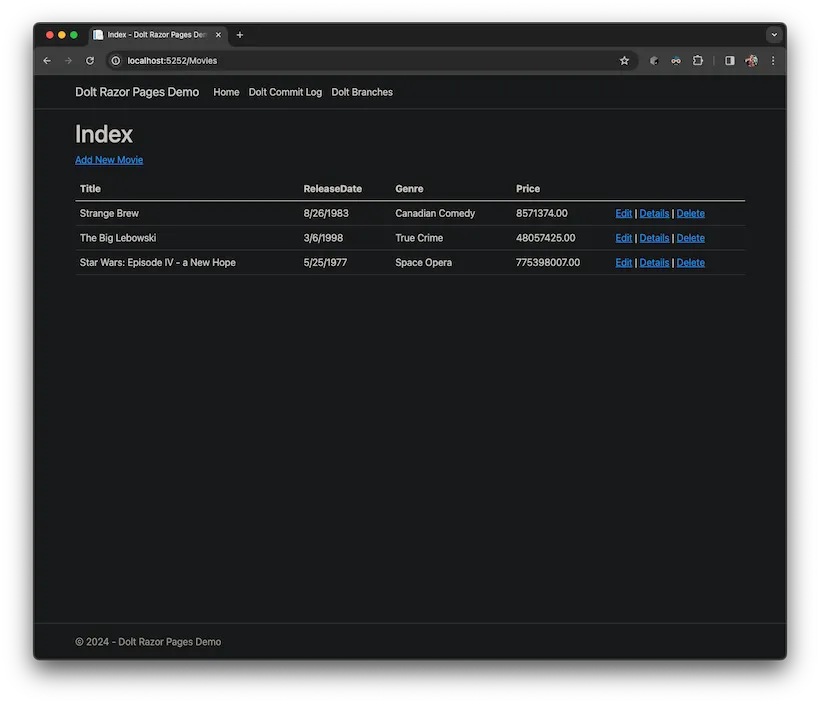
Now that we’ve got everything set up, let’s start up our web app and try it out! From the command line, I’ve run dotnet run and the output told me the web app was started up at http://localhost:5277, so I point my web browser to http://localhost:5277/Movies to see the main page for our Movie pages.
As expected, we see an empty list of movies at first, since we haven’t entered any data.
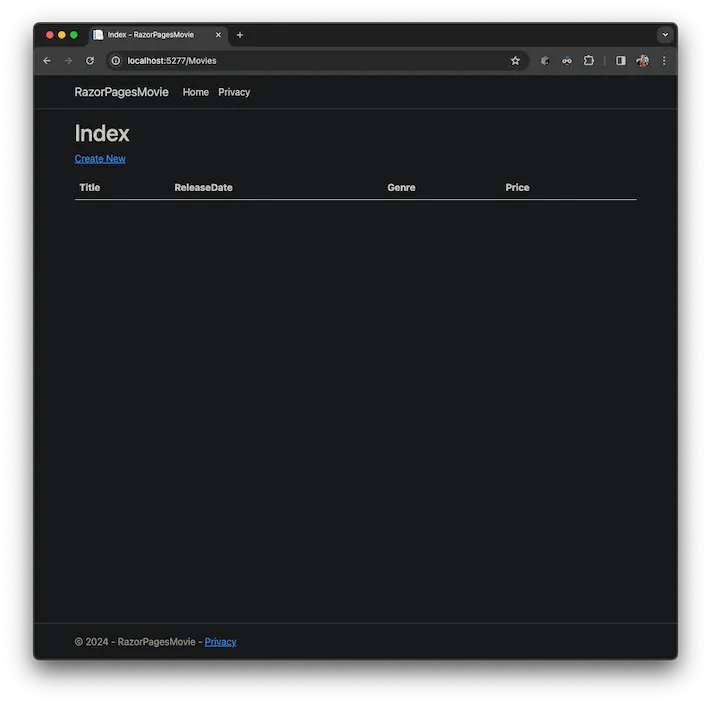
We can use the “Create New” link to add a movie:
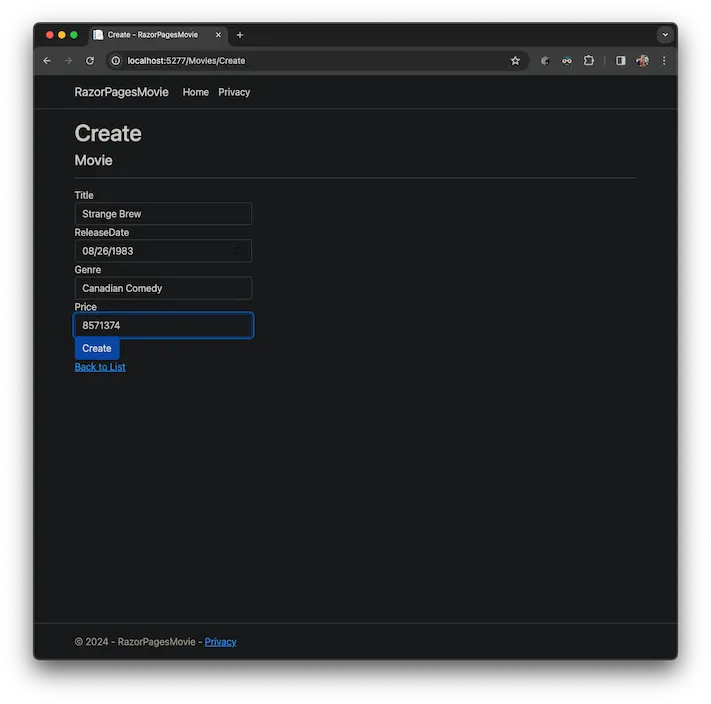
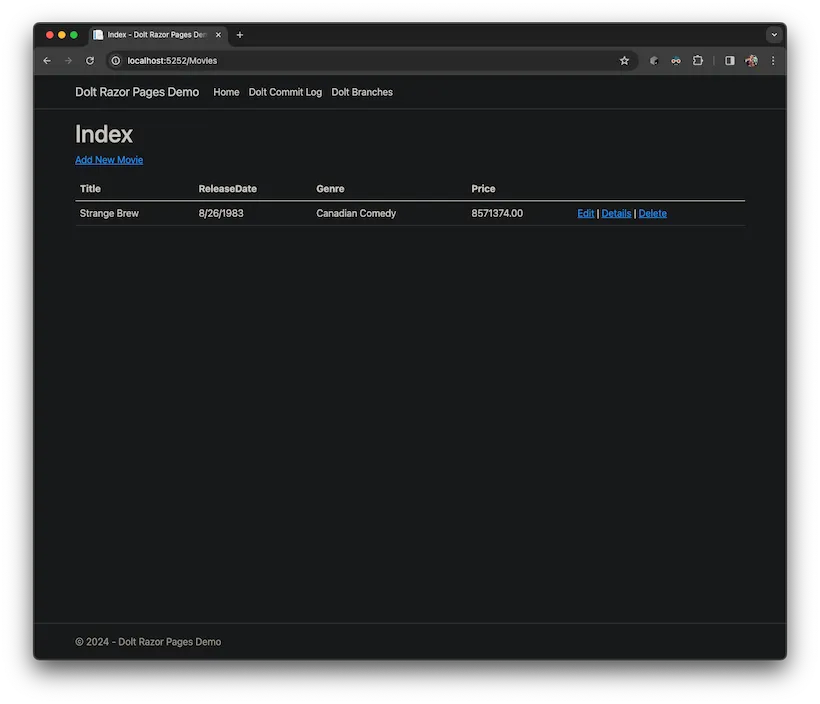
After adding a movie, we see it show up in the list of movies:
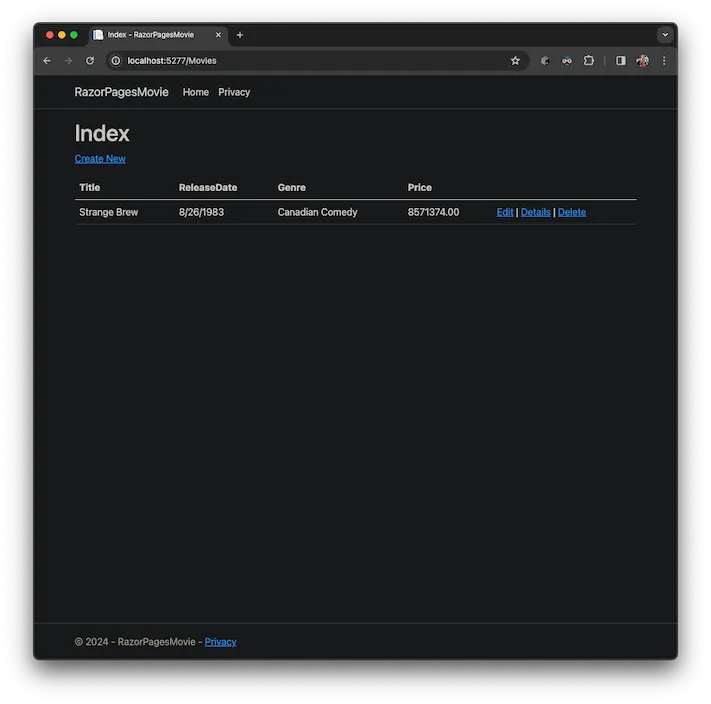
Let’s take a look at the dolt_log system table to see what our commit log looks like. We should see one commit for the movie we just added, one commit for the database schema creation, and one commit for the repository initialization.
mysql> select * from dolt_log;
+----------------------------------+-----------+-------------------------+---------------------+---------------------------------+
| commit_hash                      | committer | email                   | date                | message                         |
+----------------------------------+-----------+-------------------------+---------------------+---------------------------------+
| vhjr6iinifajuhjihmjasrgspqcvb58e | root      | root@%                  | 2024-02-20 21:27:07 | Adding Movie: Strange Brew      |
| 5dlc0ilkvdfhaphin7q8f9livqbod7rl | root      | root@%                  | 2024-02-20 20:43:28 | Initial database schema created |
| ris9norg5jj4u416fi685hc1ekkfspqn | jfulghum  | jason.fulghum@gmail.com | 2024-02-20 19:26:01 | Initialize data repository      |
+----------------------------------+-----------+-------------------------+---------------------+---------------------------------+
3 rows in set (0.00 sec)
Go ahead and play with the app some more, add more movies, delete some, and edit others. In the next sections, we’ll add more features that expose Dolt’s versioning features directly through our web app.
Adding the Dolt Commit Log Page#
Now we’ve got a working web application that lets us catalog a set of movies, saves the results back to our Dolt database, and captures Dolt commits for each change our users are making. We were able to log into the database to see the Dolt commit log, but it would be really cool to expose the Dolt commit log directly through the web application itself. To do that, we need to create a new model entity for Dolt commits so that Entity Framework Core can load them from the database for us, and create some new Razor pages and page models to handle displaying that data.
Let’s start by creating the new Commit model class. Note that since this data can only be read from the database, we’ve given all the fields private setters. This allows EF Core to set the values it reads from the database, but prevents us from accidentally modifying the values in our application code.
using System.ComponentModel.DataAnnotations;
using System.ComponentModel.DataAnnotations.Schema;

namespace RazorPagesMovie.Models;

/// <summary>
/// The Commit class models a Dolt commit, as returned by the dolt_log system table.
/// </summary>
/// https://dolthub.com/docs/sql-reference/version-control/dolt-system-tables#dolt_log
public class Commit
{
    [Key]
    [Column("commit_hash")]
    public string? CommitHash { get; private set; }

    [Column("committer")]
    public string? Committer { get; private set; }

    [Column("email")]
    public string? CommitterEmail { get; private set; }

    [Column("date")]
    public DateTime Date { get; private set; }

    [Column("message")]
    public string? Message { get; private set; }
}
Next, we need to update the OnModelCreating() method in our DoltContext class to tell Entity Framework Core how to map the Commit model to the dolt_log system table. Add these lines to the OnModelCreating() method in DoltContext.cs:
    // The dolt_log system table provides a commit log for the currently checked out branch, similar to git log.
    // Because this is a system table that Dolt creates automatically, we exclude it from migrations.
    // https://dolthub.com/docs/sql-reference/version-control/dolt-system-tables#dolt_log
    modelBuilder.Entity<Commit>()
        .ToTable("dolt_log")
        .HasAnnotation("Relational:IsTableExcludedFromMigrations", true);
And add this new property to your DoltContext class:
public DbSet<RazorPagesMovie.Models.Commit> Commits {get; set;} = default!;Next, let’s create the new Razor Page and the new PageModel that feeds it data. Create a new “Admin” subdirectory under the “Pages” directory and then add two new files to that subdirectory:
There’s nothing too interesting in the new Razor pages, although, there is a link to a new “Diff” page that won’t work quite yet (foreshadowing!). We’ll see more about that in the next section. Before we get to that, let’s run the app and see the new commit log page.
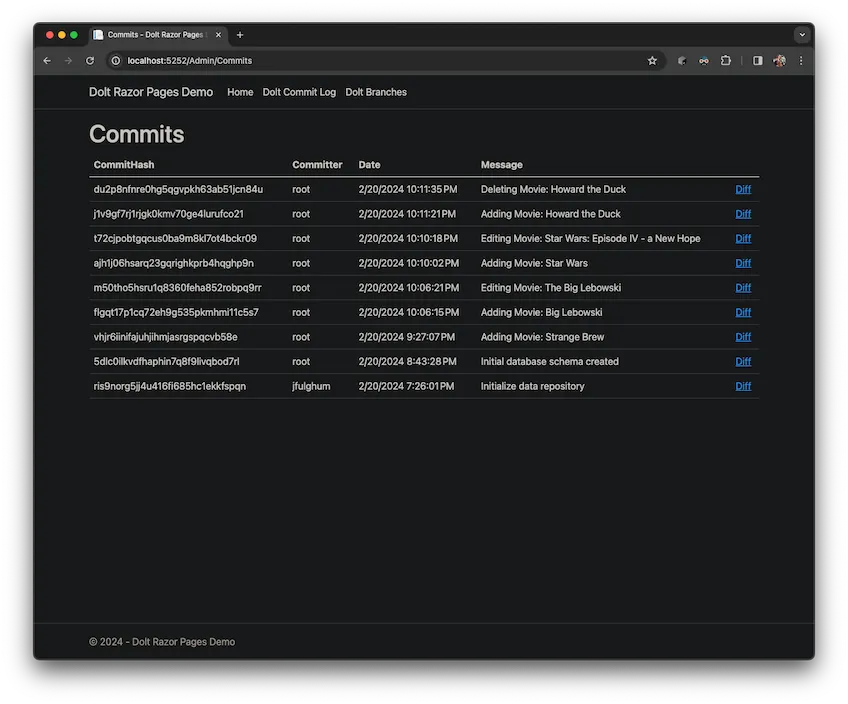
Pretty neat to be able to see a log of all the changes users have been making! If we added authentication to our application, we could easily attribute each change to a specific user, too, by passing in an explicit commit author to the dolt_commit() stored procedure.
Adding Dolt Diffs#
Now that we’re able to see the history of the Dolt commits in our database, the next question we want to ask is how our database changed in each of those commits. Fortunately, Dolt makes it really easy to answer that question and to expose that data through our application so our users can see it, too.
The first thing we need is a new EF Core Model class that will hold the results of our diff data. Dolt provides several ways to access schema and data diffs from your database, and they each generally represent the diff by showing the “from” values and the “to” values of the fields in each row of your data. So, to model diff data for our Movie model class, we’ve created a new MovieDiff model class that has fields like “FromTitle” and “FromReleaseDate” to show the values of the entity before the commit, and “ToTitle” and “ToReleaseDate” to show the values of the entity after the commit.
using System.ComponentModel.DataAnnotations;
using System.ComponentModel.DataAnnotations.Schema;

namespace RazorPagesMovie.Models;

/// <summary>
/// The MovieDiff class models the changes to a Movie between two Dolt commits. This information is loaded from the
/// dolt_diff() table function provided by Dolt. The returned schema from dolt_diff() shows the values for a single
/// table record before and after a Dolt commit. The fields prepended with "from_" are the values before the Dolt
/// commit, and the fields prepended with "to_" are the values after the Dolt commit.
/// </summary>
/// https://dolthub.com/docs/sql-reference/version-control/dolt-sql-functions#dolt_diff
public class MovieDiff
{
    [Column("from_id")]
    public Guid? FromId {get; private set;}

    [Column("to_id")]
    public Guid? ToId {get; private set;}

    [Column("from_title")]
    public string? FromTitle { get; private set; }

    [Column("to_title")]
    public string? ToTitle { get; private set; }

    [Column("from_releasedate")]
    [DataType(DataType.Date)]
    public DateTime? FromReleaseDate { get; private set; }

    [Column("to_releasedate")]
    [DataType(DataType.Date)]
    public DateTime? ToReleaseDate { get; private set; }

    [Column("from_genre")]
    public string? FromGenre { get; private set; }

    [Column("to_genre")]
    public string? ToGenre { get; private set; }

    [Column("from_price")]
    public decimal? FromPrice { get; private set; }

    [Column("to_price")]
    public decimal? ToPrice { get; private set; }
}
Just like with our Commit Model class, we also need to configure this MovieDiff model class in our DoltContext class. We’ve added these lines to the OnModelCreating() method in DoltContext:
    // The MovieDiff model class is used to load diff information for the Movies table, using the dolt_diff()
    // table function. The result set from this table function depends on the schema of the table being queried,
    // and includes the values of each row in the table before and after a commit. Because this data comes from
    // a Dolt table function, we also want to exclude the MovieDiff class from migrations.
    // https://dolthub.com/docs/sql-reference/version-control/dolt-sql-functions#dolt_diff
    modelBuilder.Entity<MovieDiff>()
        .HasNoKey()
        .HasAnnotation("Relational:IsTableExcludedFromMigrations", true);
Now we’re ready to start using the MovieDiff model class in our application. We need a couple new Razor pages and their associated page models to support viewing the diff data. You can grab those new files from the completed sample app in GitHub:
The new Razor pages are pretty straightforward, but it’s worth calling out the OnGetAsync() method in Diffs.cshtml.cs. There, you can see the code that uses the dolt_diff() table function to query Dolt for the diff data:
    // The "id" parameter contains the Dolt commit ID where a movie was changed. To calculate what changed in that
    // Dolt commit, we use the dolt_diff() table function and provide the from commit, to commit, and the table name.
    // The same ancestry syntax from Git also works when specifying Dolt commits, so an easy way to specify the
    // from commit parameter below is to append "~" to the end, meaning the first parent of the specified commit ID.
    var previousCommit = id + "~";
    var commit = id;

    // Because we know our application only updates a single row in our Movies table for each Dolt commit it creates,
    // we know that calling dolt_diff() to view the diff between two adjacent commits will only return one row, so
    // we use the .First<MovieDiff>() method to grab the first (and only) result.
    this.MovieDiff = _context.Database.SqlQuery<MovieDiff>($"SELECT * from dolt_diff({previousCommit}, {commit}, 'Movie')").First<MovieDiff>();
The Commit Log page we added previously, already has a link to the diff page. You can see how we create a link to the /Admin/Diff page and pass the commit’s hash as the ID, which is then used to query the diff data:
<td>
<a asp-page="/Admin/Diff" asp-route-id="@item.CommitHash">Diff</a>
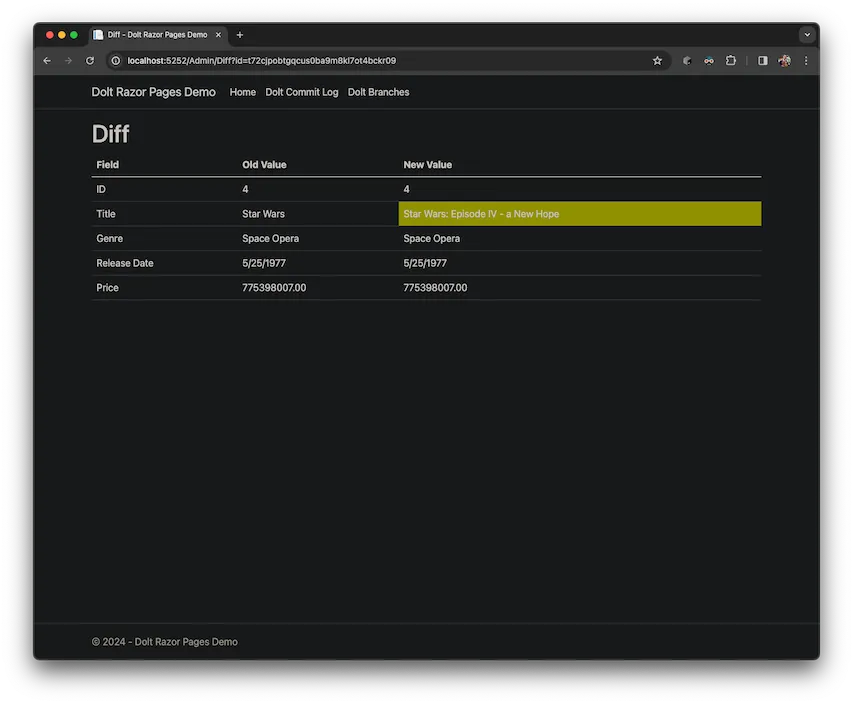
</td>Now that we’ve got our diff page set up, let’s restart our web application and see what it looks like. When you go to the Commit Log page, click on the “Diff” link in the far right column for a commit and you’ll see the data that changed in that commit. Here’s a diff where I edited the title of a movie:
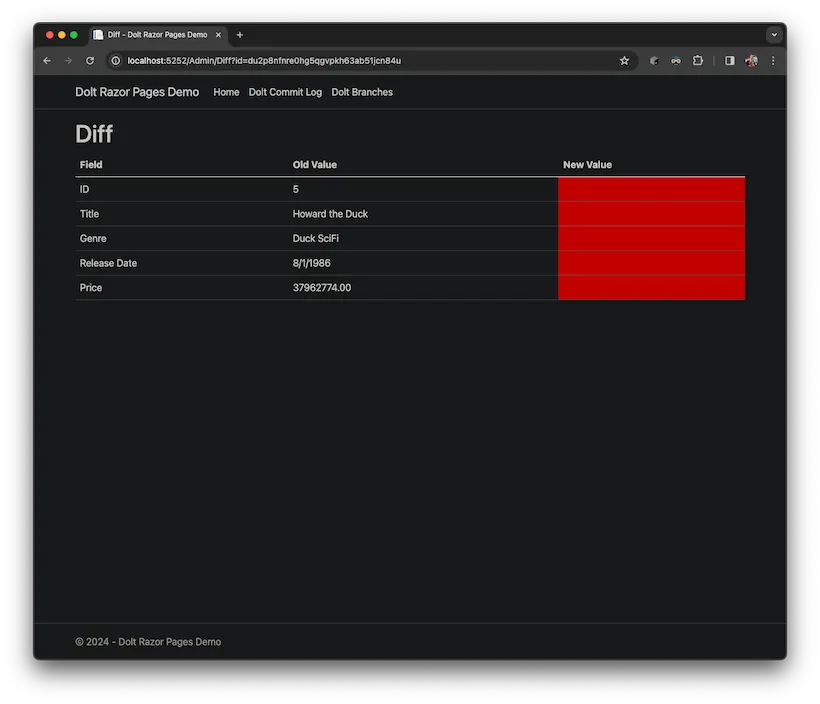
And here’s another one where I deleted a movie:
Adding Dolt Branching#
Finally, the last feature we’re going to add to our sample application is the ability to work with multiple branches. Up until now, we’ve been implicitly using the default branch for a Dolt database, called “main”. We’re going to add a page that lists the branches in the database, using the dolt_branches system table, another page that creates a new branch using the dolt_branch() stored procedure, and we’re also going to update our DoltContext class so that it consistently applies that branch to all database access.
Just like before, let’s start by creating a new Branch Model class for the branch data that we’re going to be displaying.
using System.ComponentModel.DataAnnotations;
using System.ComponentModel.DataAnnotations.Schema;
using System.Security.Policy;

namespace RazorPagesMovie.Models;

/// <summary>
/// The Branch class models a Dolt branch, as returned by the dolt_branches system table.
/// </summary>
/// https://dolthub.com/docs/sql-reference/version-control/dolt-system-tables#dolt_branches
public class Branch
{
    [Key]
    [Column("name")]
    public string? Name { get; private set; }

    [Column("hash")]
    public string? Hash { get; private set; }

    [Column("latest_committer")]
    public string? LatestCommitter { get; private set; }

    [Column("latest_committer_email")]
    public string? LatestCommitterEmail { get; private set; }

    [Column("latest_commit_date")]
    public DateTime? LatestCommitDate { get; private set; }

    [Column("latest_commit_message")]
    public string? LatestCommitMessage { get; private set; }
}
And just like in the two previous sections, we need to set some more configuration in DoltContext to tell Entity Framework Core how to map this new Model class. Add these lines to the OnModelCreating() method in DoltContext.cs:
    // The dolt_branches system table shows what branches exist in the Dolt database. This is also a system table
    // that Dolt provides automatically, so we also exclude it from migrations.
    // https://dolthub.com/docs/sql-reference/version-control/dolt-system-tables#dolt_branches
    modelBuilder.Entity<Branch>()
        .ToTable("dolt_branches")
        .HasAnnotation("Relational:IsTableExcludedFromMigrations", true);
There are three new Razor pages and PageModels we need to add to our application to support branching:
Pages/Admin/Branches.cshtml– This is the Razor page that encodes the UI for listing the branches in the database.Pages/Admin/Branches.cshtml.cs– This is the PageModel that makes the data accessible that our Razor page needs in order to display the list of Dolt branches.Pages/Admin/CreateBranch.cshtml– This is a very simple Razor page that contains a form that asks for the name of a new branch to create.Pages/Admin/CreateBranch.cshtml.cs– This is the PageModel for the CreateBranch page that handles the form submission and creates the new branch. Check out theOnPostAsync()method to see how the application uses thedolt_branchstored procedure to create the new branch.Pages/Admin/SetBranch.cshtml– This extremely simple Razor page doesn’t actually contain any UI code. It simply wires up its Page Model, and then the Page Model will redirect back to the main Branches page after it sets the active branch.Pages/Admin/SetBranch.cshtml.cs– This PageModel simply updates some shared, in-memory state for the active branch, then redirects back to the Branches page.
We also need to make a small change to our DoltContext class so that it uses the active branch for any data access. There are many ways to set the active branch in a Dolt session, such as using the dolt_checkout() stored procedure, but in this application, we want the selected branch to be a global setting that gets used consistently everywhere. We’ve chosen to do that by setting the branch directly in the connection string. This is a handy Dolt feature that allows you to connect directly to a specific branch, without having to first issue a dolt_checkout() statement. In order to dynamically change the connection string, we’re going to override a new method in our DoltContext class that will be called every time a new DoltContext instance is created and injected into a Page Model to use.
protected override void OnConfiguring(DbContextOptionsBuilder optionsBuilder)
{
// There are many ways to control the active branch with Dolt. One of the most common
// is to use the dolt_checkout() stored procedure from within a SQL session to checkout
// a branch. This approach is flexible, but requires running a SQL statement on the connection
// before the connection can be used. In the code below, we show how to use a database revision
// specifier (e.g. <database_name>/<branch_name>) in a connection string to automatically select
// a checked out branch as soon as the connection is established.
// https://dolthub.com/docs/sql-reference/version-control/branches#specify-a-database-revision-in-the-connection-string
var connectionString = _configuration.GetConnectionString("RazorPagesMovieContext");
connectionString = connectionString.Replace("database=dolt", "database=dolt/" + activeBranch);
optionsBuilder.UseMySql(connectionString, ServerVersion.AutoDetect(connectionString));
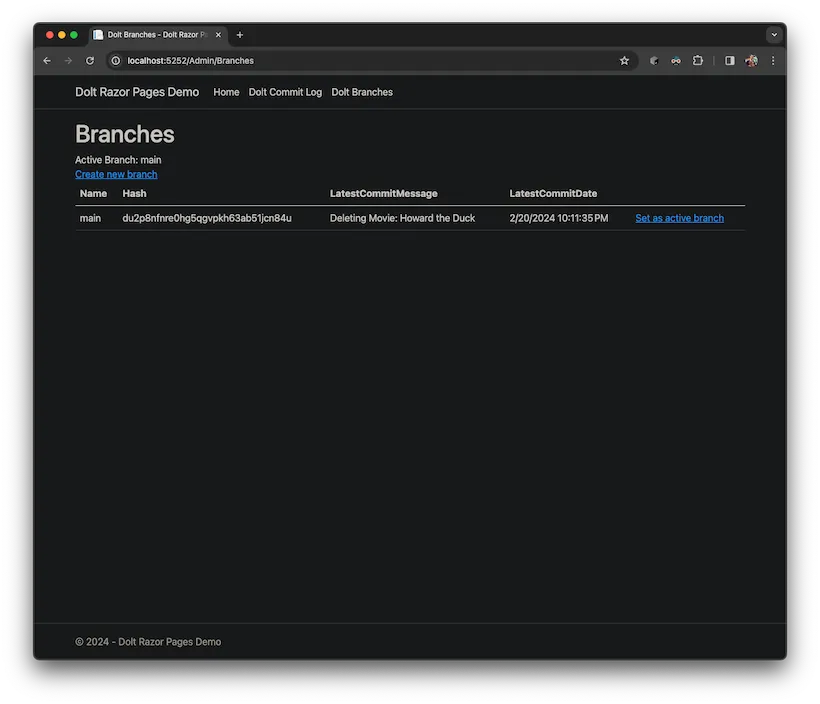
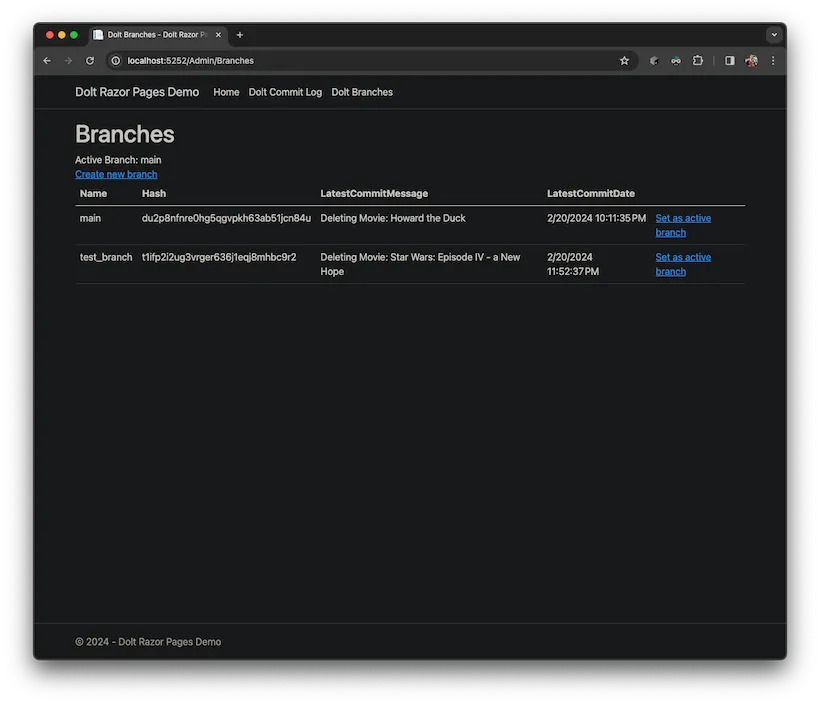
}Now that we’ve got our Razor pages and PageModels created, and we’ve updated DoltContext to ensure every connection is using the active branch, let’s test out the new branch features! The first time we go to the new Branches page, we should see only the main branch:
Let’s click on the link to create a new branch and create a new branch called “test_branch”. Now that we see the new branch in the list, click on the “Set as active branch” link and let’s see how the application works. When we go to look at our list of Movies, we should see the exact same set of movies as we added before, since this new branch was created off of the main branch. Let’s make some changes here… I’m going to delete all of these movies except for one:
Now if we go back to the Branches page, we see that our two branches are pointing to different commits now. We made changes on the test_branch branch, but the main branch is still pointing to the same commit where all our movies are still present.
Click on the “Set as active branch” link for the main branch, and then go back to the movie listing page, and we’ll see that the changes we just made on the test_branch branch did not affect anything on the main branch.
There’s a LOT more you can do with Dolt branches. Now that we’re able to create branches and work on them, another useful feature would be to merge those changes back to the main branch. You could imagine a workflow where each movie editor works on their own branch in isolation of other users and gets all their movie updates staged. Then, after they’ve reviewed their changes, they merge them back to the main branch for everyone else to see. Let’s take a quick look at the second part of that scenario and see how we can add branch merging to our application.
In the sample code on GitHub, we’ve added a new link on the Branches page that says “Merge to main”. When this link is followed, our web app executes a new Page (MergeBranch) and the PageModel checks out the main branch using the dolt_checkout() stored procedure, then uses the dolt_merge() stored procedure to merge the selected branch into the main branch. This means any movie updates, additions, or deletions that have happened on that branch will be applied to the main branch. These two files show how we implemented that:
MergeBranch.cshtml– this two line Razor Page is trivial, since there’s no UI for the MergeBranch feature in the sample app yet. It simply connects its PageModel, and then the PageModel handles everything else.MergeBranch.cshtml.cs- the PageModel is what does all the work here. Check out theOnGetmethod to see how we grab a database connection, then checkout the main branch and merge the selected branch into it. This also provides a good example of calling multiple Dolt stored procedures and using the results without explicitly mapping them to an EF Core entity.
Earlier, I mentioned the importance of using a Guid instead of an auto_increment int for the primary key in our Movie entity. This becomes really important if you’re going to merge branches together. Without using Guids, two branches would use the same next integer value for an auto_increment column, and you’d end up with a data conflict that you’d have to manually resolve before you could complete a merge. Instead, by using Guids, we avoid that problem. It is still possible to generate data conflicts if two branches make different edits to the same data, although Dolt uses a pretty intelligent merge algorithm that will cell-wise merge the data together, so you’ll only see a data conflict if two branches make different edits to the same cell of the same row.
Merging is a really powerful feature in Dolt, and there’s a lot more we could add to this sample app. If you want to experiment and learn some more Dolt, you could extend the sample app to detect conflicts, display them in the UI, and allow users to resolve them. Check out Dolt’s documentation on dealing with conflicts if you want to play with that. Or if you want to try extending other parts of the sample app, you could add a feature to delete branches using the dolt_branch() stored procedure. Another good feature to add would be adding a “Revert” link on the Commit page that uses the dolt_revert() stored procedure to undo the changes made in a commit. There are a LOT of fun possibilities to keep extending this app with more of Dolt’s versioning features!
Wrap Up#
ASP.NET Core provides some great tooling and libraries for building web apps. Razor pages can help you build clean and maintainable UIs, and Entity Framework Core makes accessing your data and working with databases easy. Dolt works great with all these technologies as a drop in replacement for a MySQL database, plus you get access to a bunch of stored procedures and functions that are built into Dolt and let you access all the versioning features of Dolt, such as calculating how your data has changed over time, seeing the commit history, and working with branches.
If you hit any problems using Dolt with ASP.NET Core or Entity Framework Core (or anything else really), we want to know about it so we can help! If you have ideas for other good example cases to show, or any feature suggestions for Dolt, please hit us up on GitHub with an issue or swing by our Discord server and chat with us. Our dev team hangs out on Discord every day while we’re working and we’re always happy to talk about databases, versioning, and programming frameworks! 🤓