
Dolt is a combination of MySQL and Git, creating the first ever version controlled database. Today’s blog we will build a simple Shiny app using Dolt to branch, commit, push, and pull a database.
What we need for this demo:
All installed and ready to go? Let’s dive in.
Prepare your database locally#
First, we need to connect Dolt to DoltHub to clone a database that you want to work on. Or you can create a new database.
You can use this guide.
Make sure first to create an account on DoltHub.
For our demo, we use the shiny-iris database.
You’re welcome to fork and clone it to use for this demo.
Let’s run Dolt SQL Server#
Once we have the database ready, we will start a simple local server. You can configure the server in any way you like. Here is the command documentation to configure a custom server. Here, I am using my username to start the server.
$ cd shiny-iris
$ dolt sql-server -u jennifersp
Starting server with Config HP="localhost:3306"|T="28800000"|R="false"|L="info"|S="/tmp/mysql.sock"
INFO[0000] Server ready. Accepting connections.
WARN[0000] secure_file_priv is set to "", which is insecure.
WARN[0000] Any user with GRANT FILE privileges will be able to read any file which the sql-server process can read.
WARN[0000] Please consider restarting the server with secure_file_priv set to a safe (or non-existent) directory.
For the rest of the demo, any package used as library("<package>") needs to be installed. Since I’m new to R,
I found this information not included in most R resources on the Internet unless you specifically search for it. 🙂
> install.packages("DBI")Let’s set up the database connection using R#
Now that we have our local server running, let’s connect to it. This is a simple example to connect to the server
using the DBI package in R, which helps to connect R to database management systems (DBMS).
You will see the following in R terminal.
> library(DBI)
> db <- dbConnect(RMySQL::MySQL(), dbname = "shiny-iris", Server = "127.0.0.1", port = 3306, user = "jennifersp", password = "")
> dbListTables(db)
[1] "iris_test"     "iris_train"    "iris_validate"
> dbDisconnect(db)
[1] TRUE
Don’t forget to close the connection once you are done.
✨ Shiny ✨#

Now, let’s dive into the fun part of the demo, the Shiny package.
To use the Shiny package, there are two main parts to it, ui, the front-end side, and server, the back-end side.
There are many ways to implement a shiny app in terms of how to organize your code. For instance, you can put all your code in a single file or each
part in a separate file. This is up to your preference, but for this demo, I am going to keep everything in a single
file.
Here is how my app.R file looks. Let’s go over it. We define loadData function to connect to the shiny-iris
database and use dbGetQuery function from the DBI package to get the results from iris_test table. It’s important
to disconnect after we’re done with the connection, so we add on.exit function to help us close the connection when
the function exits.
The ui defines the appearance of the app and server builds the app. We use DT package
function to render and display the iris_test table data on our app.
library(DBI)
library(shiny)

tableName <- "iris_test"

loadData <- function() {
  # Connect to database
  db <- dbConnect(RMySQL::MySQL(),
                    dbname = "shiny-iris",
                    Server = "127.0.0.1",
                    port = 3306,
                    user = "jennifersp",
                    password = ""
  )
  # Disconnect when the function exits
  on.exit(dbDisconnect(db))
  # Get the table data
  data <- dbGetQuery(db, sprintf("SELECT * FROM %s", tableName))
  data
}

ui <- fluidPage(
  DT::dataTableOutput("results", width = 700),
)

server <- function(input, output, session) {
  # Show the results
  output$results <- DT::renderDataTable({
    loadData()
  })
}

# run Shiny app
shinyApp(ui, server)
Let’s run our app! Click on this button —>  Did you just click on the screenshot of the button? 👀
You will see this in R terminal:
...
> shinyApp(ui, server)

Listening on http://127.0.0.1:3852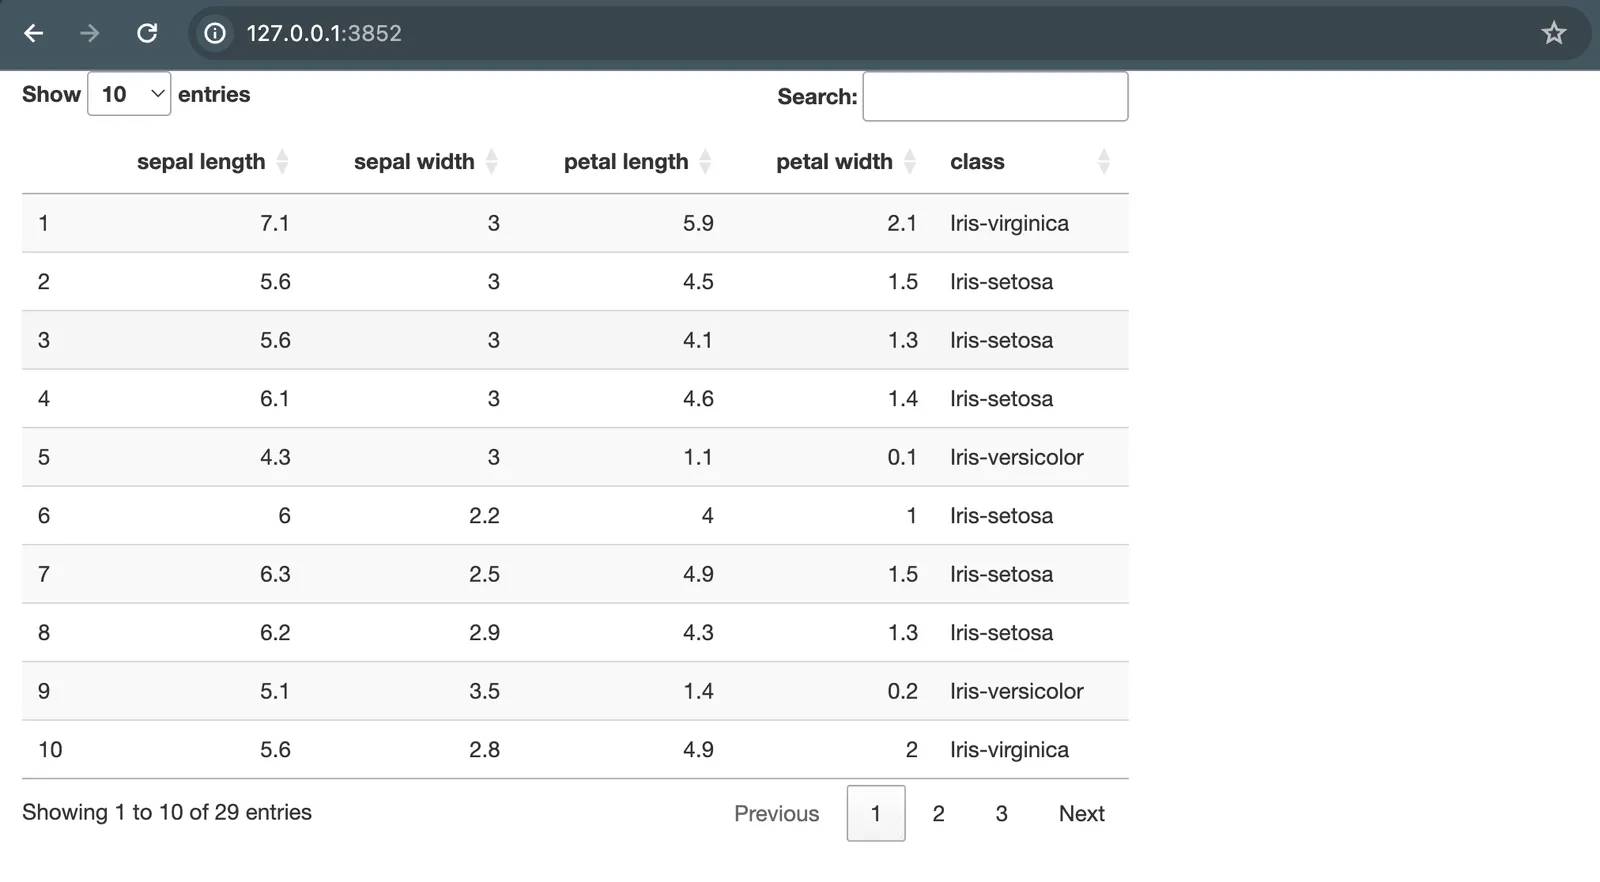
Yay! We’ve got a shiny table! ✨
Which branch am I on?#
Seeing what branch you are on is as simple as using Dolt’s active_branch() function.
getCurrentBranch <- function() {
  # Connect to database
  db <- dbConnect(RMySQL::MySQL(),
                    dbname = "shiny-iris",
                    Server = "127.0.0.1",
                    port = 3306,
                    user = "jennifersp",
                    password = ""
  )
  # Disconnect when the function exits
  on.exit(dbDisconnect(db))
  cb <- sprintf("Current Branch: %s", dbGetQuery(db, sprintf("SELECT active_branch()"))[[1]])
  cb
}

...

# inside `ui`
textOutput("currentBranch"),

...

# inside `server`
output$currentBranch <- renderText({
  getCurrentBranch()
})
Next, let’s check it out a new branch#
Creating a new branch will allow us to edit this table without conflicting with other’s work. This is one of the best
features of Dolt. We create a function that will run CALL DOLT_CHECKOUT('-b', '<new_branch>') procedure. It creates
a new branch then checks out to that branch. You can create similar function for any of Dolt’s version control procedures.
checkoutNewBranch <- function(newBranchName) {
  # Connect to database
  db <- dbConnect(RMySQL::MySQL(),
                  dbname = "shiny-iris",
                  Server = "127.0.0.1",
                  port = 3306,
                  user = "jennifersp",
                  password = ""
  )
  # Disconnect when the function exits
  on.exit(dbDisconnect(db))
  dbGetQuery(db, sprintf("CALL DOLT_CHECKOUT('-b', '%s')", paste(newBranchName)))
}

...

# inside `ui`, we need a text input for the new branch name and a button to trigger the server event.
textInput("newBranch", "", ""),
actionButton("checkout", "Checkout a New Branch"),

...

# inside `server`, calls the above function that will create a new branch.
observeEvent(input$checkout, {
    checkoutNewBranch(input$newBranch)
  })
Notice how on the command line your branch is still main? However, we can see that the branch mybranch was indeed
created. Checking out a branch in sql session only persists within that session lifetime.
$ cd shiny-db
$ dolt branch
* main
  mybranch
The current branch didn’t change. Why is that?#
Notice that in each function, we create a new connection and close it to run a single query. This means every action is
run in separate sessions. Every session will start on the branch that the server started on. But we need to preserve
the session state to check out a branch and get the active branch. To fix this, we use the Pool package,
which handles the database connection management. This package lets us use a single sql session per shiny server session.
library(pool)

# Database connection setup
db <- dbPool(
  drv = RMySQL::MySQL(),
  dbname = "shiny-iris",
  host = "127.0.0.1",
  port = 3306,
  username = "jennifersp",
  password = ""
)

...

# Clean up the database connection when the app exits
onStop(function() {
  poolClose(db)
})
Useful tip: You can set up your database connection to a specific branch rather than the branch the server started on.
The syntax is <database>/<branch> as the dbname. The below is how we would connect to dev-branch as
a starting branch for the sql session. You can still checkout other branches.
# Database connection setup to specific branch
db <- dbPool(
  drv = RMySQL::MySQL(),
  dbname = "shiny-iris/dev-branch",
  host = "127.0.0.1",
  port = 3306,
  username = "jennifersp",
  password = ""
)
Now, we are good to go. Let’s try checking out a new branch again.

To get the current branch status after checkout out a new branch, we need to update it whenever a checkout branch event
is triggered. This can be done by adding input$checkout in the output objects that needs updating such as updating the
table result.
  # Show current branch
  output$currentBranch <- renderText({
    # update the current branch whenever a checkout branch event is triggered.
    input$checkout
    getCurrentBranch()
  })
We just created a new branch, now we want to switch between existing branches#
Let’s add couple functions that will allow us to see all the branches there are and checkout one of them.
getBranchNames <- function() {
  res <- dbGetQuery(db, "SELECT name FROM dolt_branches")
  return(res)
}

checkoutBranch <- function(branch) {
  query <- sprintf("CALL DOLT_CHECKOUT('%s')", paste(branch))
  dbGetQuery(db, query)
}

...

# inside `ui`, we use selectInput instead of textInput to show the current branch and switch the branch.
selectInput("current_branch", "Branches:", getBranchNames()[[1]]),

...

# inside `server`
observeEvent(input$current_branch, {
  checkoutBranch(input$current_branch)
})
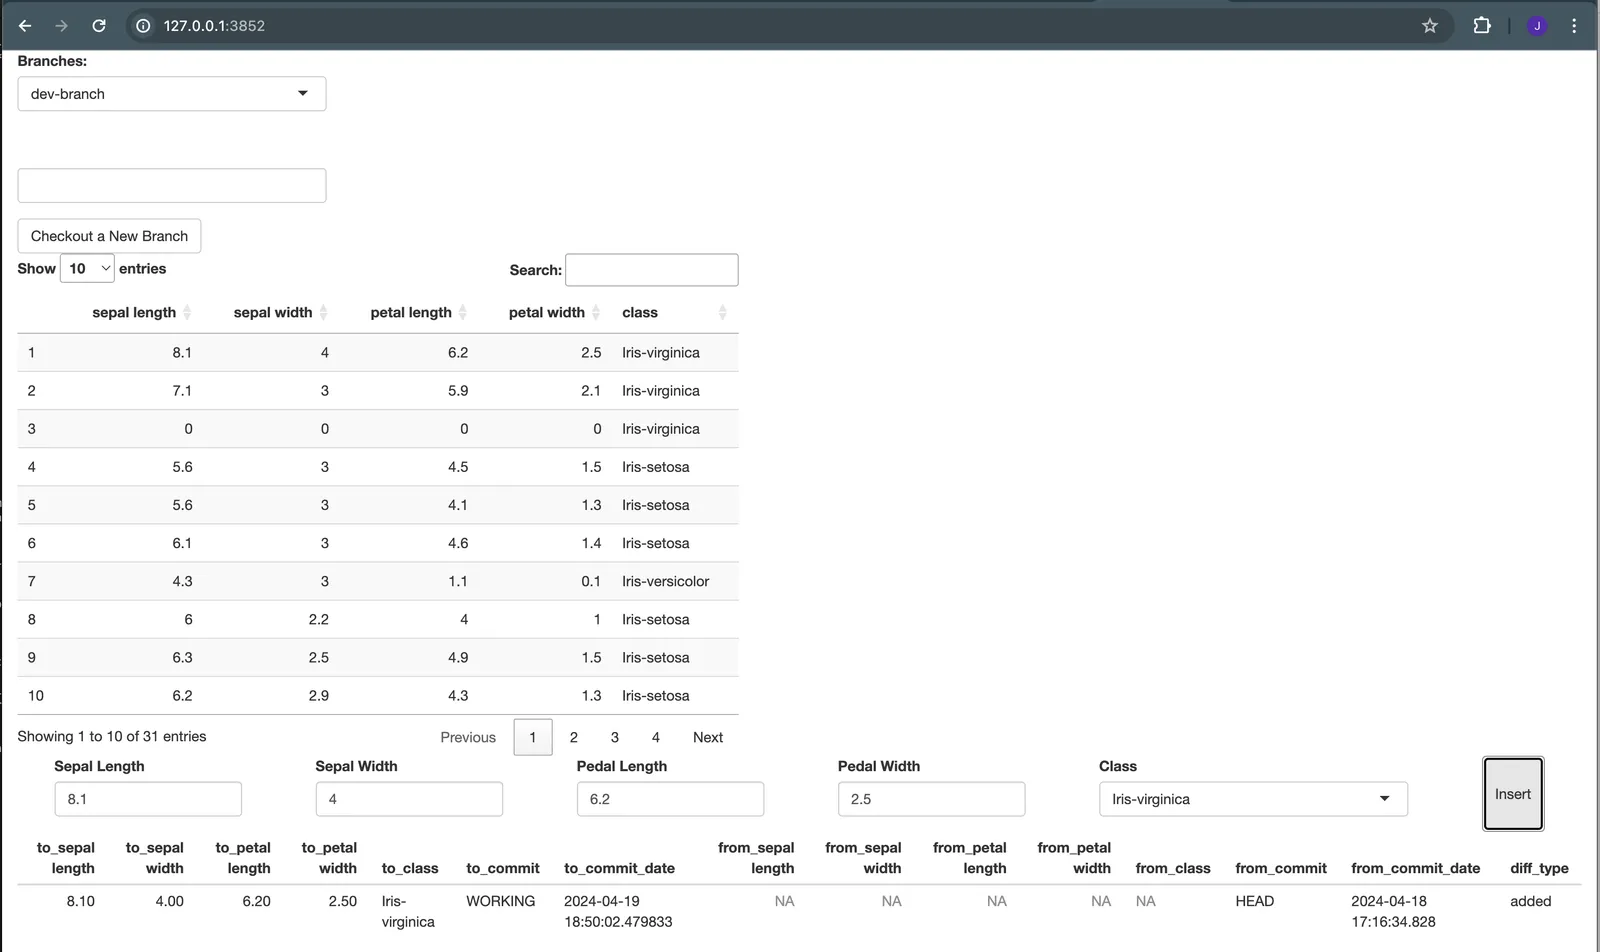
Let’s add some more stuff#
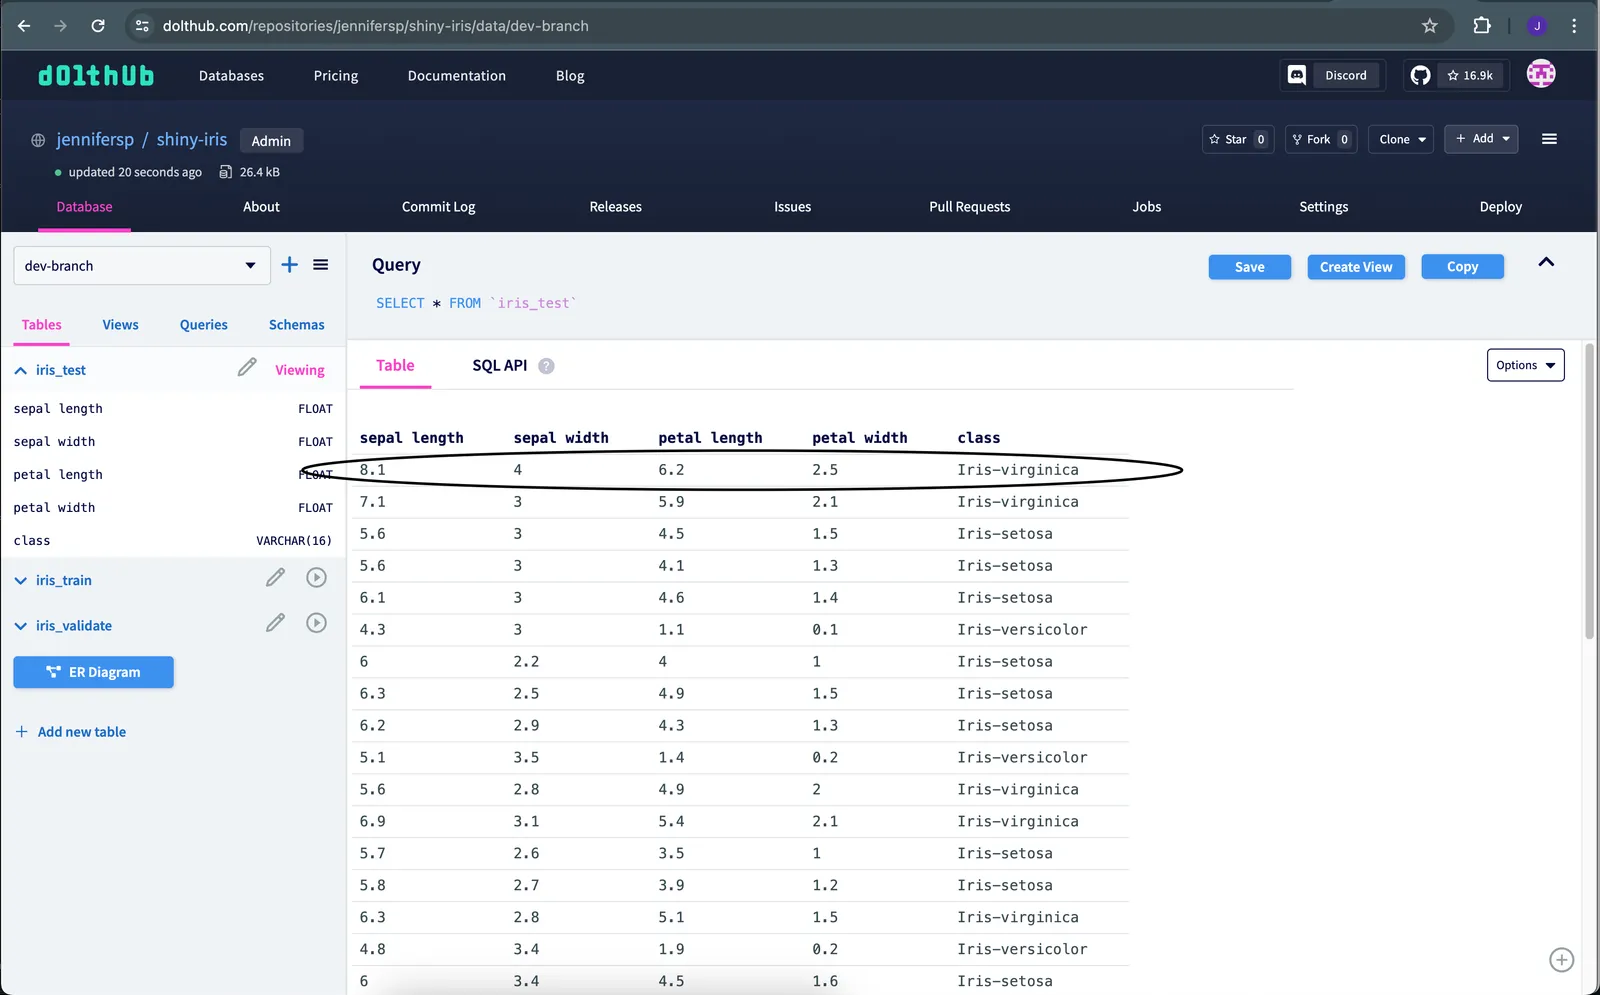
I have added more interfaces to insert data to the iris_test table and see the diff between the HEAD and the WORKING set
of the current branch. Here is a link to a GitHub repo that has the complete code.
The UI isn’t the prettiest, but it works. 🎉
Quick note: the DT package provides a very nice interactive data table on the app. Currently, the table cannot be edited,
but this package allows us make edits directly to the table. You’re welcome to play with this package to make your table
more editable for using UPDATE and DELETE functions. Here is the docs to the DT package.
Now, let’s continue.
Commit and push our changes#

After we committed and pushed our changes, we can see it in the remote DoltHub repository
Create pull request and merge using DoltHub APIs#
Let’s create API request to create pull request dev-branch to main. For more information, refer to the documentation.
We need to build the pull request information to use for the POST request body. In case you’re curious about
the weird JSON formatting line, the request body needs to be JSON object format, but the toJSON function returns
the JSON object in a list. Although, it has auto_unbox=TRUE option, currently it does not work,
so I found this workaround.
library(httr)
library(jsonlite)
createPR <- function(t, d, fb, tb) {
# create json object for request body
pr <- data.frame(
title = paste(t),
description = paste(d),
fromBranchOwnerName = "jennifersp",
fromBranchRepoName = "shiny-iris",
fromBranchName = paste(fb),
toBranchOwnerName = "jennifersp",
toBranchRepoName = "shiny-iris",
toBranchName = paste(tb)
)
prBody <- toJSON(unbox(fromJSON(toJSON(pr))))
# create POST request
url <- sprintf("https://www.dolthub.com/api/v1alpha1/%s/%s/pulls", owner, dbName)
res <- POST(url,
body = prBody,
content_type("application/json"),
add_headers("authorization" = sprintf("token %s", authToken))
)
response <- fromJSON(rawToChar(res$content))
response$status
}
...
# inside `ui`
titlePanel("Create PR"),
textInput("prTitle", "Title", ""),
textInput("prDescription", "Description", ""),
textInput("prFromBranch", "From", ""),
textInput("prToBranch", "To", ""),
actionButton("createpr", "Create a Pull Request"),
...
# inside `server`
observeEvent(input$createpr, {
status <- createPR(input$prTitle, input$prDescription, input$prFromBranch, input$prToBranch)
showNotification(status)
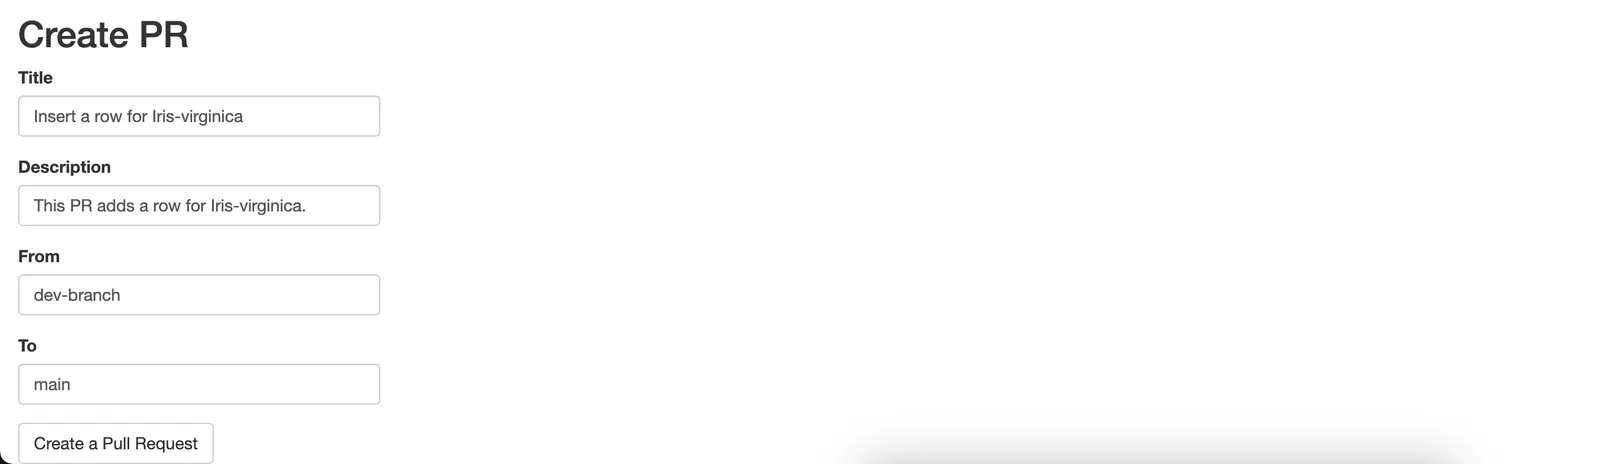
})Let’s create a PR with the small change we made earlier.
In DoltHub, we can see the pull request created, then we check the diff and review it.
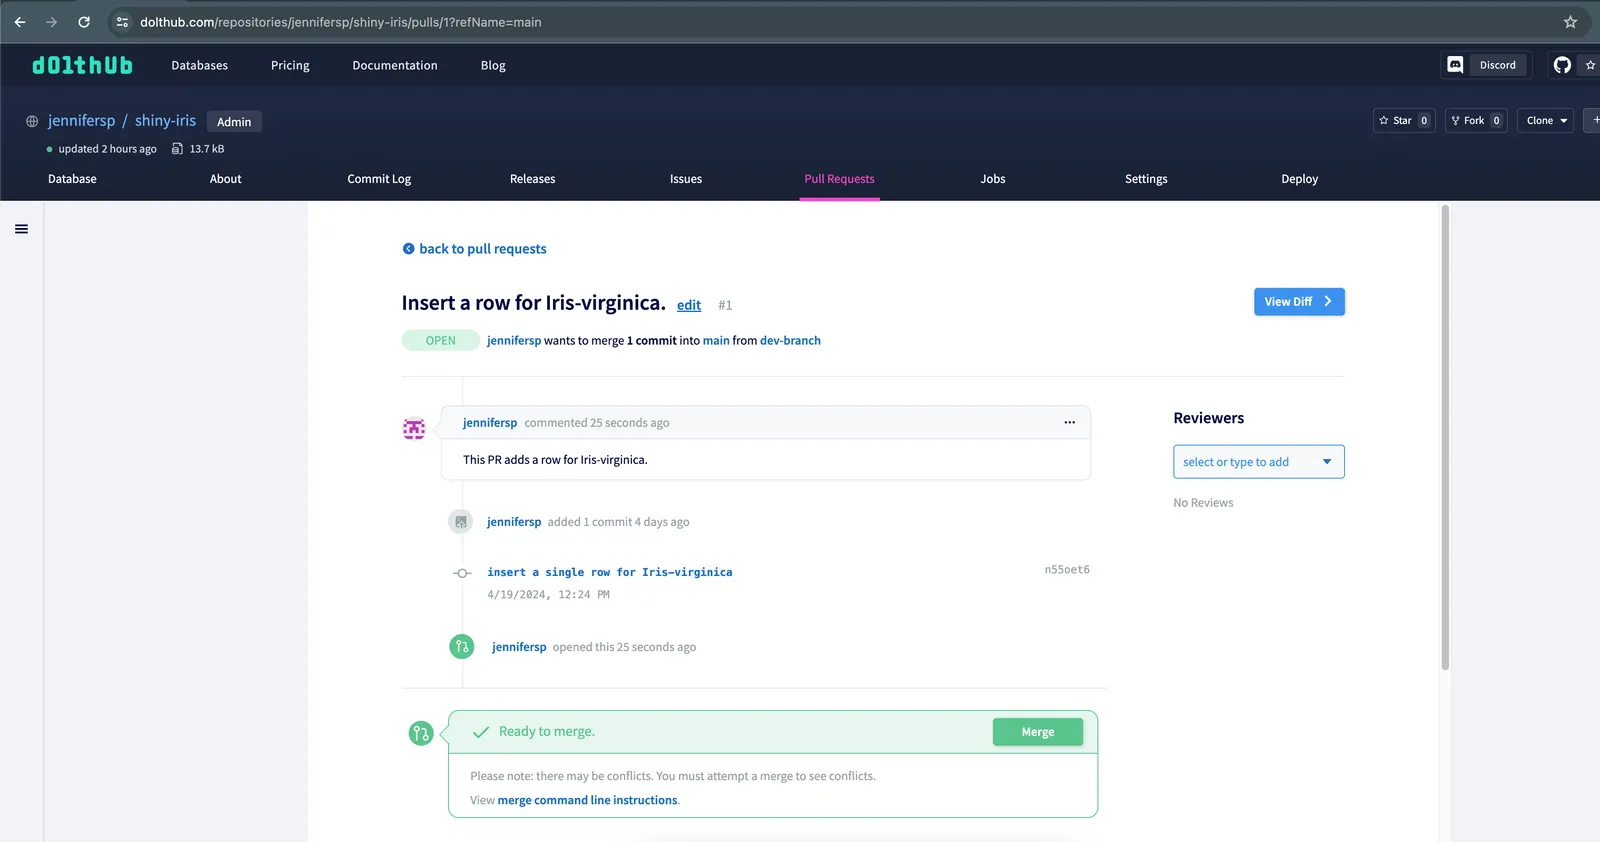
It looks good, let’s merge it.#
Keeping it simple, we list the pull requests as selectInput with their status displayed, so we can
choose a pull request to merge. For this, we use couple more DoltHub APIs, getting the list of pull requests
and merging a pull request.
listPRs <- function() {
  l <- data.frame(
    owner = owner,
    database = dbName
  )
  listPRsBody <- toJSON(unbox(fromJSON(toJSON(l))))
  url <- sprintf("https://www.dolthub.com/api/v1alpha1/%s/%s/pulls", owner, dbName)
  # create GET request
  res <- GET(url,
             body = listPRsBody,
             add_headers("authorization" = sprintf("token %s", authToken))
  )
  response <- fromJSON(rawToChar(res$content))
  return(setNames(response$pulls$pull_id, paste(response$pulls$title, ":", response$pulls$state)))
}

mergePR <- function(prId) {
  url <- sprintf("https://www.dolthub.com/api/v1alpha1/%s/%s/pulls/%s/merge", owner, dbName, prId)
  # create POST request
  res <- POST(url,
              content_type("application/json"),
              add_headers("authorization" = sprintf("token %s", authToken))
  )
  response <- fromJSON(rawToChar(res$content))
  response$status
}

...

# inside `ui`
uiOutput("PROptions"),
actionButton("mergepr", "Merge Pull Request"),

...

# inside `server`, updates the select inputs of existing pull requests, including open and closed ones.
observeEvent(input$mergepr, {
  status <- mergePR(input$prId)
  showNotification(status)
})

output$PROptions <- renderUI({
  input$mergepr
  input$createpr
  selectInput("prId", "Pull Requests:", listPRs())
})
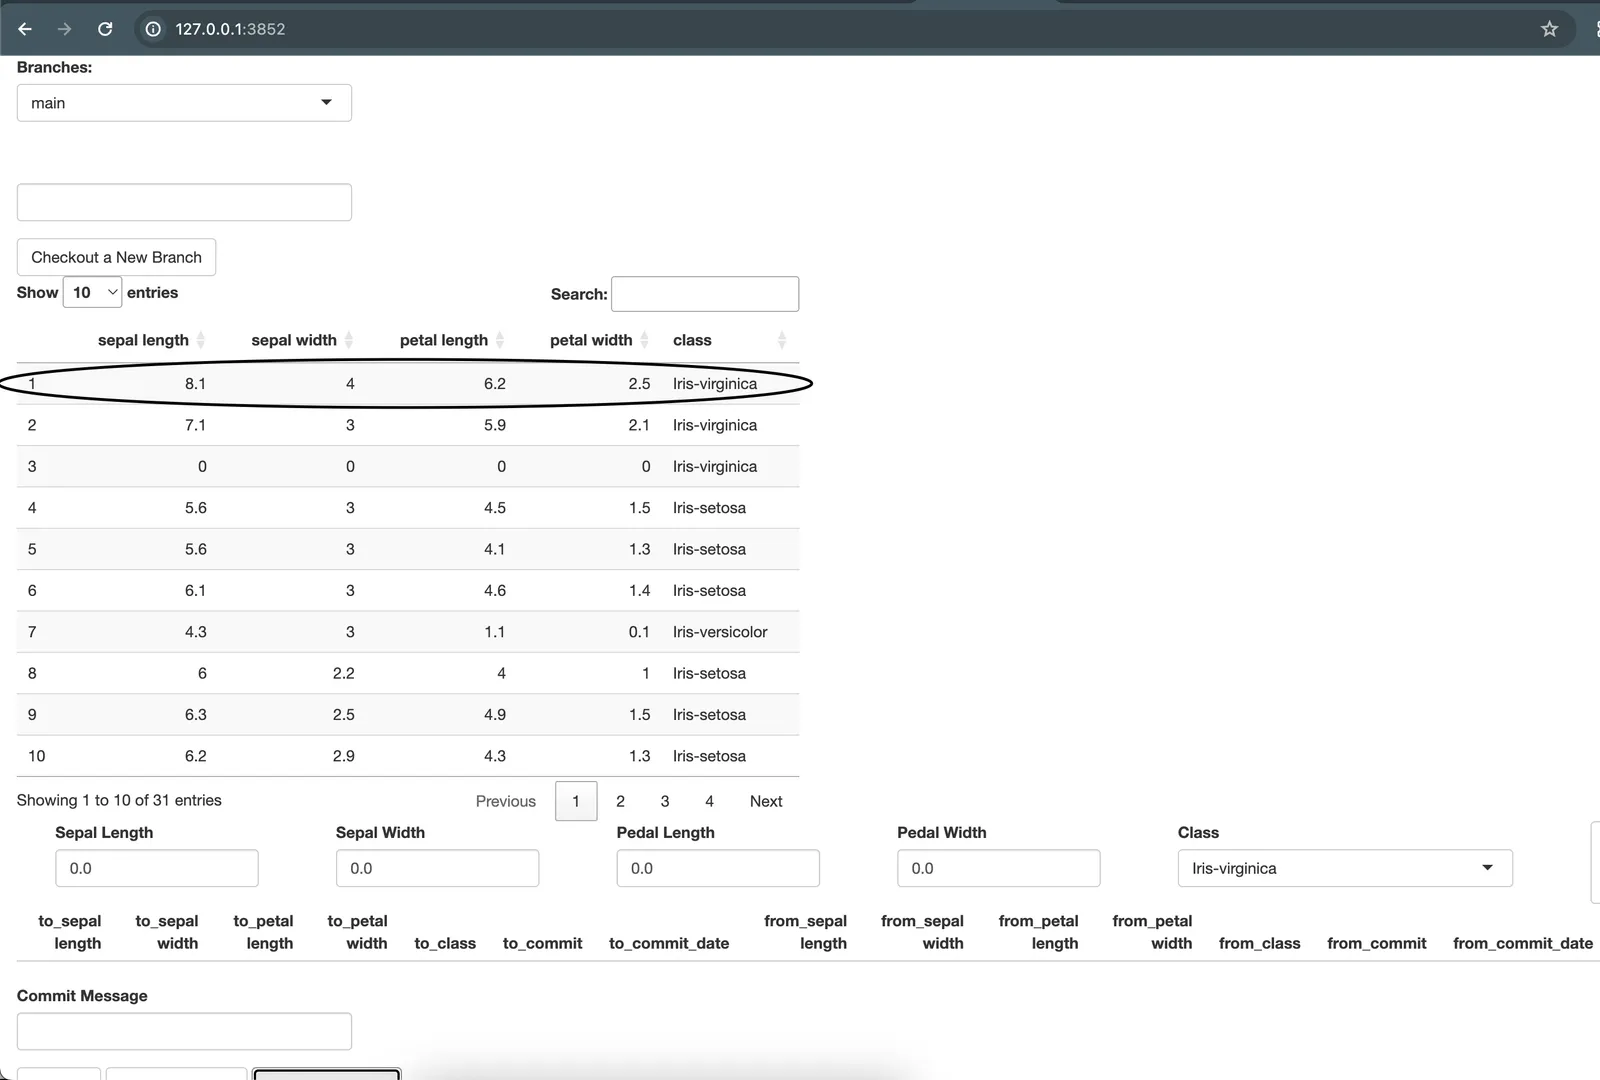
Now the changes we made in dev-branch is in main, which we can pull to update our local main branch up to date.
Make sure you check out main branch before you pull, otherwise, pulling on dev-branch would be no-op. Here,
we can see that the row we inserted in now in main.
Note that there are lots of work to do to improve your app such as catching any error returned from the sql server, making the table editable and so on. This would a great opportunity for anyone who wants to learn more about Dolt, R and Shiny.
Conclusion#
Woohoo! Thank you for following along building this fun app with me. It was lots of fun working on this demo. If you have any questions or feedback, feel free to join our Discord channel. The whole Dolt team is there to help you.