
Dolt and DoltHub are Git and GitHub for data. The same way that GitHub enables collaboration on source code repositories in Git format, DoltHub enables collaboration on data repositories in Dolt format.
A very common workflow on GitHub involves using continuous integration software to automatically run a suite of builds and tests when new code is pushed to the repository. We envision a similar process being used to ensure the integrity of datasets, especially those which are large and/or updated frequently or automatically, which would be cumbersome for a human to review manually.
To facilitate workflows like these, we’re happy to announce that webhooks are now available in DoltHub. Webhooks are simple: just give DoltHub the URL of an HTTP endpoint you’ve set up to accept POST requests, and then when certain events happen your endpoint will receive a payload.
Currently we only support push events, but that will change. If there’s another event you want, just let us know here and we’ll make it a priority.
The payload for the push event looks like this:
{
  "ref": "refs/heads/master",
  "head": "1pmuiljube6m238144qo69gvfra853uc",
  "prev": "ro99bhicq8renuh3cectpfuaih8fp64p",
  "repository": {
    "name": "corona-virus",
    "owner": "dolthub"
  }
}
This payload notifies the receiver that the repository corona-virus owned by dolthub had its master branch pushed from commit ro99bhicq8renuh3cectpfuaih8fp64p to 1pmuiljube6m238144qo69gvfra853uc.
In this article we use DoltHub webhooks and the Jenkins open source automation server to set up a simple example of continuous integration testing for our updated-daily coronavirus dataset. When commits are pushed to the master branch, our Jenkins instance will:
- Receive an HTTP POST request (the webhook payload) containing information about the branch that was pushed and the repository it belongs to
- Clone the repository using Dolt
- Use Dolt to check the diff between the previous branch head and the new branch head
- Flag the diff and send an email notification if
- any nulls appear in the
country_regioncolumn of theplacestable - any time-series observations in the
casestable have been modified since the last commit (i.e. we only allow new data, no updates)
- any nulls appear in the
Setting up Jenkins#
First we need to set up Jenkins. We’ll install it using Docker because it’s easy and clean and when we’re done we can delete or deploy our container as we desire.
We write a custom Dockerfile so we can have Dolt available on the image:
# you could also use jenkins/jenkins:lts if stability is your thing
# i like danger, so i'll use the weekly alpine-based image
FROM jenkins/jenkins:alpine

# the install script for dolt needs to be run as root
USER root
RUN curl -L https://github.com/dolthub/dolt/releases/latest/download/install.sh | bash

# we also want to install perl for our CI script; alpine doesn't come with it
# if you're using one of the standard debian-based images you can omit this
RUN apk add perl

# drop back to the regular jenkins user - good practice.
# (there are fun risks and there are dumb risks...)
USER jenkins
We build and run the image, mapping port 8080 in the container to port 8080 on the host system:
docker build --tag jenkins-webhooks:1.0 .
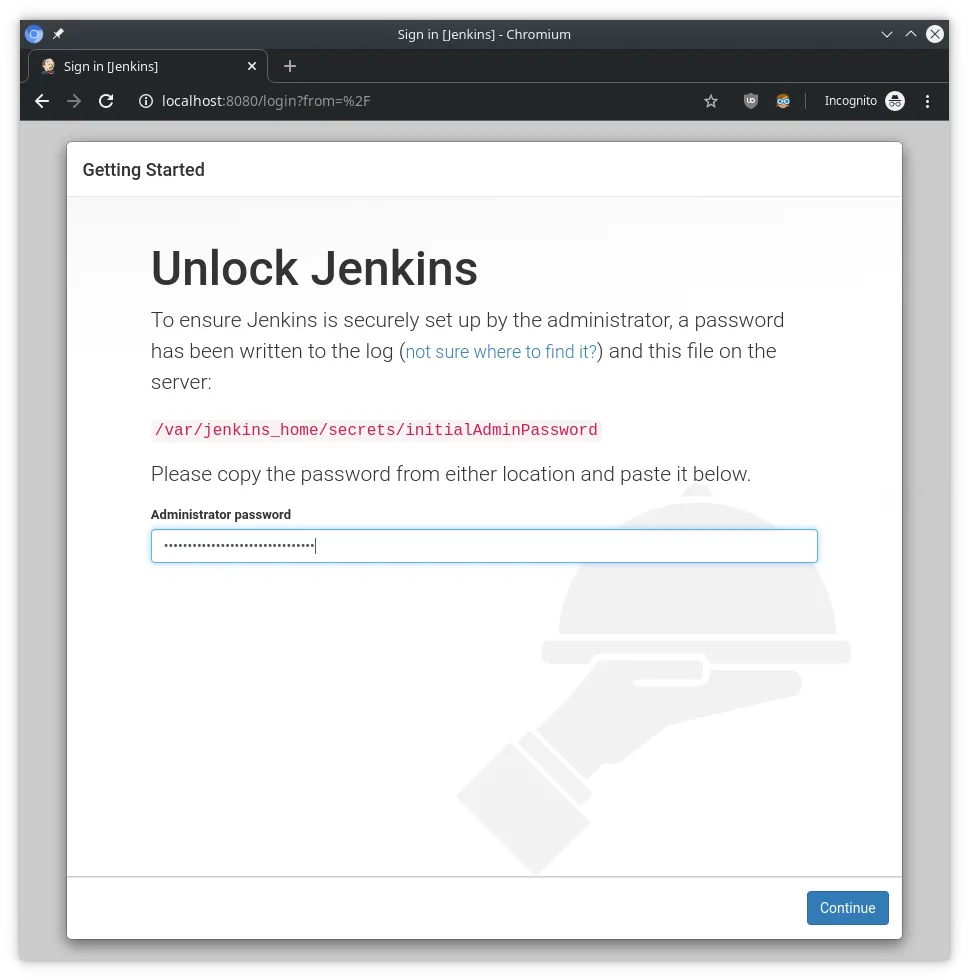
docker run -p 8080:8080 --name jenkins-webhooks jenkins-webhooks:1.0Once it starts, we copy the administrator password displayed in the terminal, then go to http://localhost:8080 in the browser and paste the password into the input box:
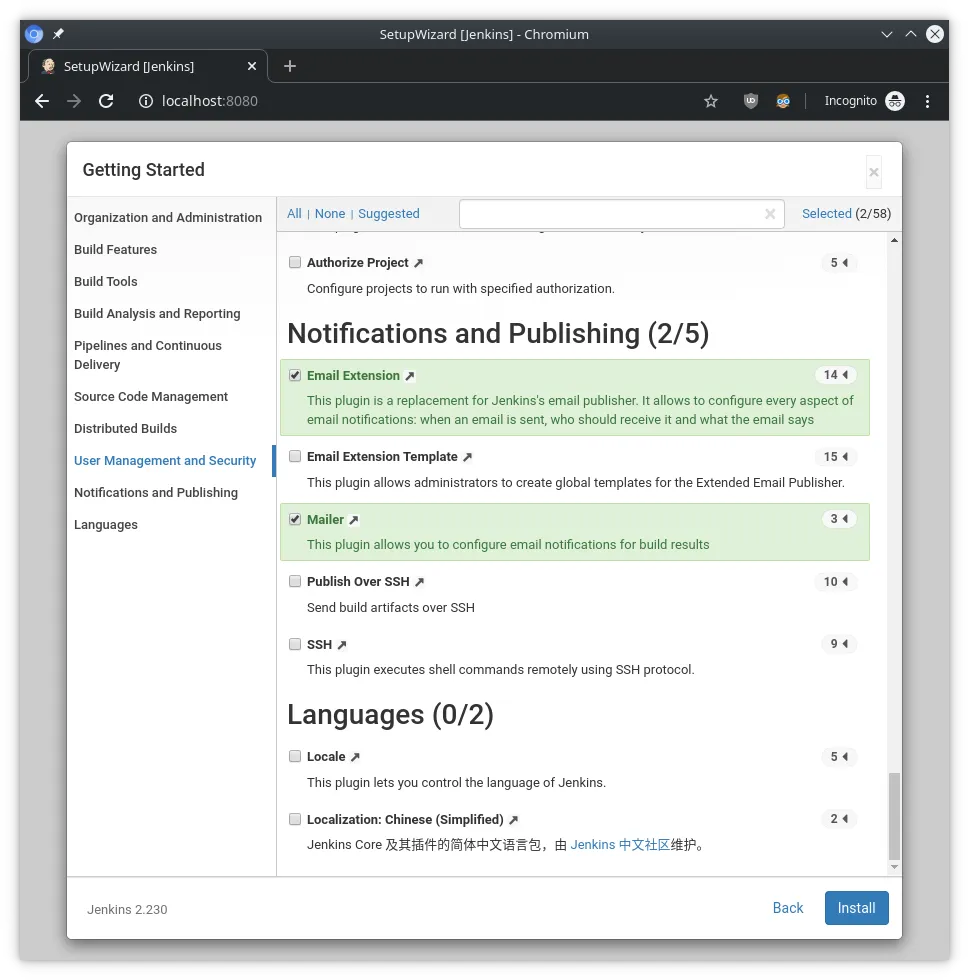
The next screen gives an option to install the recommended plugins or choose your own. I opted to choose my own and unselected everything except the email plugins.
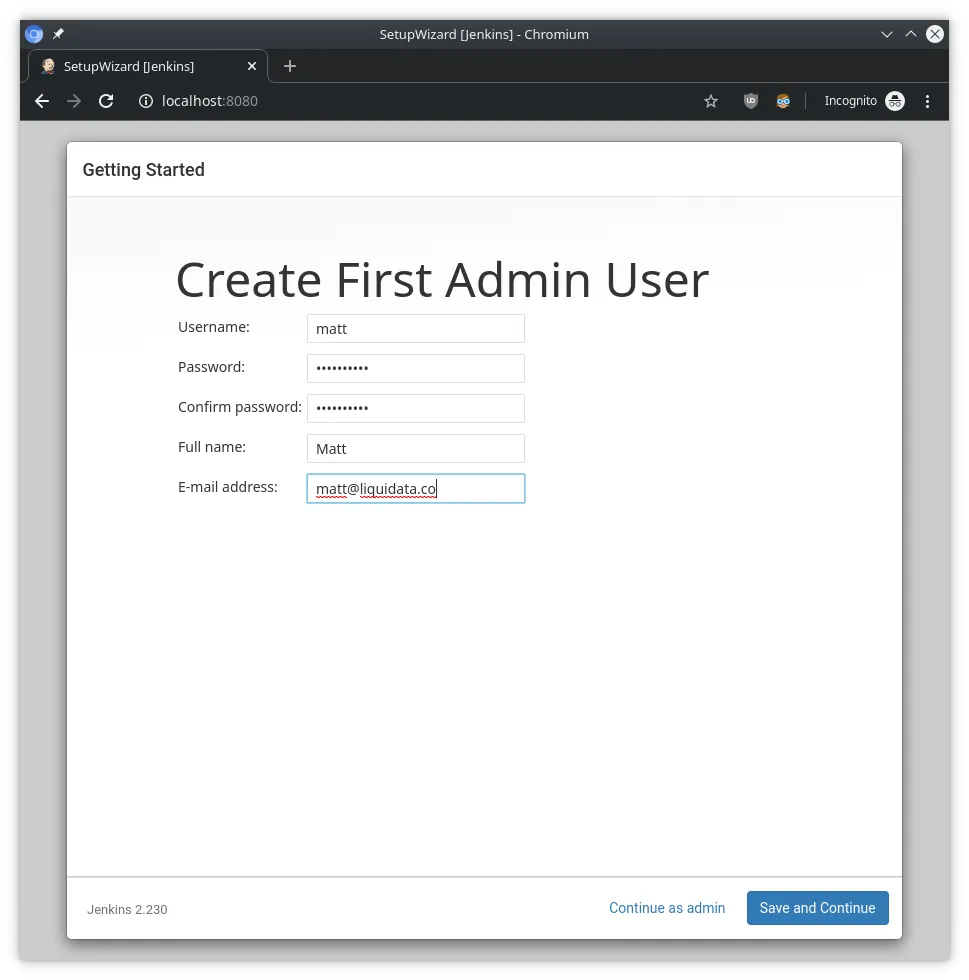
On the next screen, we set up user info and make note of the username and password because we’ll need it for the webhook.
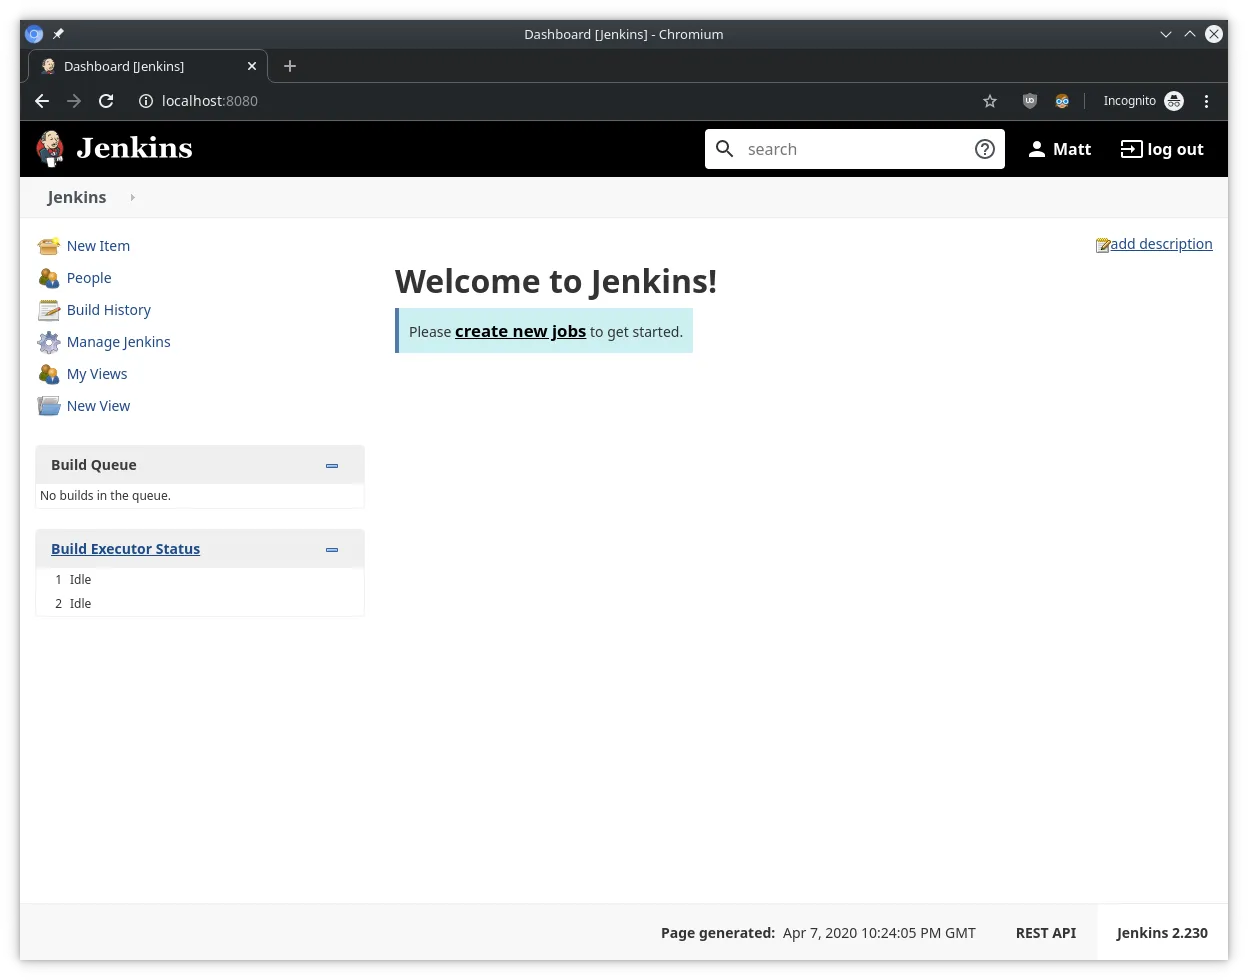
On the screen after that, we leave the default URL, then finish and save. We see our new Jenkins dashboard:
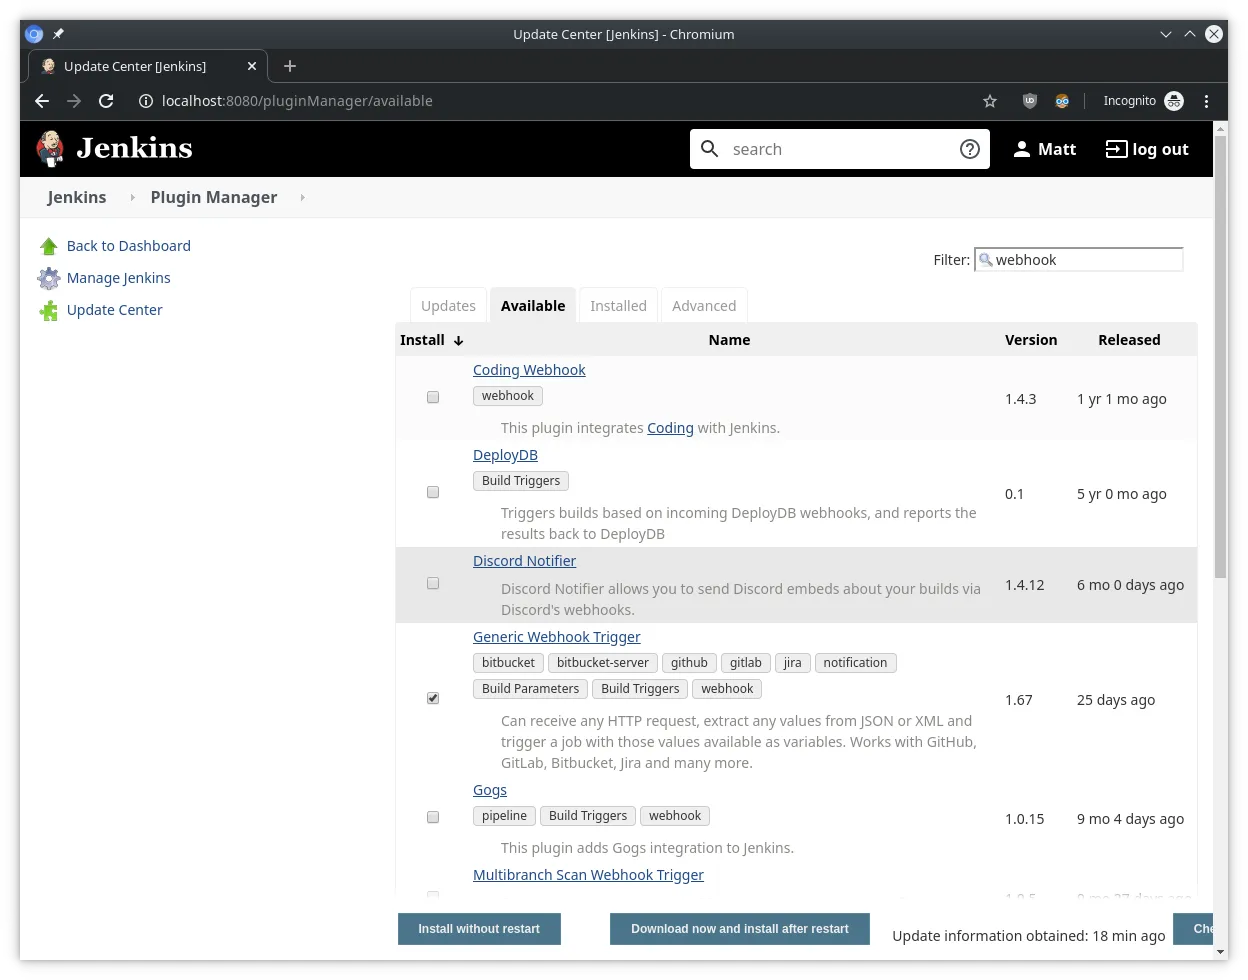
On the left we choose “Manage Jenkins”, then go to “Manage Plugins” and search for “webhook”. We find Generic Webhook Trigger, install it, and go back to the top screen:
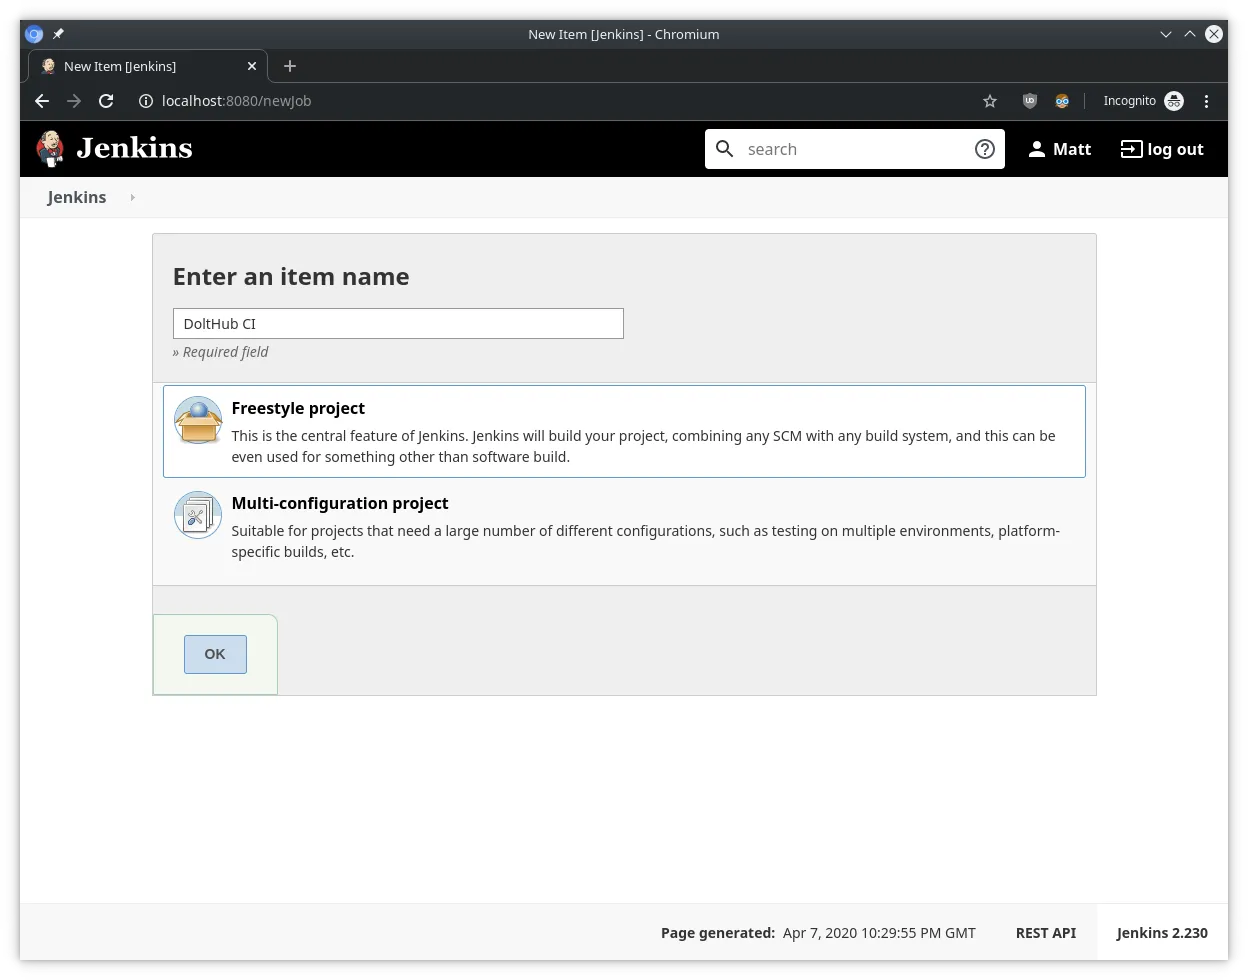
Now it’s time to create the CI job. We click “New Item” on the left, give the project a name (I called mine DoltHub CI) and choose “Freestyle Project”.
Now we need to configure the build trigger. We select the Generic Webhook Trigger and configure it to parse the fields from a webhook push payload like the one we saw earlier.
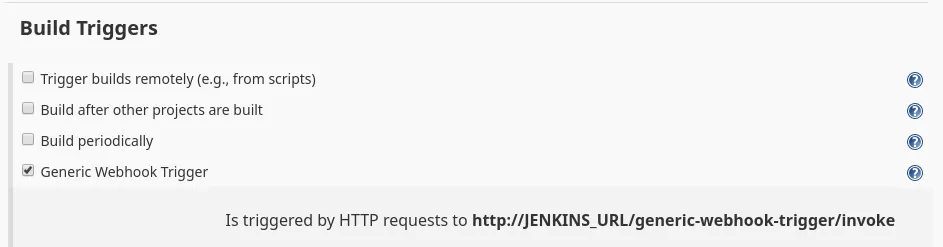
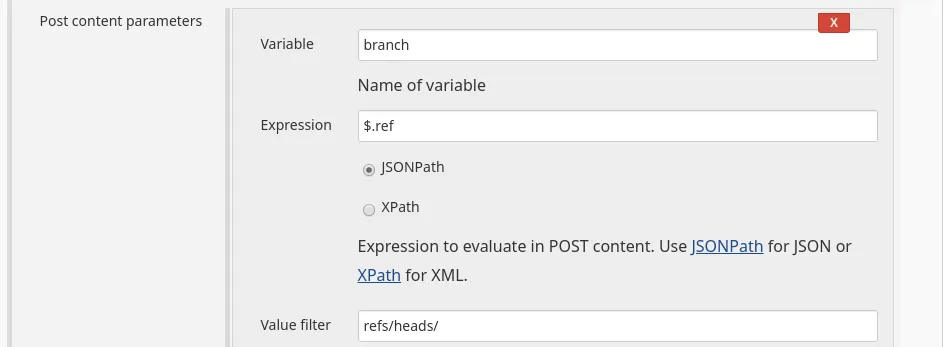
We also get the value of the x-dolthub-event header as the variable $x_dolthub_event, as this tells us which event has been triggered. Although pushes are the only event currently supported, webhooks also send a “ping” message to the endpoint when created, and we’ll want to make sure that such messages don’t trigger our job.
Referencing the branch name and event name variables, we add an “Optional filter” so that only a push to the master branch triggers this job.

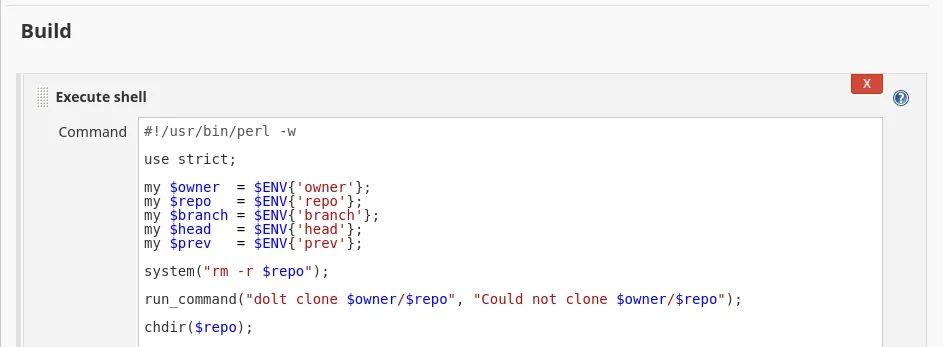
Almost done. Now we can enter our CI script under “Execute shell” in the Build section. The script we’ll use today is written in Perl (thanks, Tim!), but you can use Bash or Python or whatever you desire. You can see the source in this Gist.
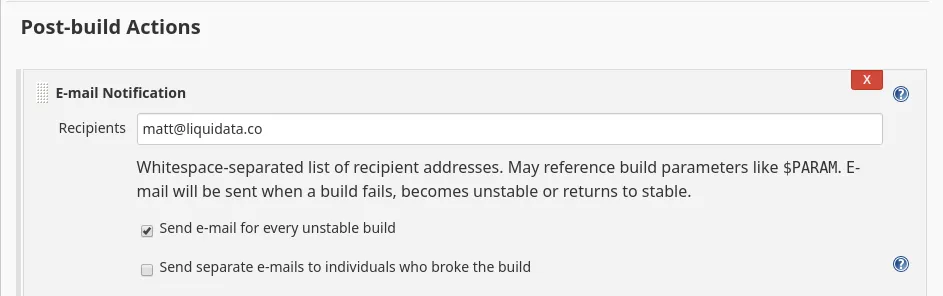
Finally, we set up the “E-mail Notification” post-build action. I’m using my Gmail credentials for sending email from Jenkins. Instructions are in this StackOverflow thread.
View a screenshot of the entire DoltHub CI job config.
Note the URL the webhooks plugin gives us as we’ll need it when we configure DoltHub: http://JENKINS_URL/generic-webhook-trigger/invoke
Great! We can save our job; we’re done configuring Jenkins.
Exposing locally-running Jenkins#
For the purposes of this article, I’m running the Jenkins container locally on my laptop on port 8080 (the default). An easy way to expose that port so that DoltHub can see it is with ngrok. After installing it, we simply run
ngrok http 8080and make note of the personalized URL it gives, like https://617d1bbc.ngrok.io. We substitute this in for http://JENKINS_URL in the URL from the Generic Webhook Trigger plugin:
https://617d1bbc.ngrok.io/generic-webhook-trigger/invokeFinally, we add our Jenkins username and password to the URL (these are not my real credentials, obviously):
https://foouser:foopass@617d1bbc.ngrok.io/generic-webhook-trigger/invokeThis is the URL we will plug into DoltHub’s webhooks setup.
Configuring DoltHub webhooks#
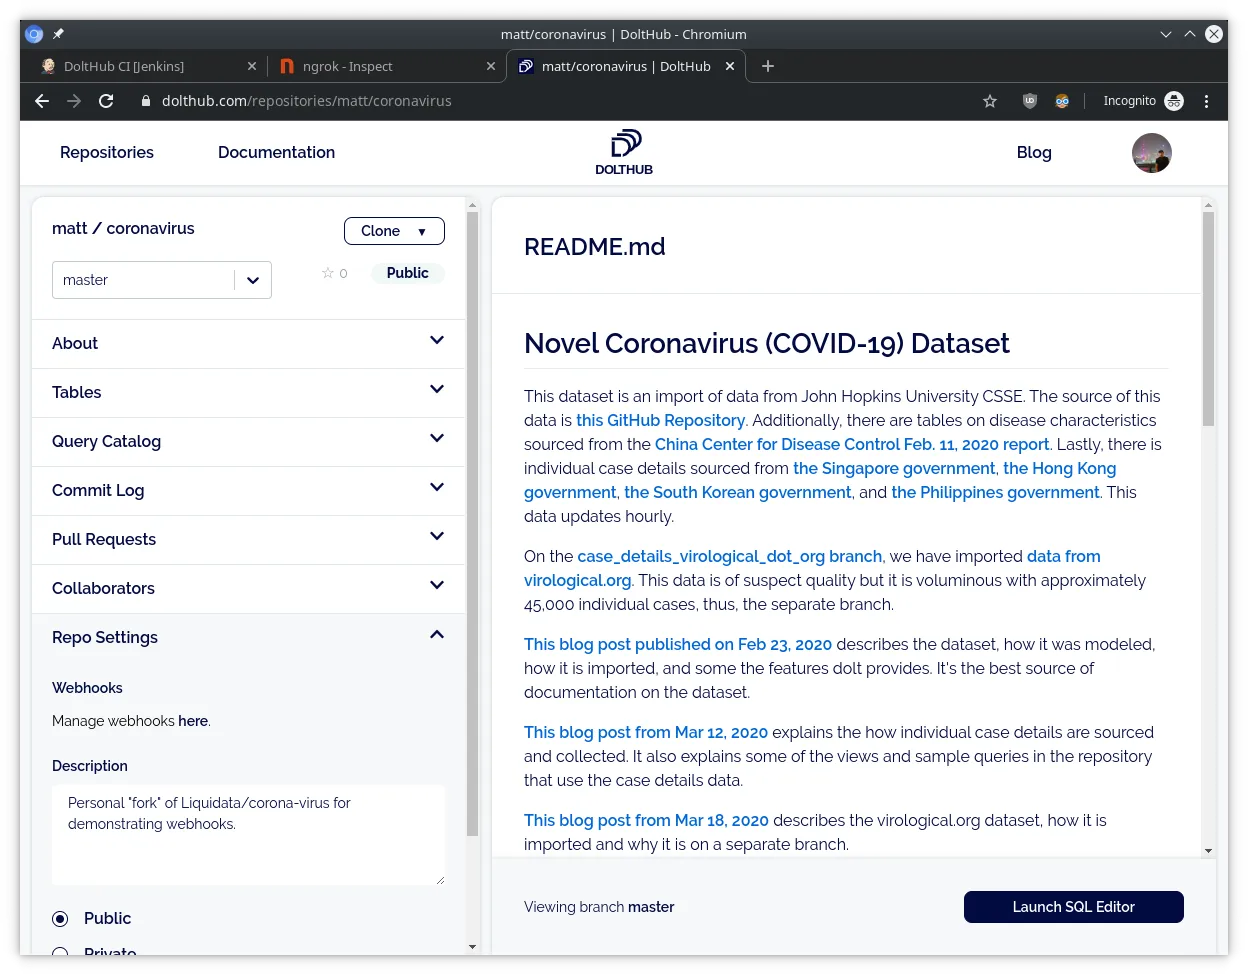
We navigate to https://www.dolthub.com/repositories/matt/coronavirus, where I’ve set up my own copy of DoltHub’s coronavirus repository for testing. On the left panel, under Repo Settings, there’s a link to the webhooks setup:
Note that only repository administrators can view, add, and edit webhooks, so if you don’t see this link, make sure you’re looking at a repository you have admin access to.
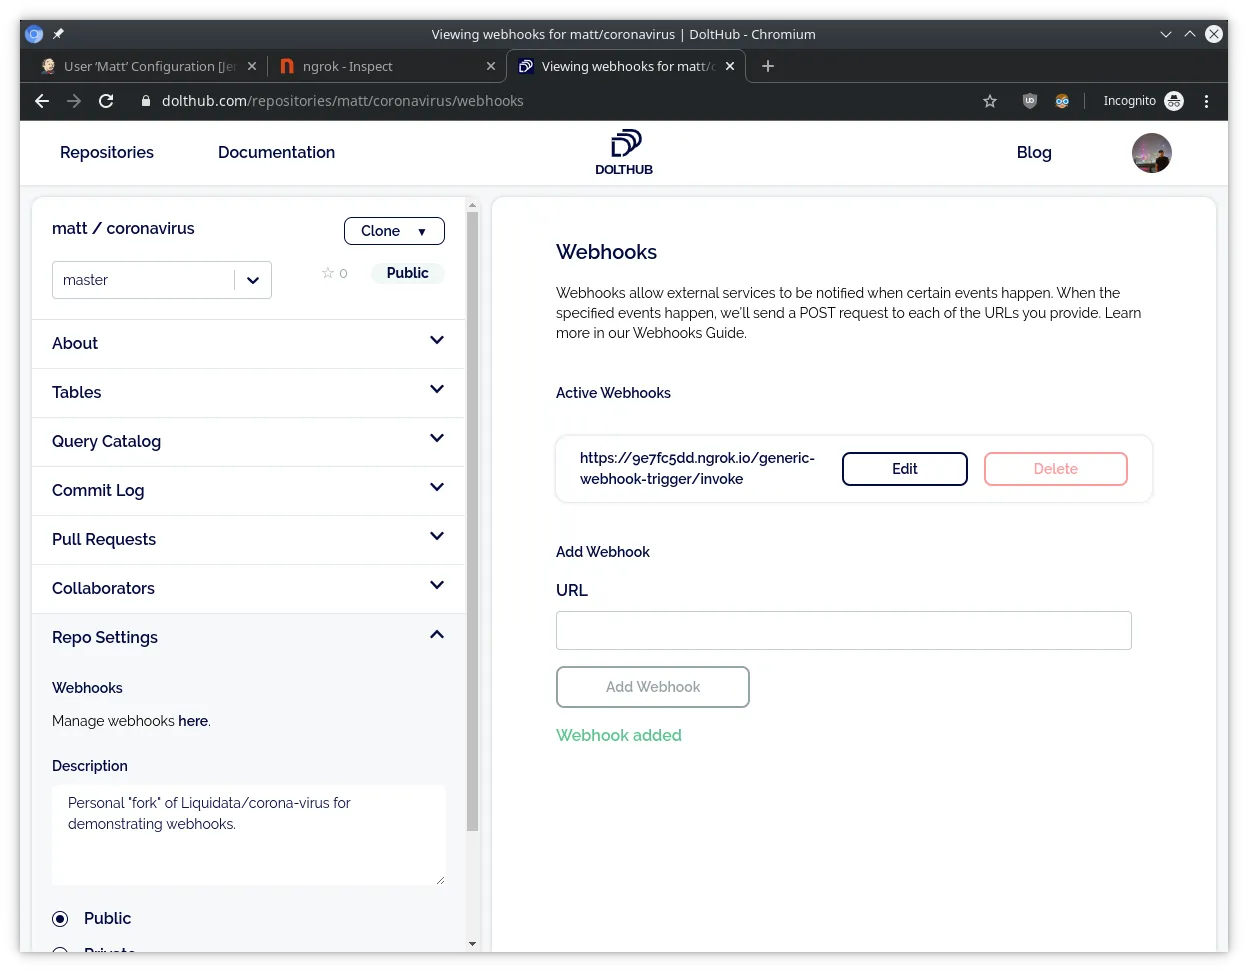
Once there, we paste our endpoint URL and click “Add Webhook”. The webhook appears in the list:
If we go to ngrok’s web dashboard we should see the ping event sent on webhook creation:
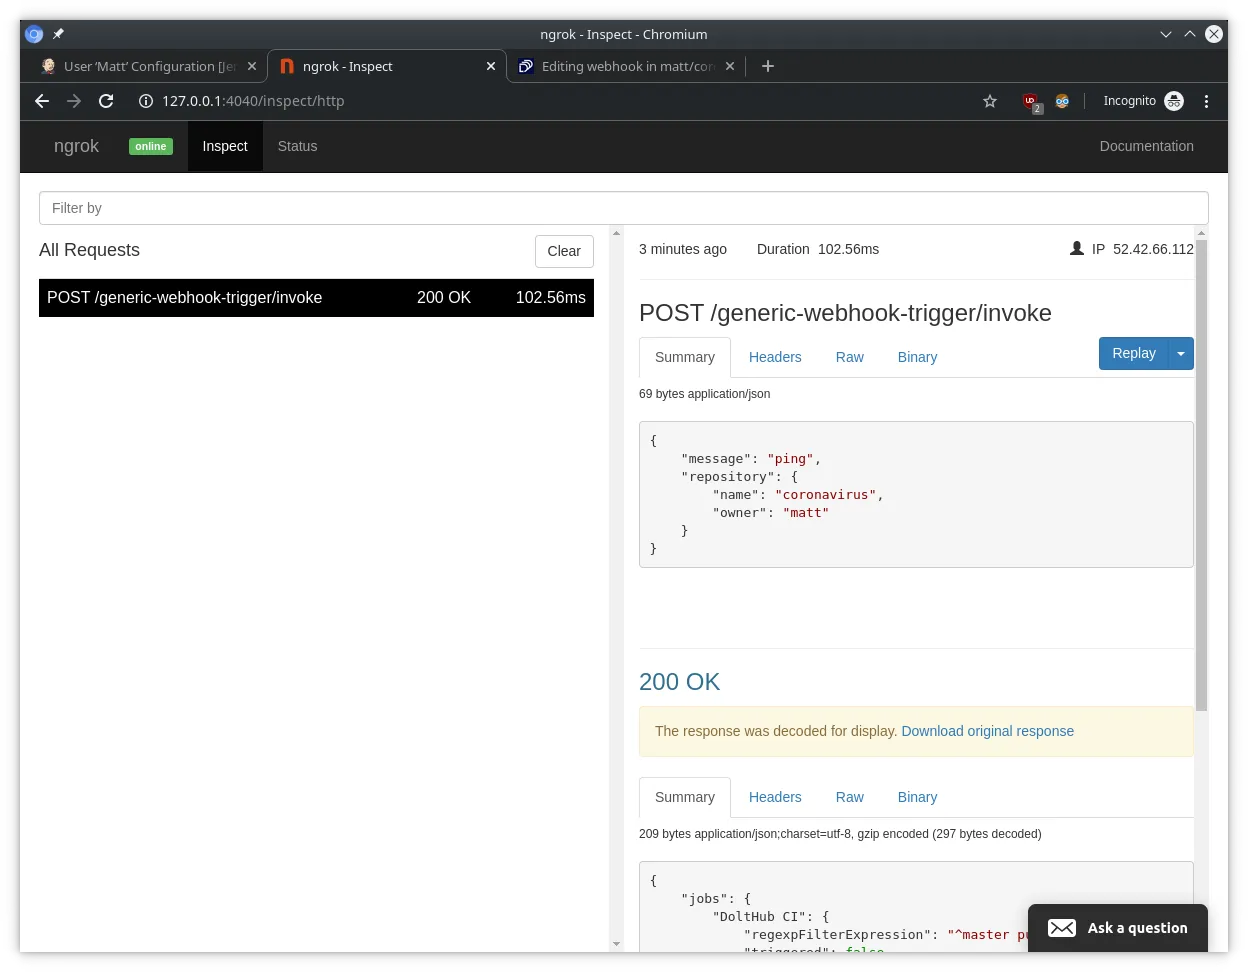
We can also see the request and response right in DoltHub by clicking on the webhook URL and then selecting the “Recent Deliveries” tab:
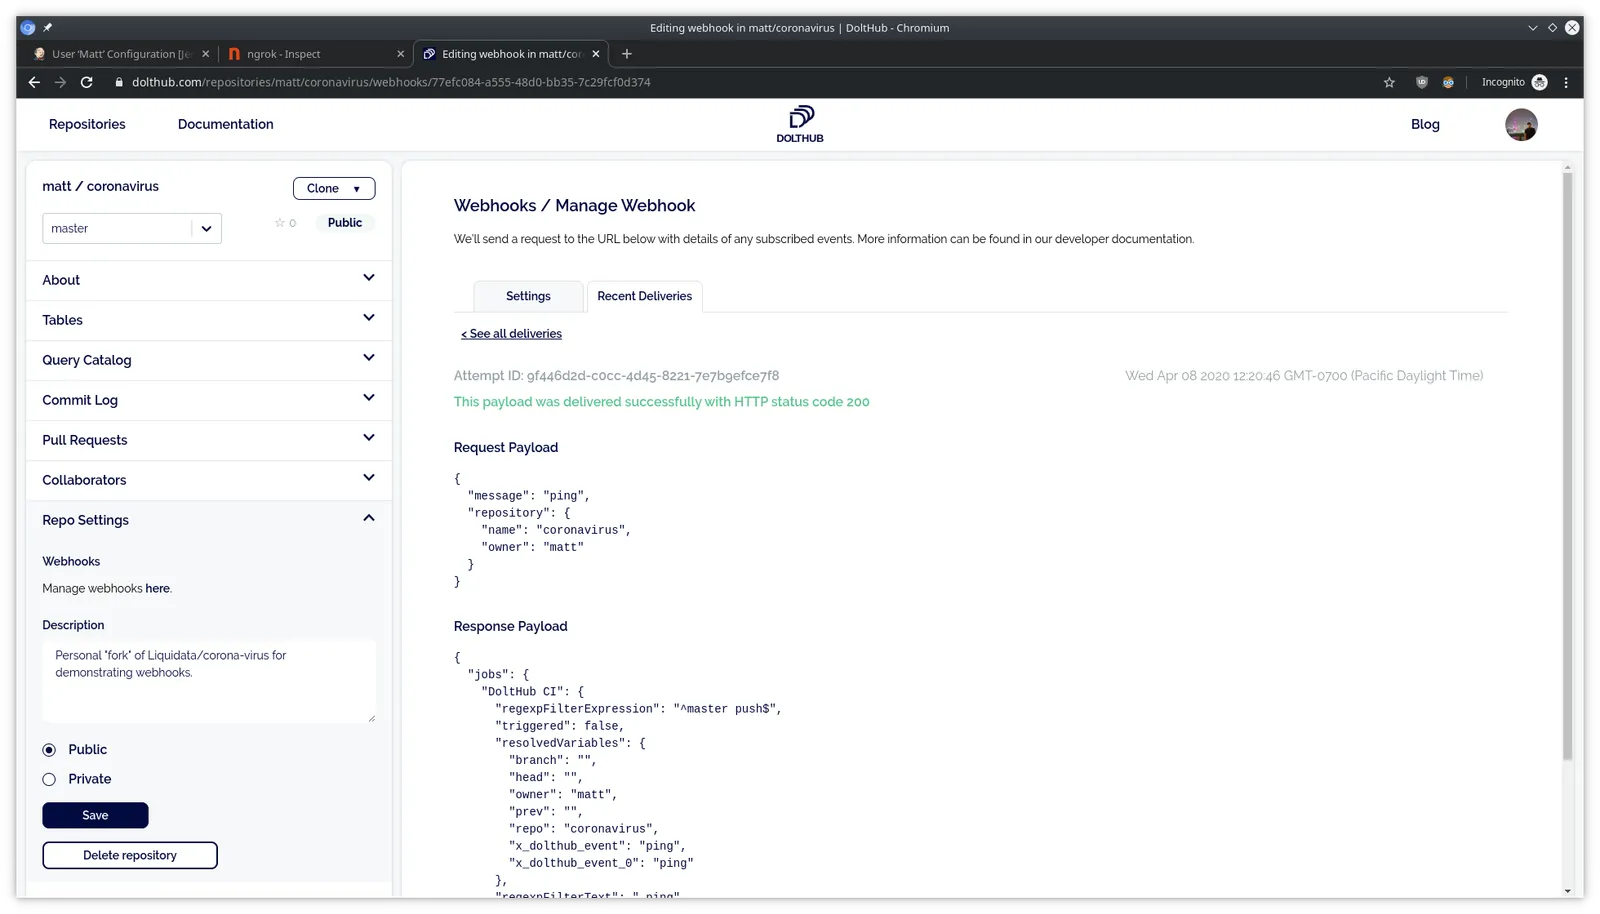
Note that our build filter kept this ping event from triggering our job, as intended. Nice.
Testing some pushes#
Okay, now let’s test this thing! We clone my copy of the coronavirus repo locally:
dolt clone matt/coronavirus
cd coronavirus
Let’s make and push a commit with null values in the country_region column of the places table, which should fail our CI script:
dolt sql -q "insert into places values (1337, 'Foo State', NULL, 34.0195, -118.4912)"
dolt add places
dolt commit -m "places: add highly questionable entry"
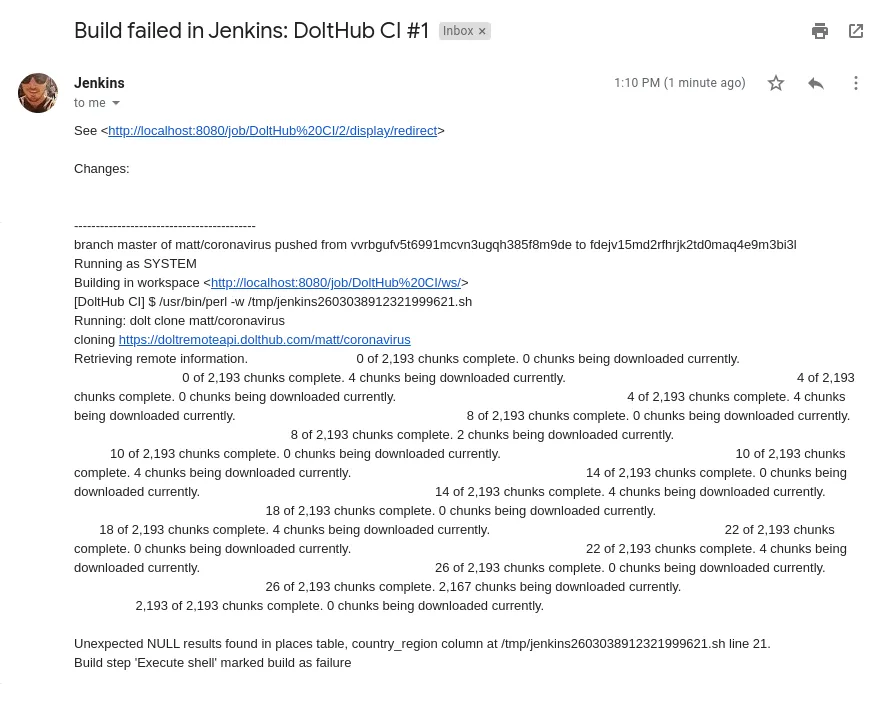
dolt push -u origin masterCheck it out! Our Jenkins job failed:

And we got an email alert:
Now let’s try updating previous time-series data, which should also fail CI:
# undo the last commit or that will cause a failure before even looking at the time series
dolt sql -q "delete from places where country_region is null"
dolt add places
dolt commit -m "places: remove entry with null region"
# 1579651200 is 00:00 UTC on Jan 22, 2020
dolt sql -q "update cases set death_count = 0 where observation_time = 1579651200 and place_id = 1"
dolt add cases
dolt commit -m "cases: minor historical revisionism"
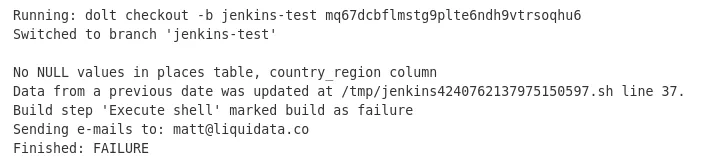
dolt pushHooray! This job fails as expected as well.
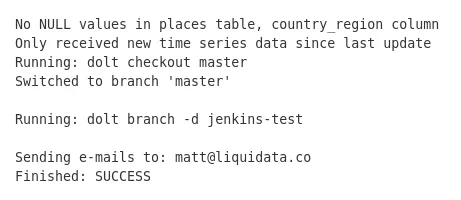
Now finally, let’s push a commit that should pass:
dolt sql -q "insert into places values (1234, 'Okay State', 'Okay Country', 34.0195, -118.4912)"
dolt sql -q "insert into cases values ('2020-04-08 00:00:00', 1, 100, 95, 5)"
dolt add cases places
dolt commit -m "cases, places: add observations which should pass CI"
dolt push
This one succeeds. Woohoo!
Conclusion#
This is just the beginning for Dolt and webhooks: we envision using them to integrate CI with pull requests, and we plan on adding more events and fine-grained controls in the medium-term. Moreover, webhooks are kind of like “internet glue”: they enable an incredible range of use cases by tying together software that already exists, like IFTTT. We can’t wait to see what wild and unexpected uses people find for them.
Go to DoltHub and create a repo, or head to an existing one you have admin access to, create a webhook or two, and try flinging some data around the interwebs. And if you have any questions or feedback whatsoever, please get in touch with us. We’re excited to hear what you think!