
If you’re looking for an open-source identity provider, Keycloak is a great option. It supports single-sign-on (SSO), identity brokering and social login, and ships with a suite of other authorization services, all built on standard protocols like OpenID Connect, Oauth 2.0, and SAML.
Here at DoltHub, I build DoltLab, the on-premises version of DoltHub you host and manage yourself. DoltLab is a remote for Dolt databases that gives you a modern web UI, pull request workflows, and continuous integration, all within your own private network. Additionally, DoltLab Enterprise offers SSO integrations with an identity provider of your choice. As part of my work building these features into DoltLab Enterprise, I’ve found Keycloak to be a great way to test and validate the different SSO authentication flows DoltLab supports.
In today’s blog, I’ll cover how you can set up a local Keycloak development server in order to test out an OIDC login flow for your application. Then, I’ll reveal some “gotchas” you’ll encounter with Keycloak if you instead want to deploy a server on a remote host. Please note that today’s post will only cover running Keycloak in development mode, but their documentation provides clear guidance on how to run a server in production.
Prerequisites#
I’ve created a small example repository written in Go called dolthub/oidc-example to act as our application to test the OIDC client we will configure in our Keycloak server.
Go ahead and clone this repository now, to work along with me.
src % git clone https://github.com/dolthub/oidc-example.git
Cloning into 'oidc-example'...
remote: Enumerating objects: 13, done.
remote: Counting objects: 100% (13/13), done.
remote: Compressing objects: 100% (10/10), done.
remote: Total 13 (delta 2), reused 5 (delta 0), pack-reused 0 (from 0)
Receiving objects: 100% (13/13), 4.76 KiB | 4.76 MiB/s, done.
Resolving deltas: 100% (2/2), done.
src % cd oidc-example
oidc-example %
You’ll also need to have Go and Docker installed. We’ll use Go to run our sample application server and Docker to run our local Keycloak server.
Running Keycloak locally#
Next, we can start our local Keycloak server with the following command:
oidc-example % docker run -p 8080:8080 -e KEYCLOAK_ADMIN=admin -e KEYCLOAK_ADMIN_PASSWORD=admin quay.io/keycloak/keycloak:latest start-devThis will run Keycloak in development mode and make the admin UI available to us on localhost:8080. It will also set our admin credentials to username=admin password=admin.
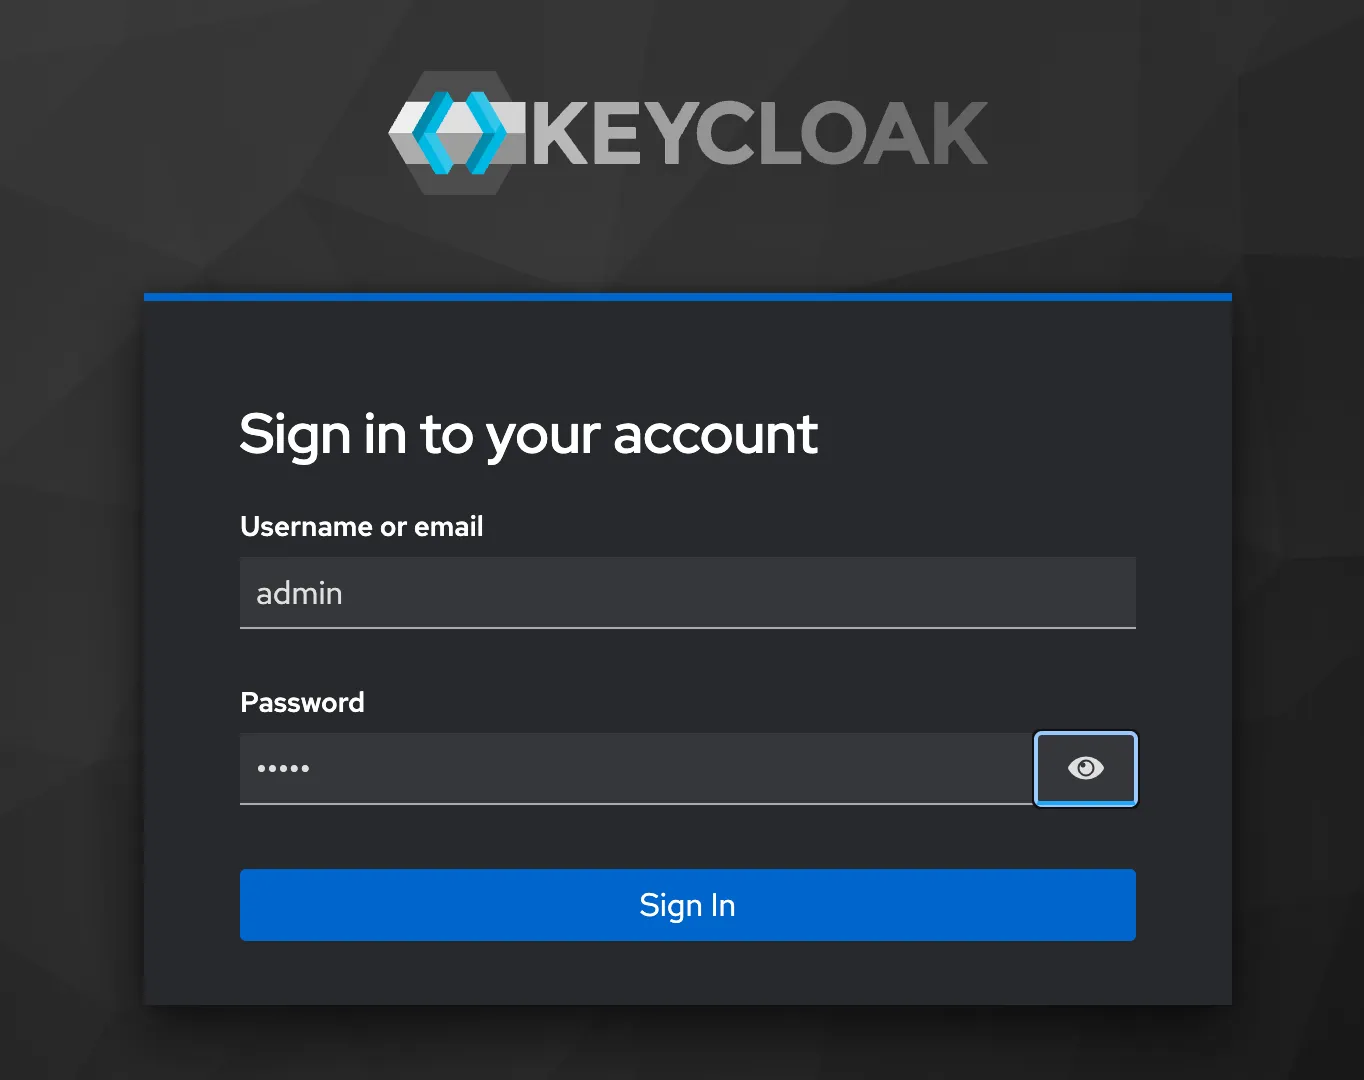
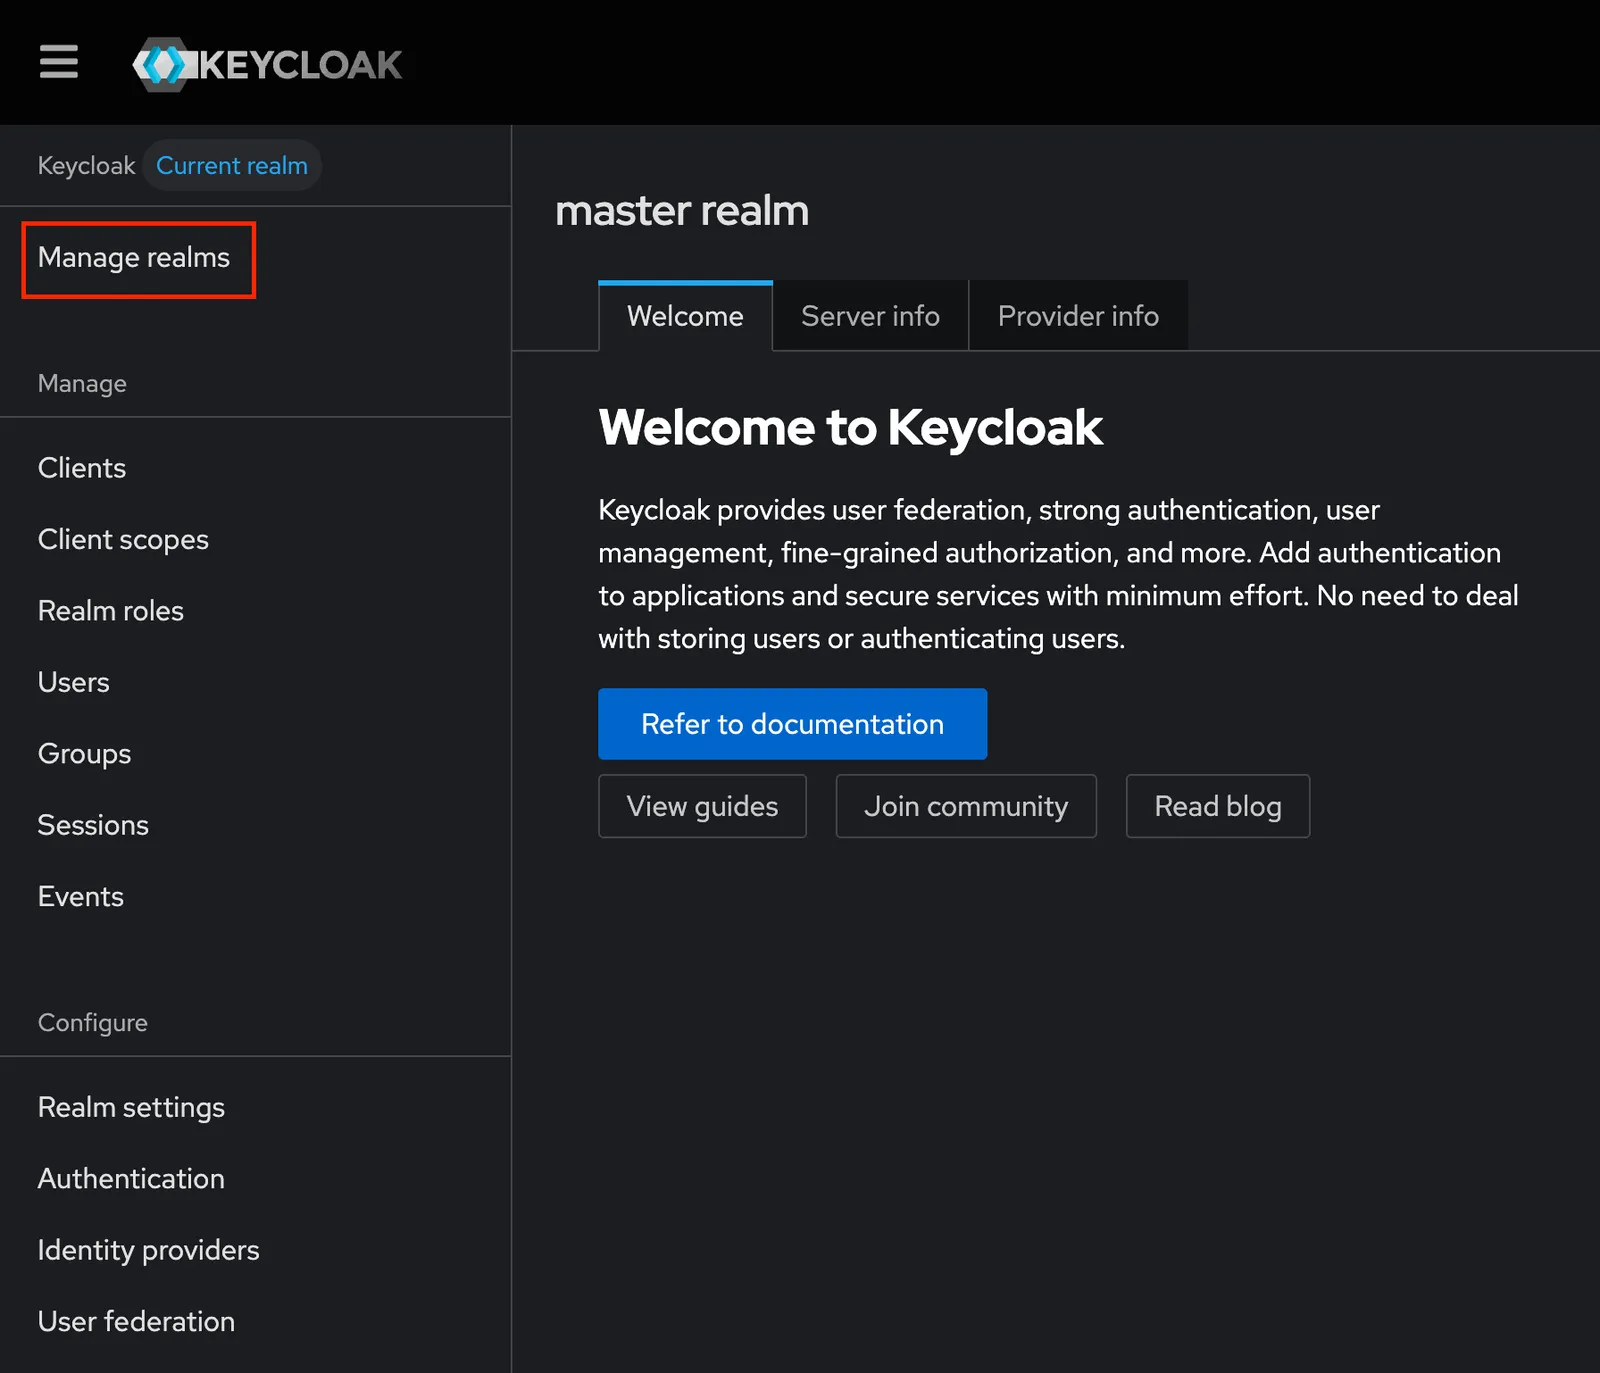
Log in to Keycloak using these credentials. By default, you will be in the master realm, which is like a namespace in Keycloak.
We’re gonna create a new realm for our sample application called example-oidc. Click on “Manage realms” and create this new realm.
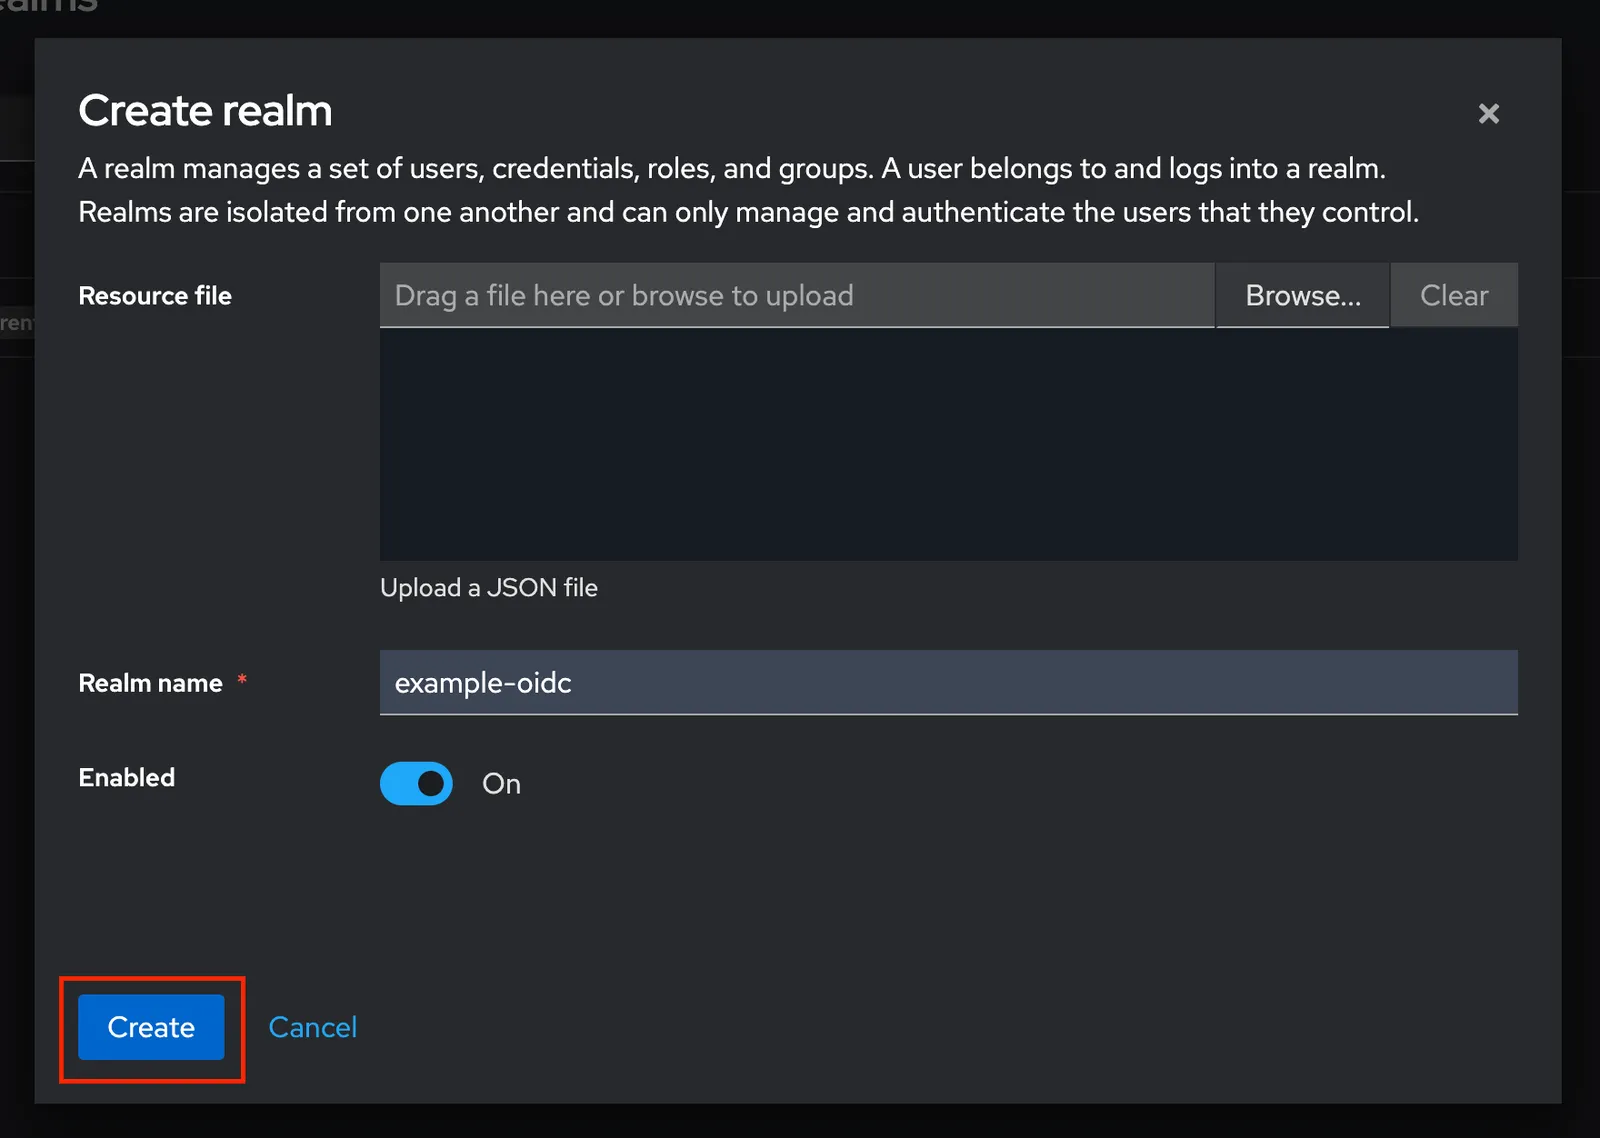
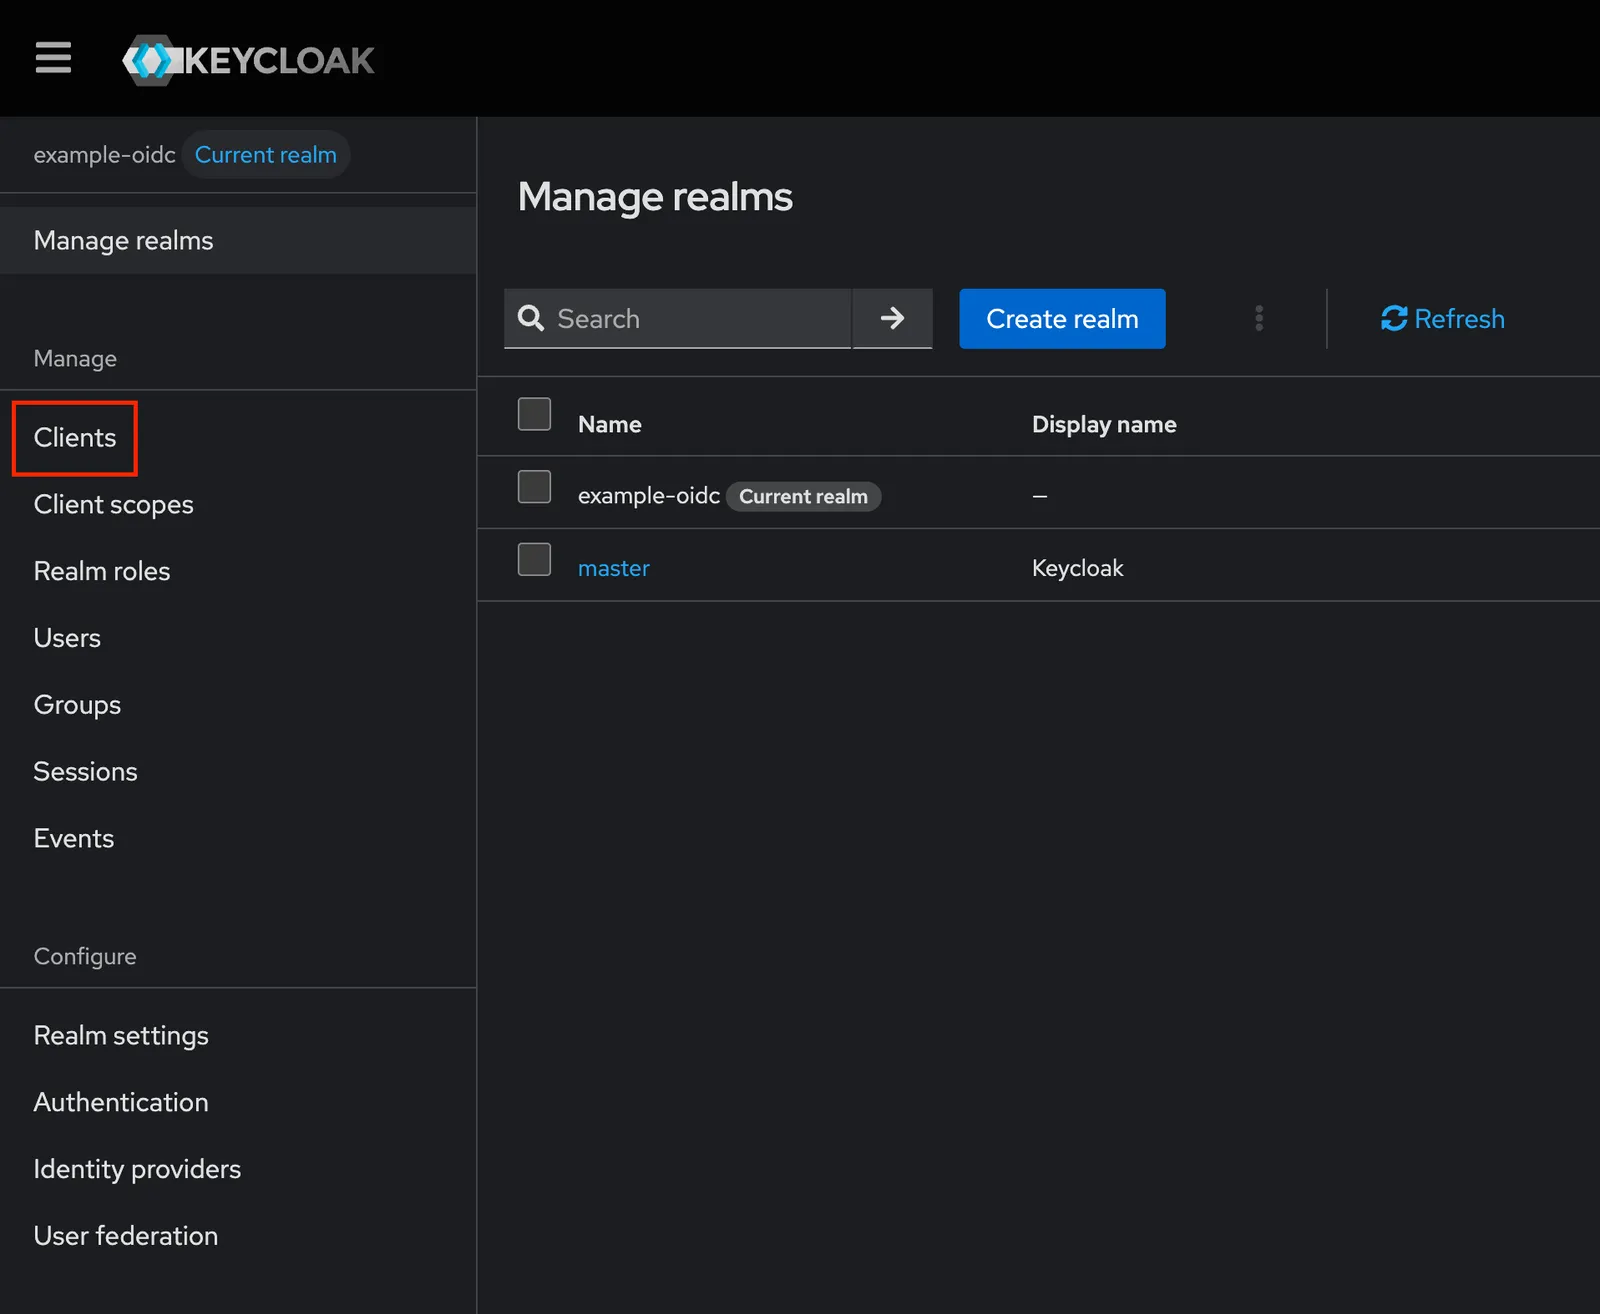
Once the new realm is made it will be your current realm.
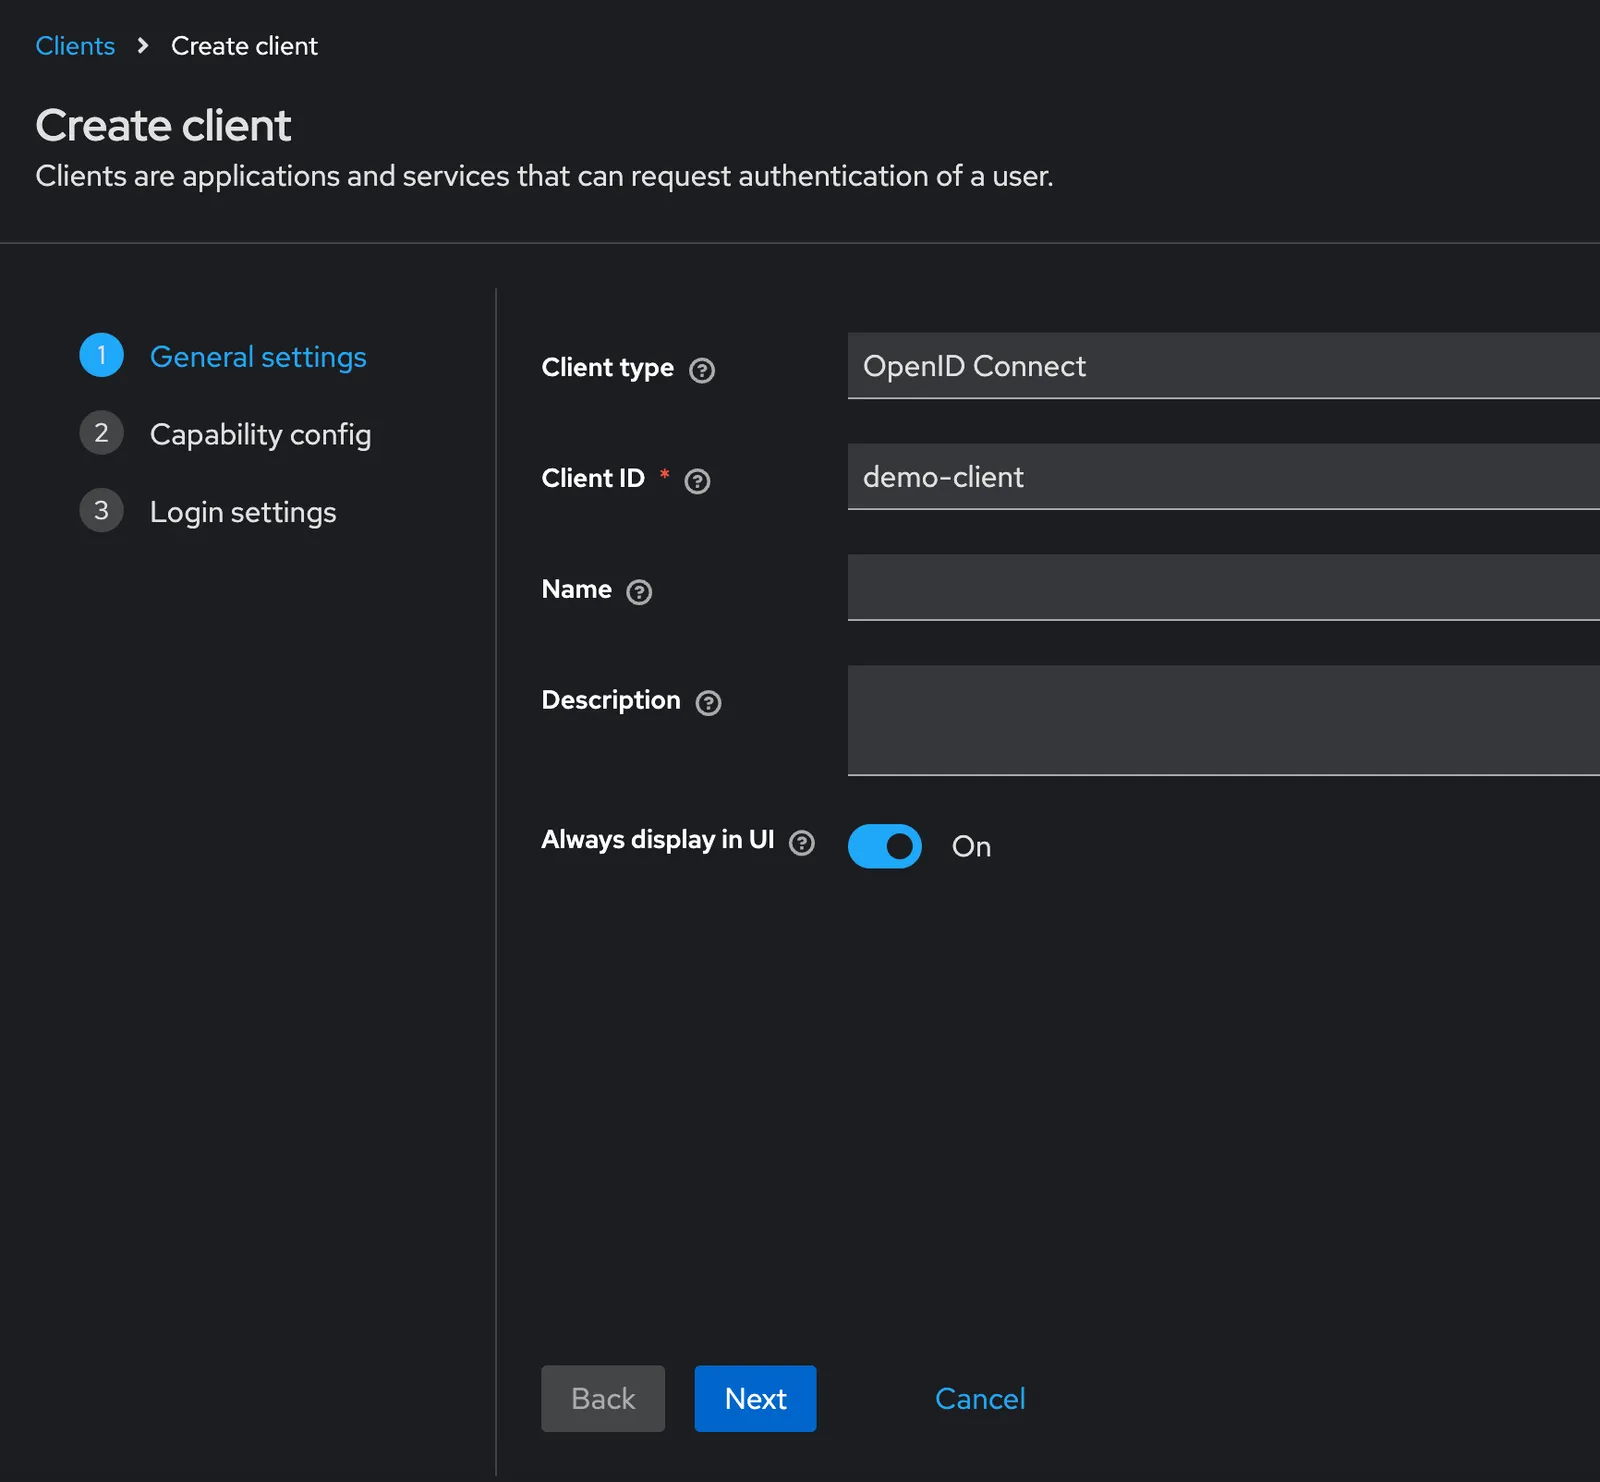
Our next task is to create an OIDC client in this new realm. Click “Clients”, then click “Create client”.
We will create a client with the following values:
Client ID: demo-client
Client Type: OpenID Connect
Root URL: http://localhost:3000
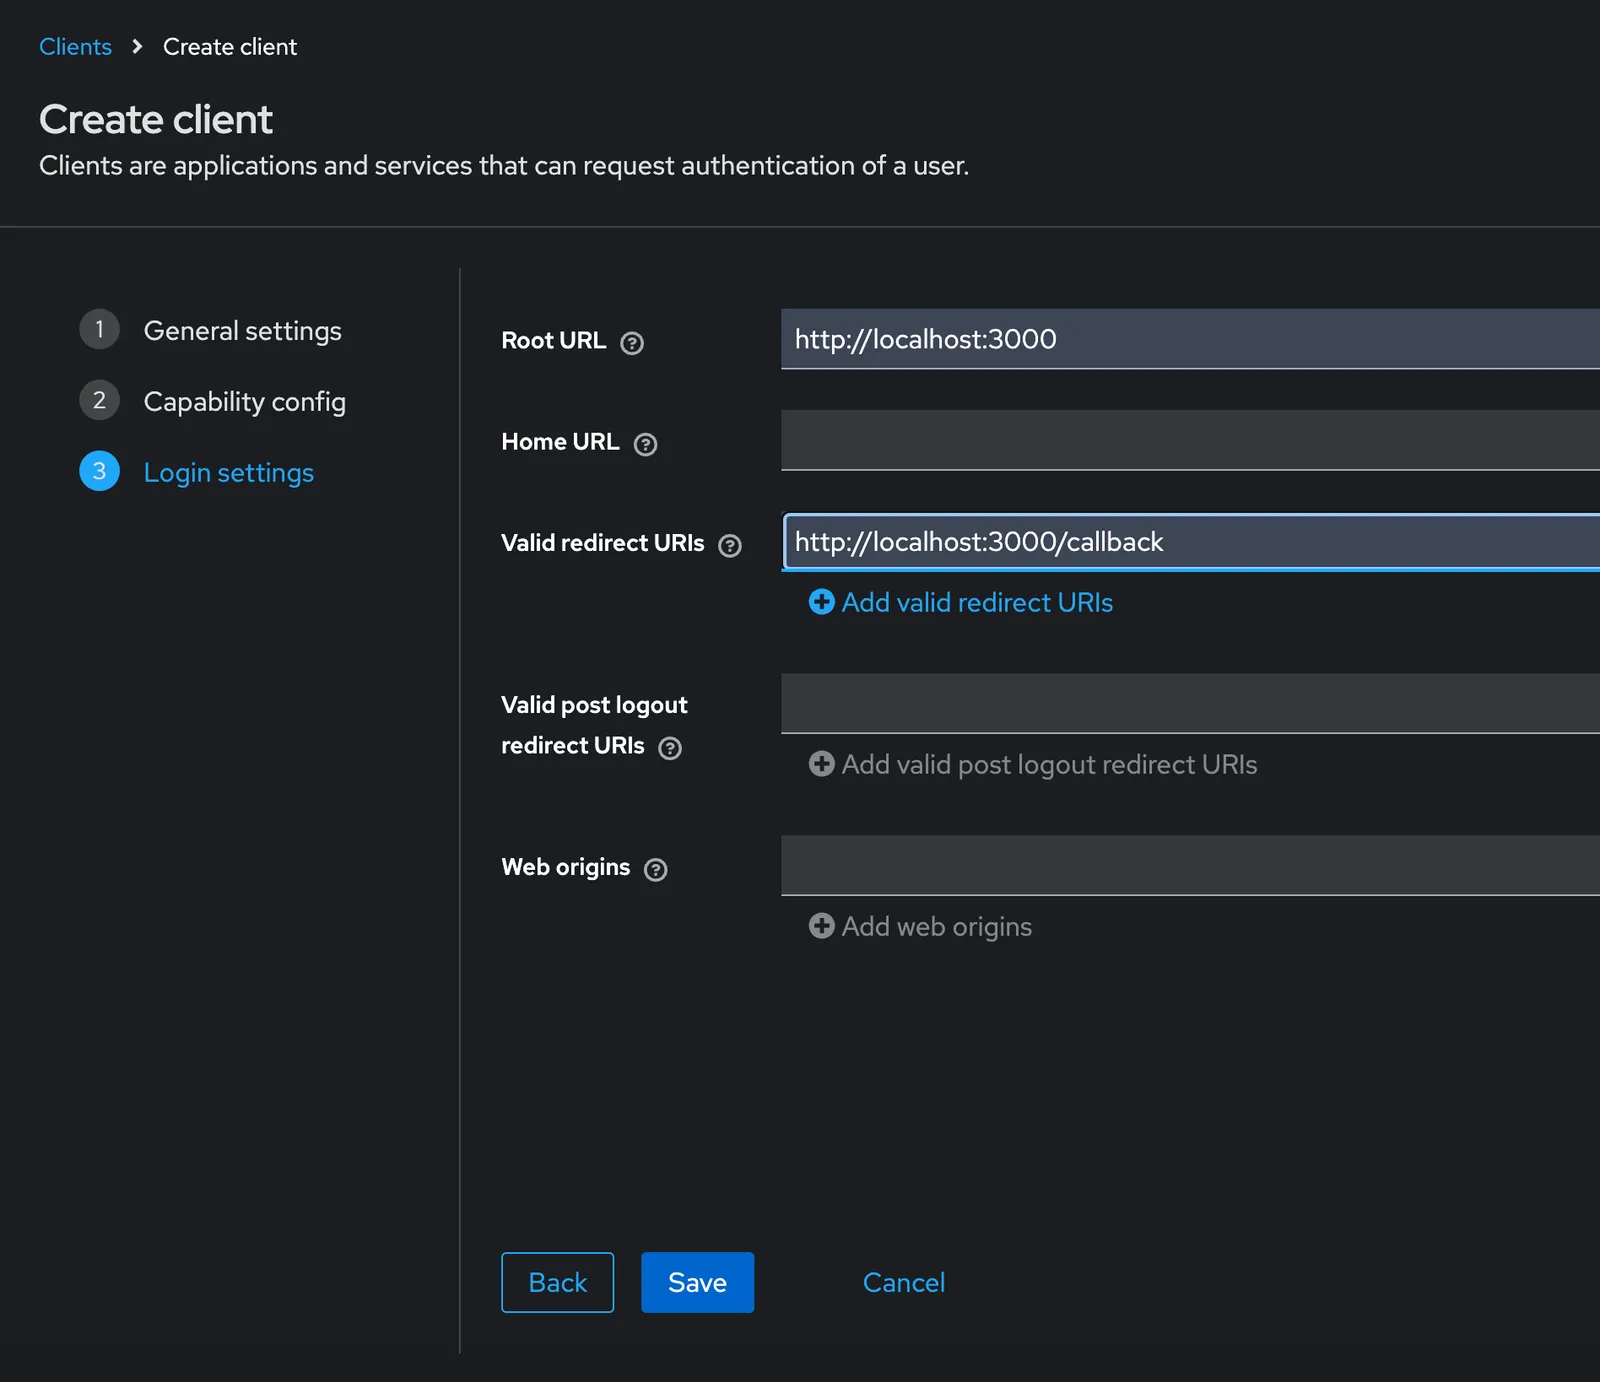
Redirect URL: http://localhost:3000/callbackYou will enter these values over three forms, like so:
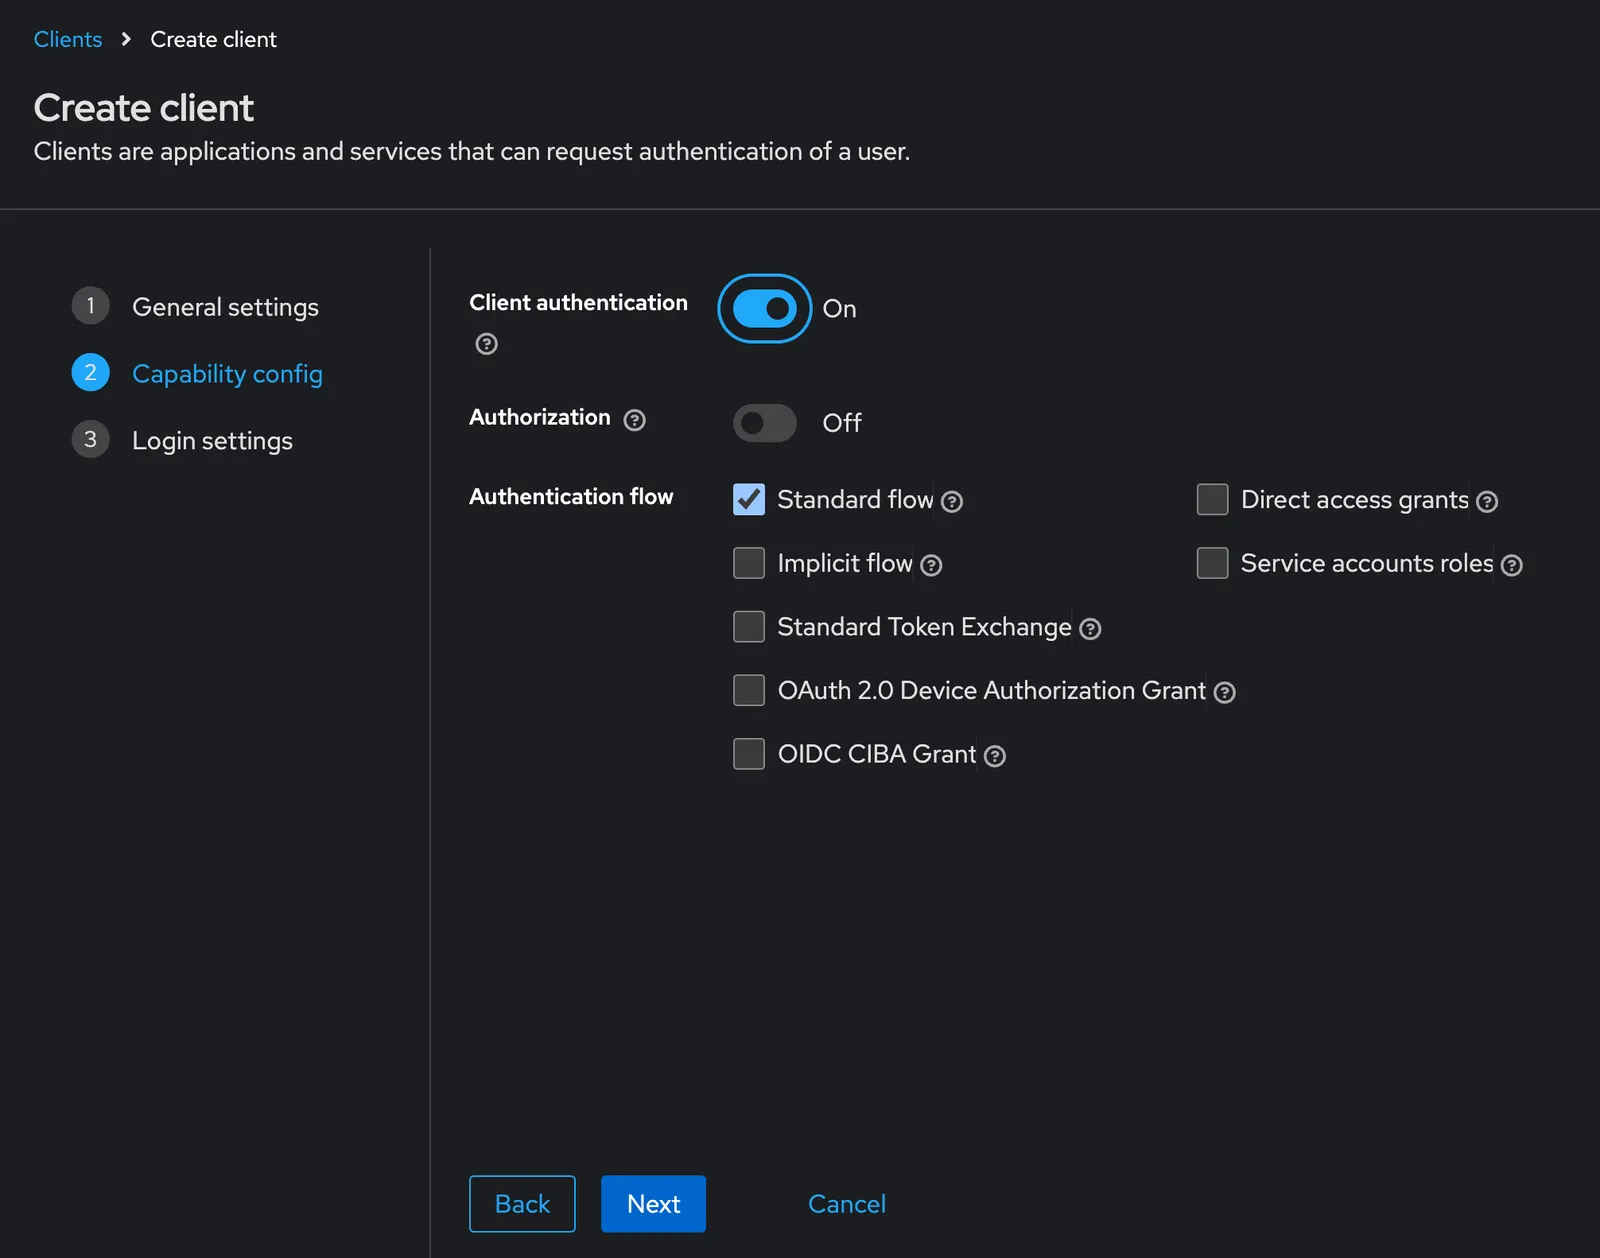
In the second form, be sure that “Client authentication” is enabled and the “Standard flow” box is checked. Once you’re done, click “Save”.
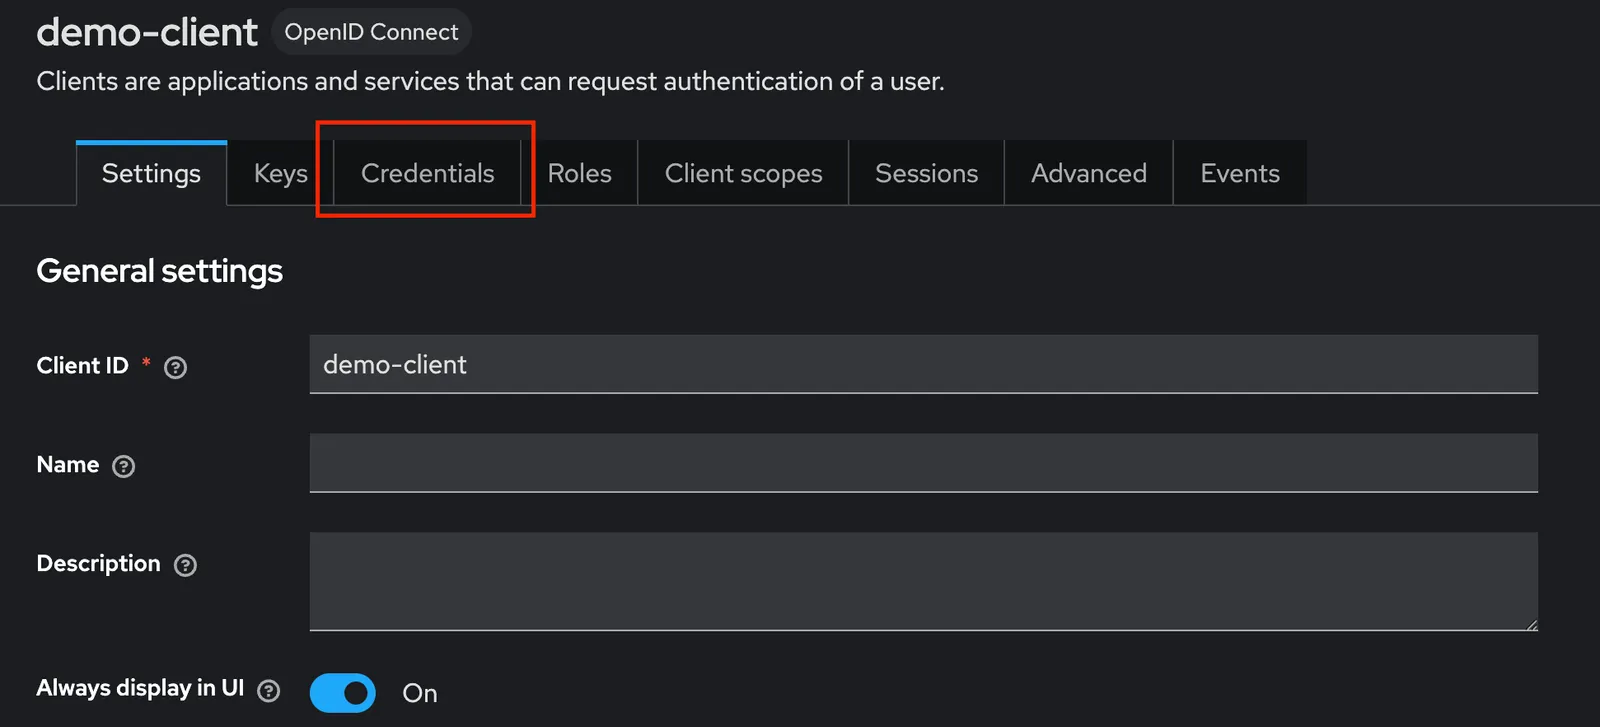
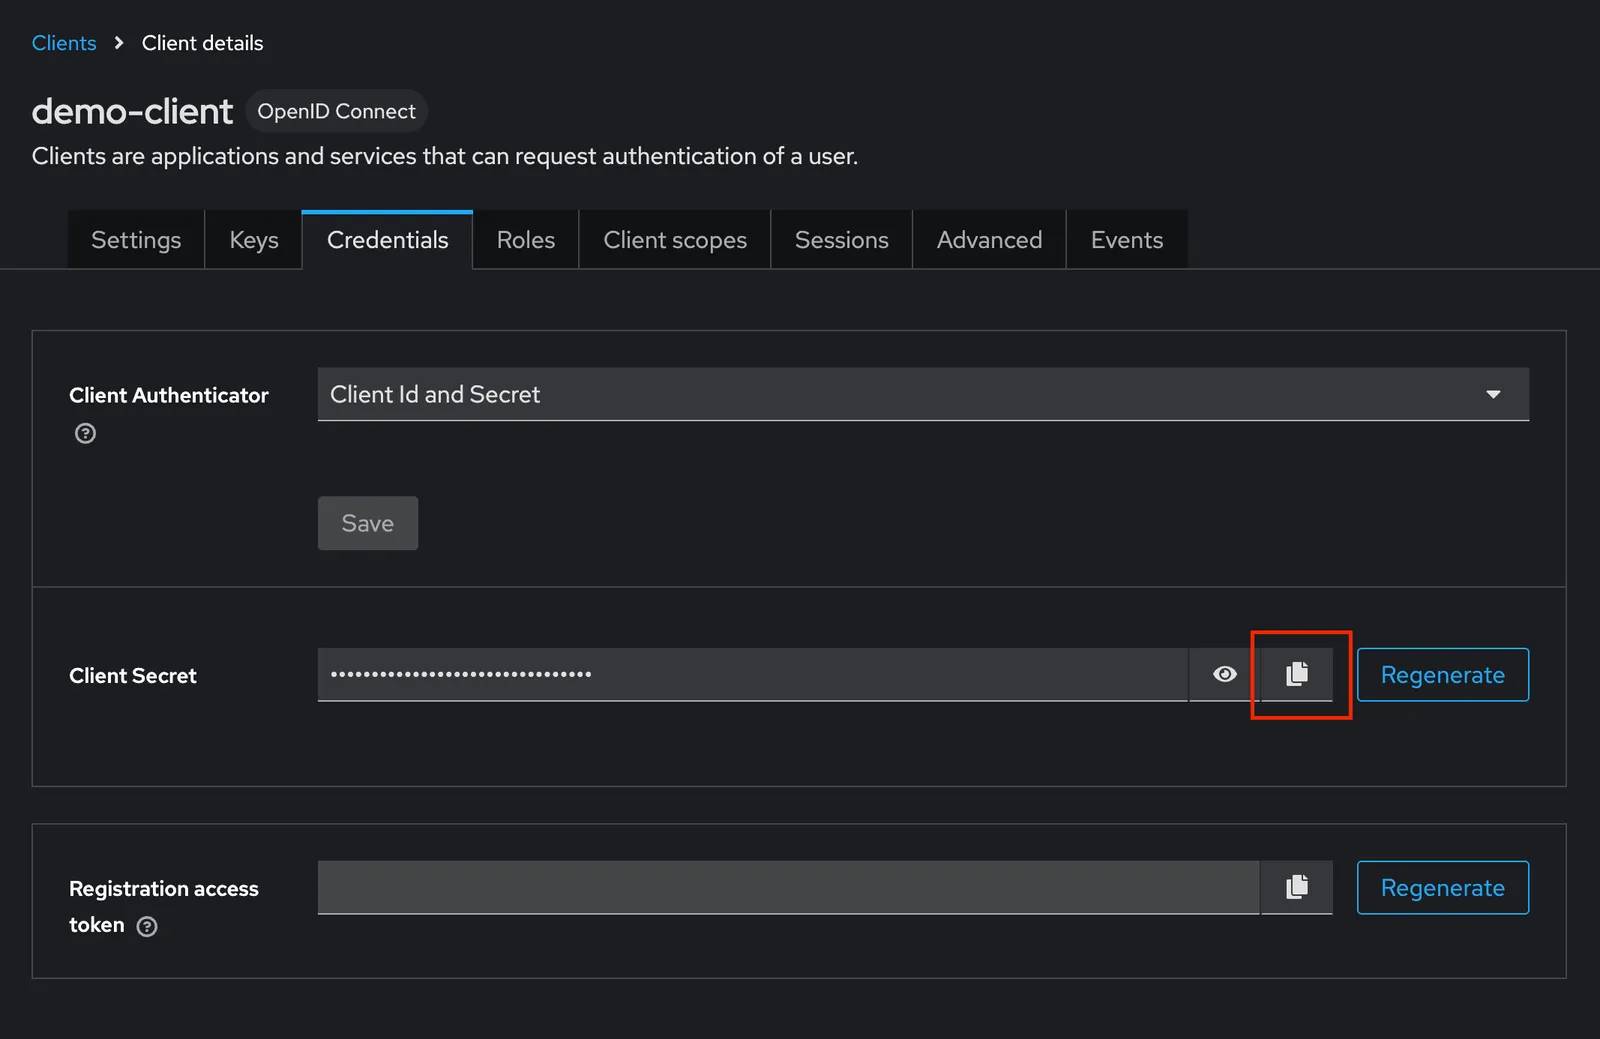
Next, we’ll need to copy the client secret associated with the demo-client we just created to use within our sample application. Click on the “Credentials” tab, and copy the “Client secret”.
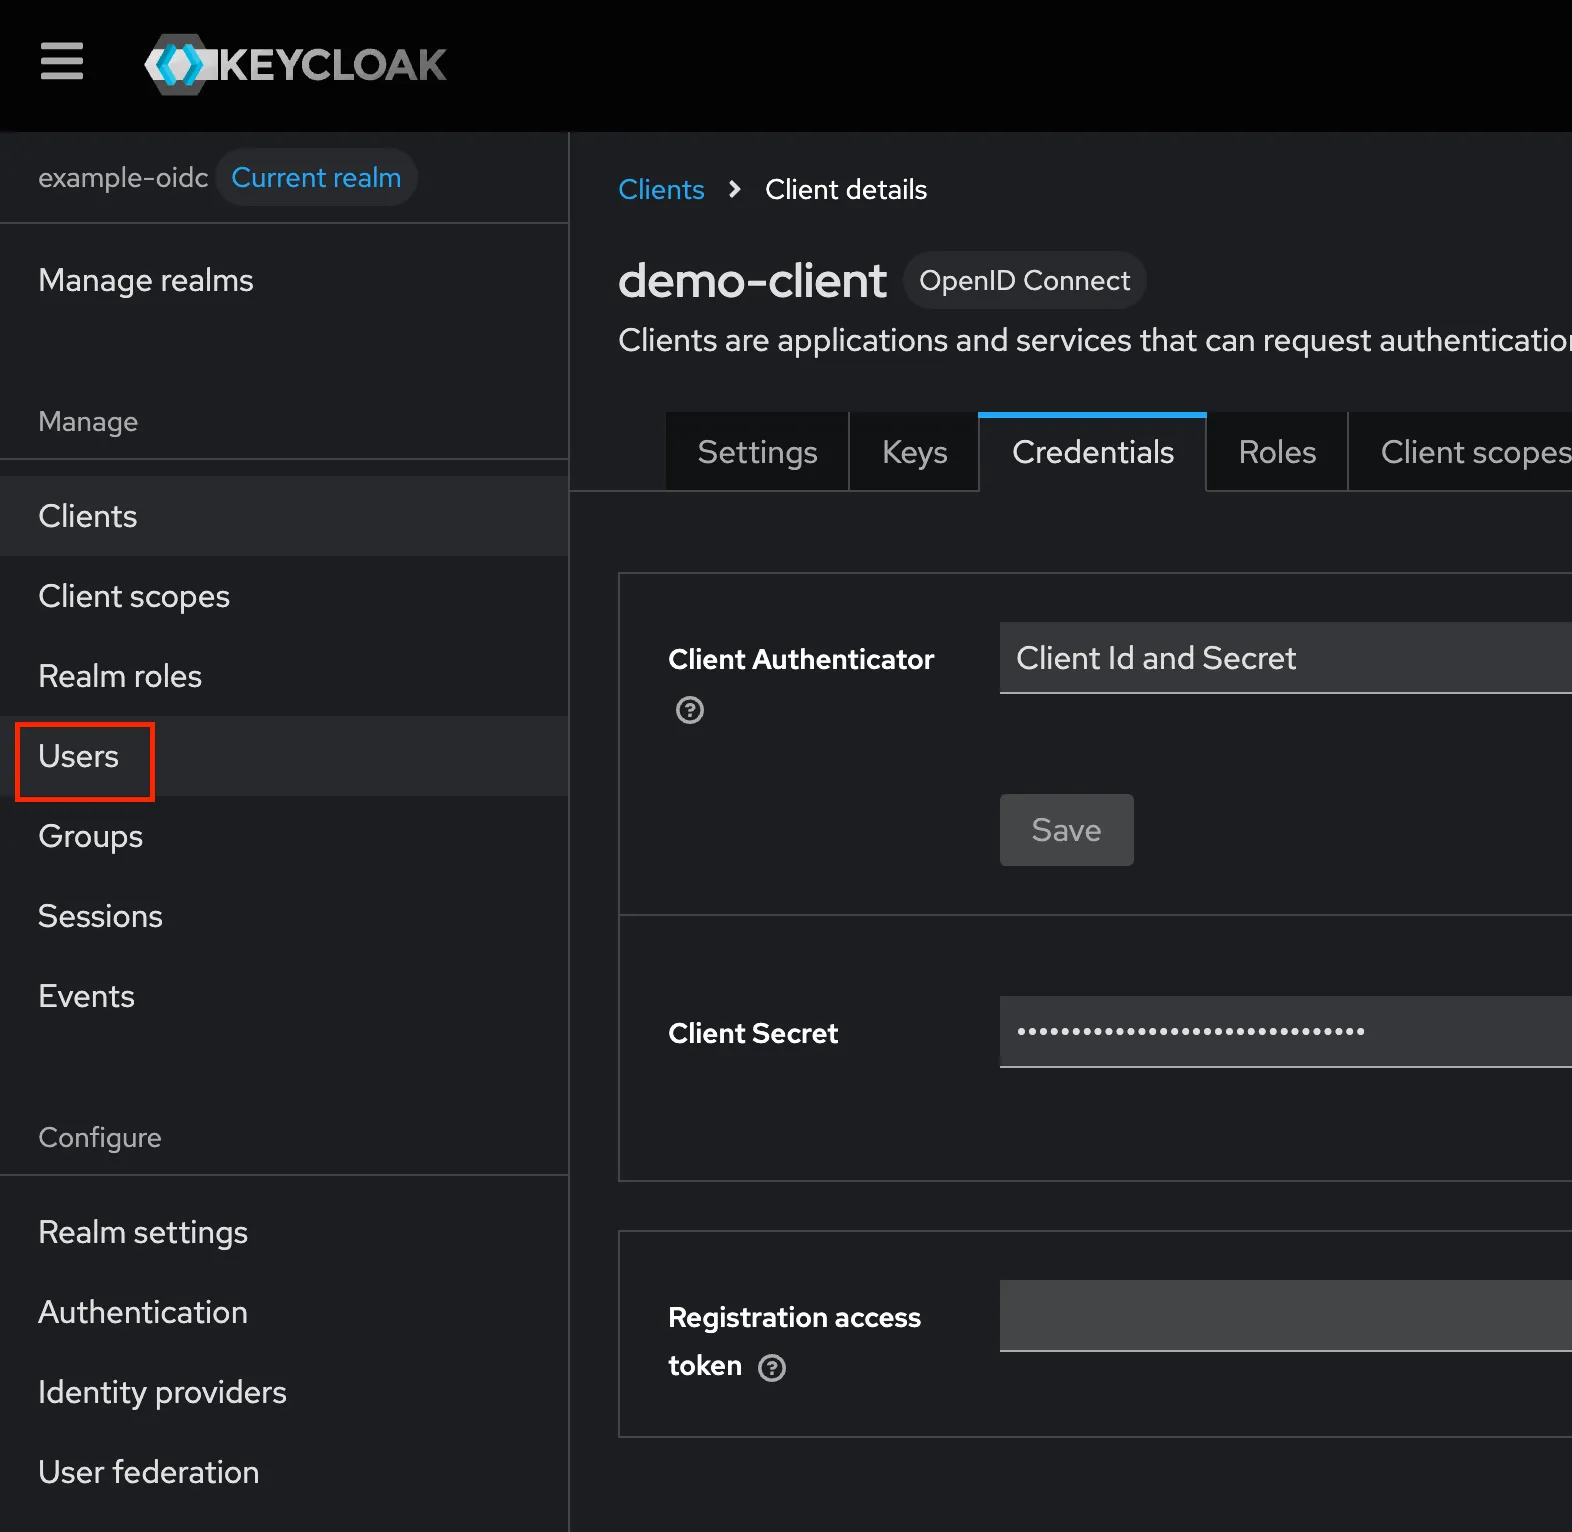
Finally, we are ready to create a test user for our sample application. Click on the “Users” tab and create a new user.
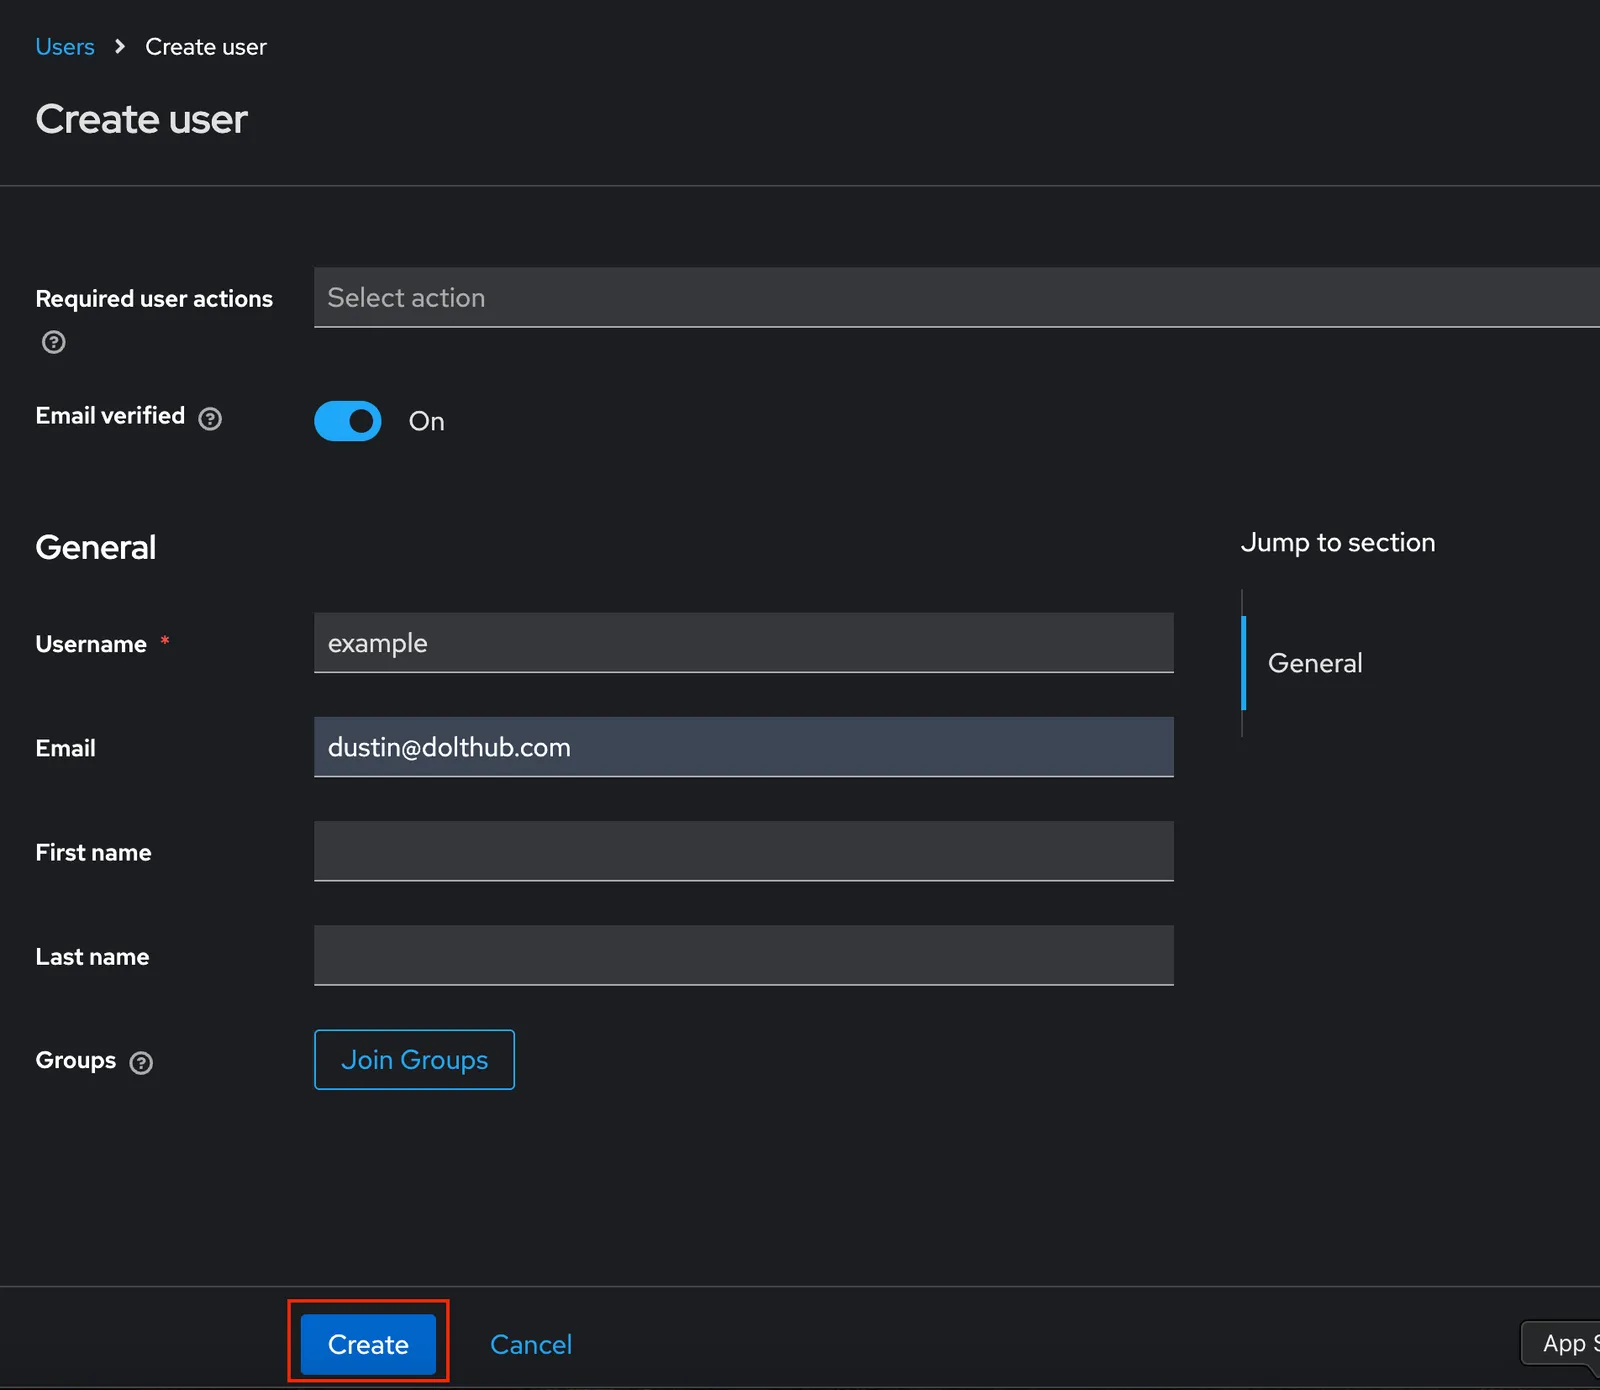
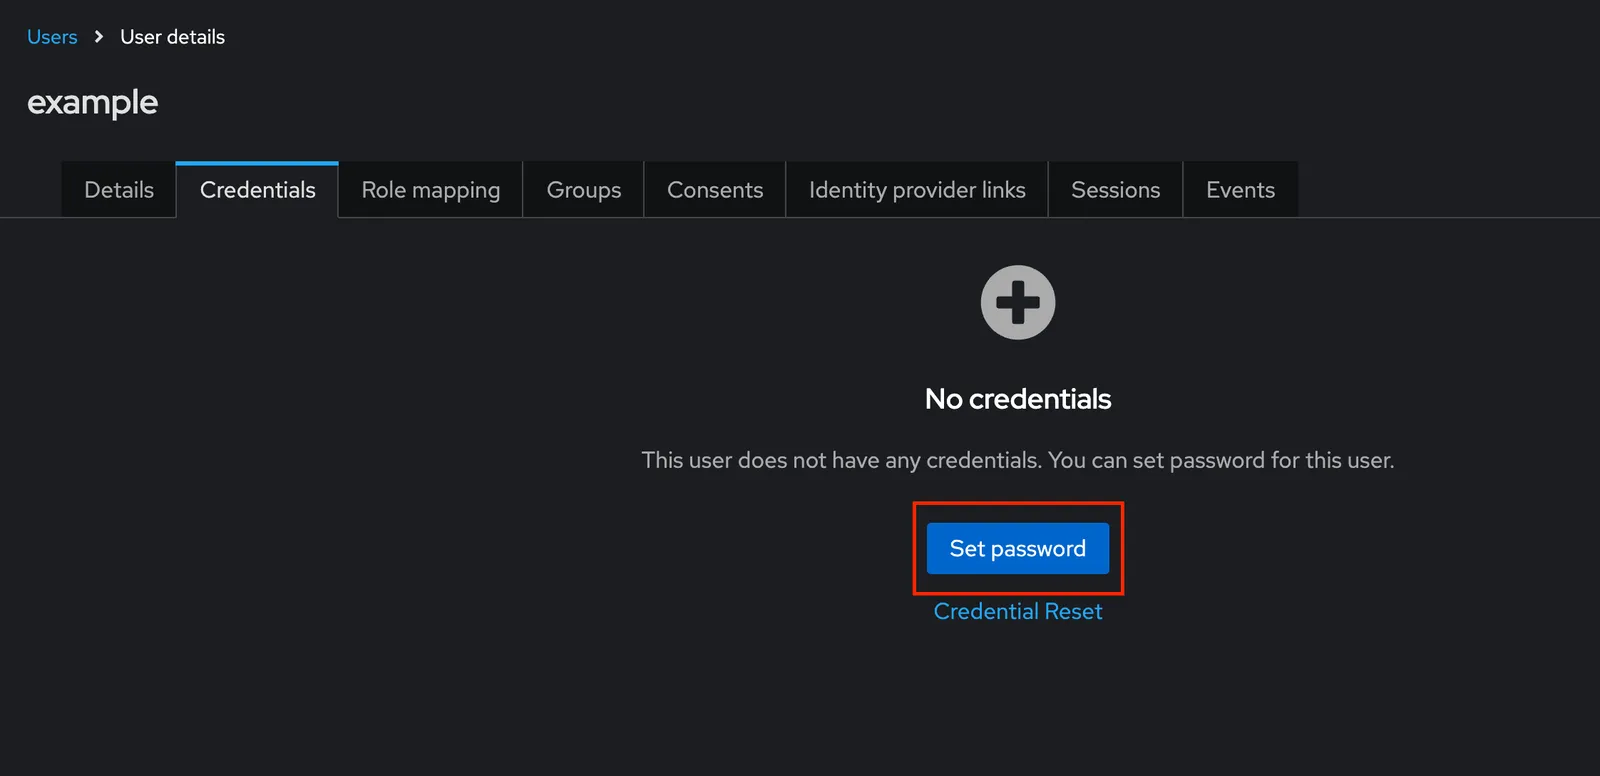
As you can see in the screenshot above, we’ll name our sample user example and supply an email address for this user as well. Once the user is created, click the “Credentials” tab, and give this user a password. We will use this password to authenticate as this user when running our sample application.
Great! Now we can go back to our oidc-example repo, and run our application. We will supply the following environment variables to our go run . invocation as well:
oidc-example % export CLIENT_ID=demo-client
oidc-example % export CLIENT_SECRET=<your client secret here>
oidc-example % export REDIRECT_URL=http://localhost:3000/callback
oidc-example % export KEYCLOAK_URL=http://localhost:8080/realms/example-oidc
oidc-example % go run .
Server starting at http://localhost:3000
This will run our sample application on localhost:3000.
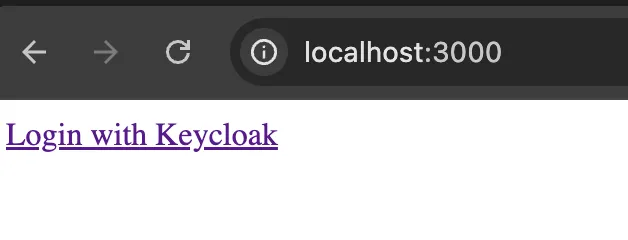
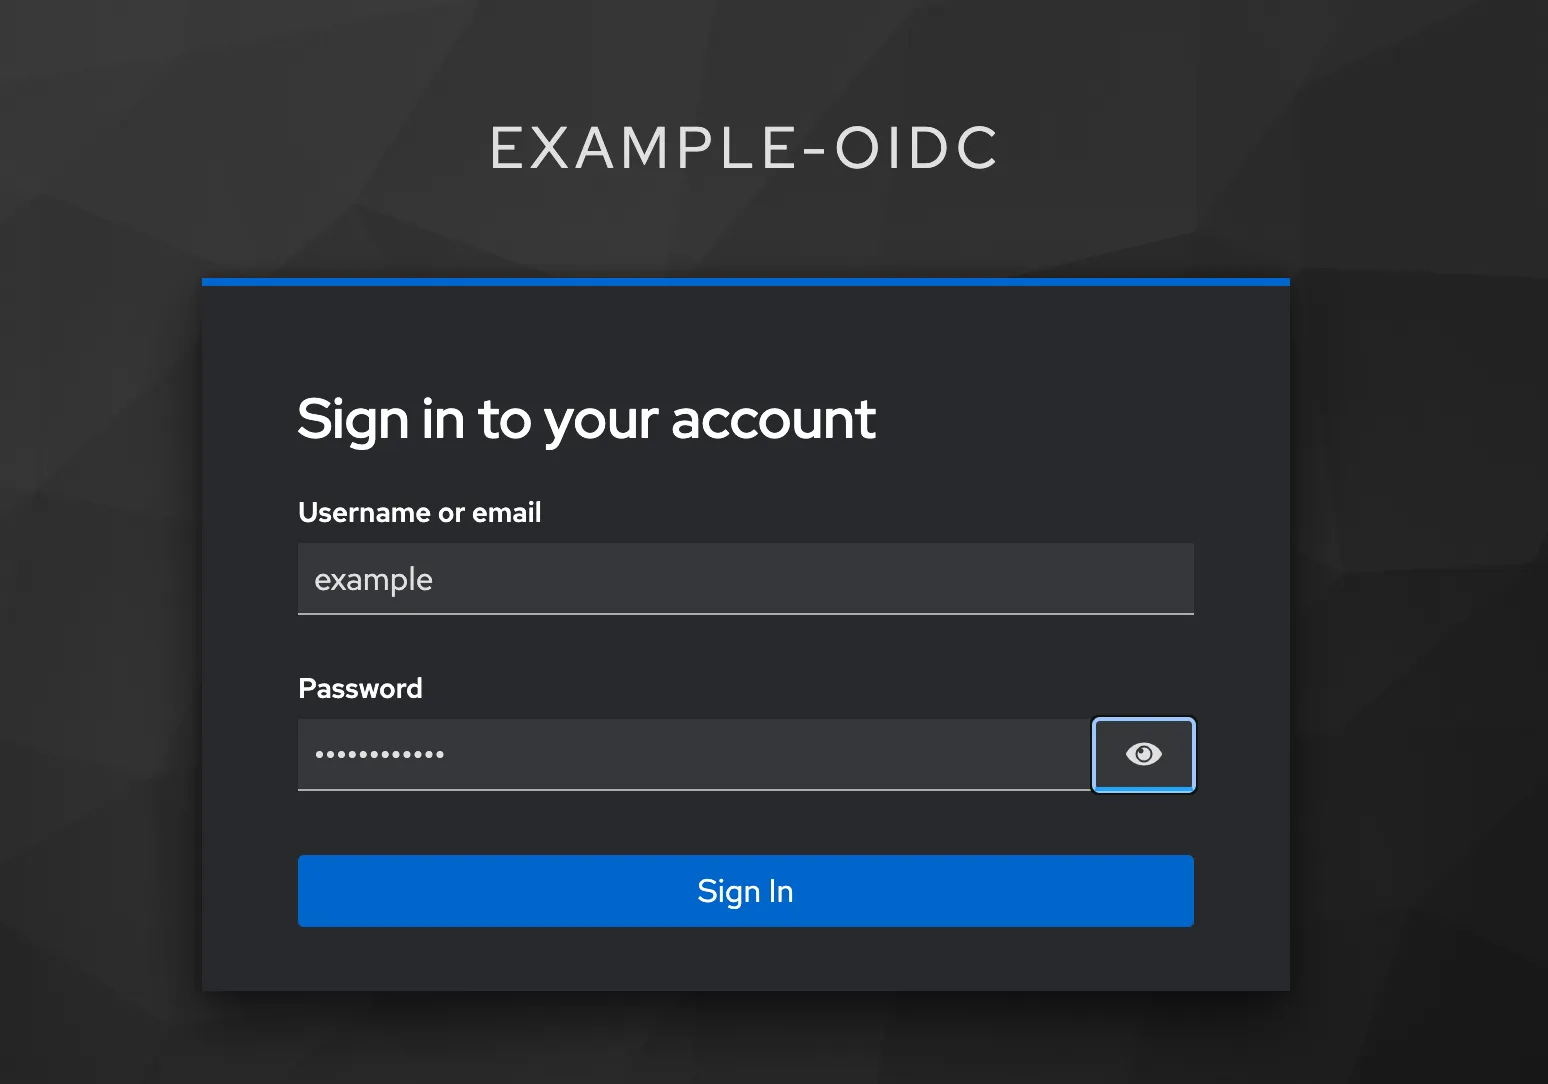
This is certainly a minimal application! Let’s now try to login as our test user example. After clicking “Login with Keycloak” we are routed to our Keycloak instance to sign in.
After clicking “Signin”, Keycloak asks for us to fill in missing details about our profile.
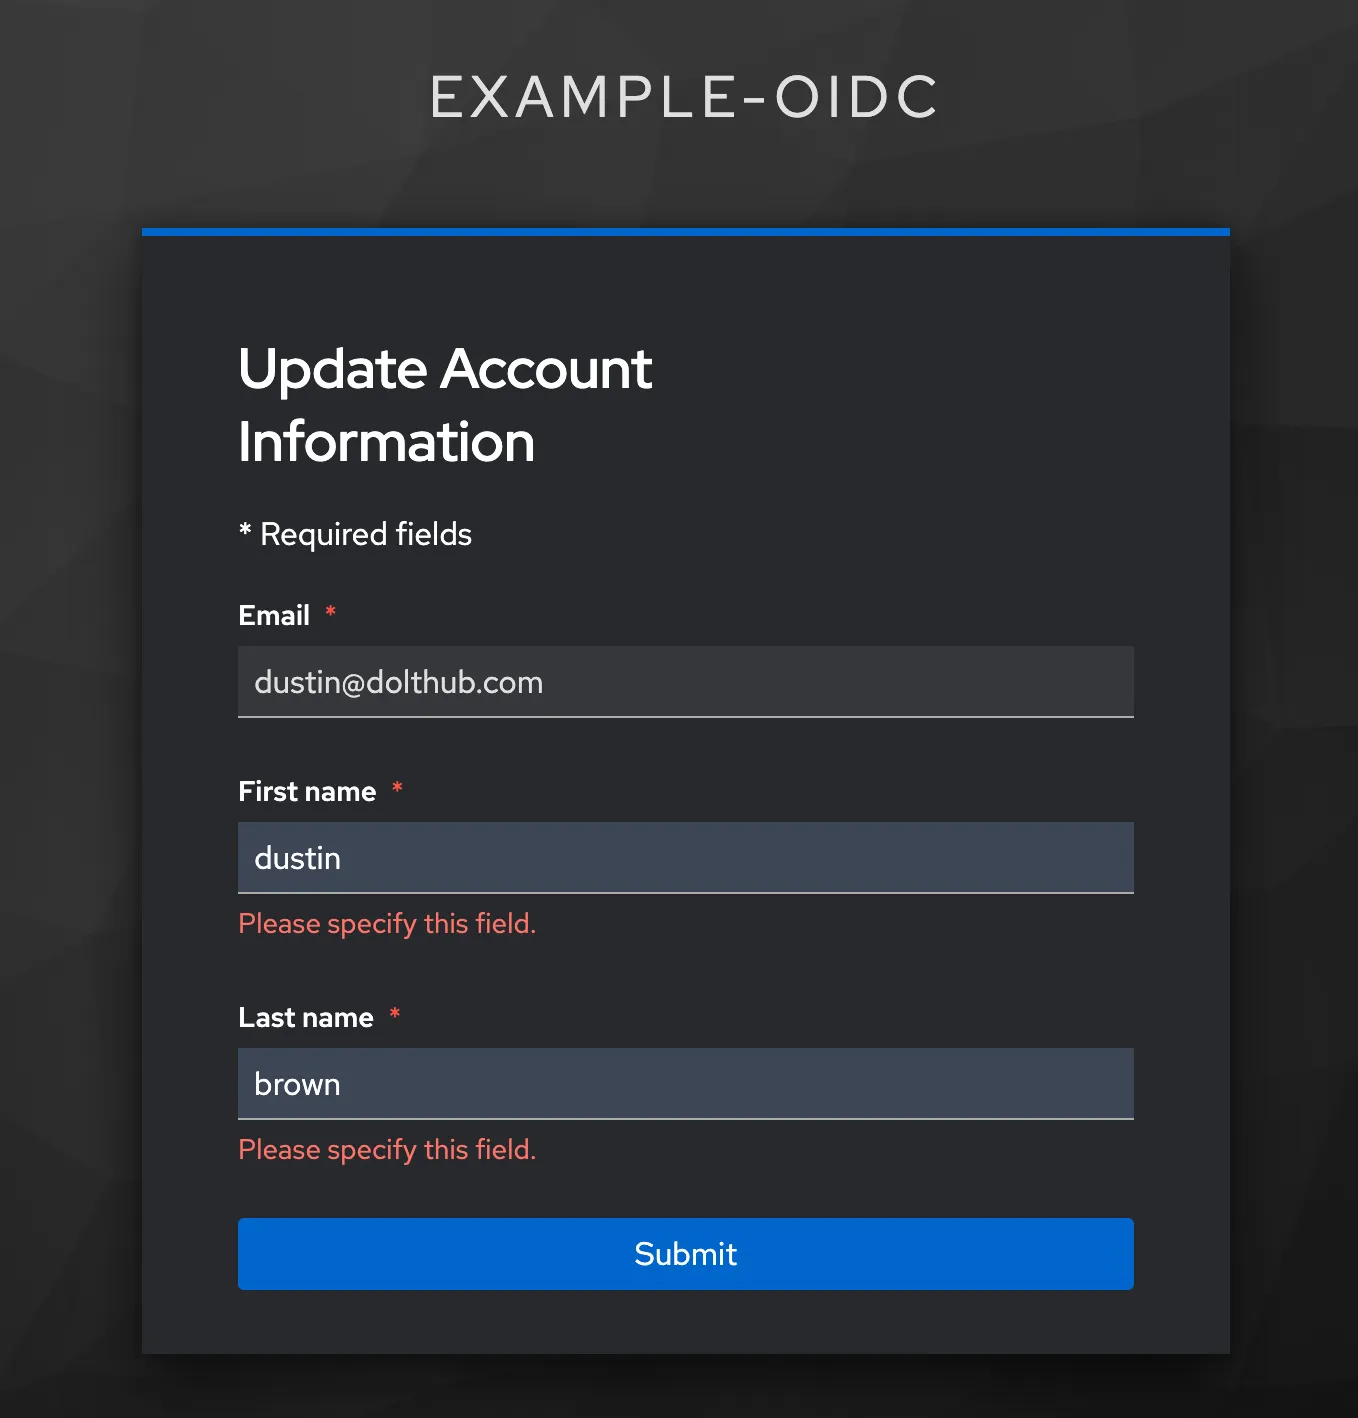
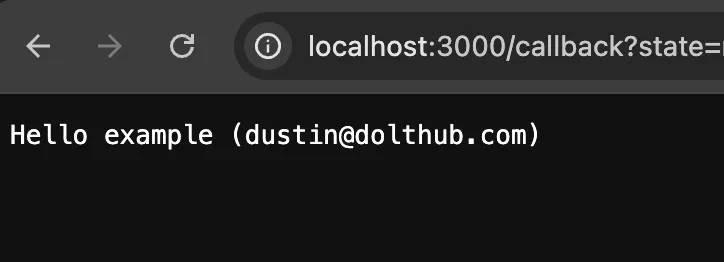
After filling out this form and clicking submit, we are successfully logged in and redirected back to our (minimal) application!
Hopefully this guide helps you get started quickly with Keycloak. Let’s go one step further though, and say we’d like to run our same Keycloak deployment on a remote host.
Running Keycloak remotely#
Presumably, if we follow the same steps for running Keycloak locally with Docker on a remote host, we’d achieve the same successful results, right?
Well, not exactly.
It turns out that running Keycloak even in development mode on a remote host has a couple of changes that need to be made in order to get it working correctly.
I had the experience of trying to deploy Keycloak in Docker to one of my EC2 instances, and was shocked to see this error page when I navigated to the admin UI on port 8080.

Ugh, why do you care, bro 😂?!
So I didn’t quite understand how this error page could be possible. Containerized applications are supposed to run deterministically across environments, but this Keycloak container was not doing that.
After a bit of digging, it turns out that Keycloak differentiates between internal and external hosts. As it states in its documentation:
External requests Users can interact with Keycloak without SSL so long as they stick to private IPv4 addresses such as localhost, 127.0.0.1, 10.x.x.x, 192.168.x.x, 172.16.x.x or IPv6 link-local and unique-local addresses. If you try to access Keycloak without SSL from a non-private IP address, you will get an error.
Boom. There it is. The reason working locally with Keycloak worked, is because it treats localhost as an internal address, and so it does not throw the SSL required error. On the remote deployment, which is using the public IP of the EC2 host, SSL is required.
So that is one “gotcha” to keep in mind when deploying Keycloak remotely. To add SSL to my remote Keycloak deployment, I ran a reverse Envoy proxy in front of it that supplied the required SSL certs. This satisfied Keycloak’s SSL requirement while allowing me to still run Keycloak on just http. To do this I added the --http-enabled true argument to my Keycloak server’s command list.
Solving the SSL problem was great, but quickly introduced the next “gotcha” I want to reveal, which has to do with how Keycloak handles endpoint routing and redirection.
What I observed in my deployment was that although I no longer received the SSL error when connecting on http://myec2ip:8080, Keycloak was trying to redirect me to http://myec2ip, which dropped the port part of my hostname. By default, http://myec2ip hits port 80, which in this case, has nothing served on it.
To fix this issue, after trying many options, I was finally able to get Keycloak to redirect without dropping the port from the hostname by doing two things. First, I added the argument --proxy-headers "xforwarded" to the command list for Keycloak, telling it to accept xforwarded proxy headers, and second, by explicitly adding an “X-Forwarded-Port” header to my proxy server configuration. It looks like this:
---
routes:
  - match: { prefix: "/" }
route: { cluster: "keycloak", append_x_forwarded_host: true }
request_headers_to_add:
  - header:
      key: "X-Forwarded-Port"
      value: "8080"
After this change, I restarted by proxy and my Keycloak on the remote host and it worked, just like it did locally.
Conclusion#
Keycloak is a great open-source tool to check out, and I hope this post encourages you to do so. We’re always experimenting here at DoltHub with different tools and integrations for our various products, so if you know of one you’d like us to check out and blog about, let us know! Just come by our Discord and give us a shout.
Don’t forget to check out each of our cool products below:
- Dolt—it’s Git for data.
- Doltgres—it’s Dolt + PostgreSQL.
- DoltHub—it’s GitHub for data.
- DoltLab—it’s GitLab for data.
- Hosted Dolt—it’s RDS for Dolt databases.
- Dolt Workbench—it’s a SQL workbench for Dolt databases.