
The Dolt Workbench is a SQL workbench for your MySQL, Postgres, Dolt, and Doltgres databases. It is distributed on Docker Hub, as well as a desktop application in the Mac App Store and Microsoft Store. We have written previous articles about how to build an Electron application and submit it on the Mac and Windows app stores. This article will go over how to release new versions of the application in both stores as a new team member.
Mac App Store#
The Mac App Store release process involves gaining access to your team’s Apple Developer account, downloading provisioning profiles and certificates, building a signed .pkg file, and submitting through App Store Connect.
1. Gain Access#
To start, create an Apple Developer account with your company email and ask your team admin for access.
Next, register your device.
2. Download provisioning profiles and certificates#
Download the provisioning profiles for Development and the App Store, and put them in build/mac. The filename should match the provisioningProfile field in your Electron YAML configuration for Mac.
You will need to ask a team admin to send you certificates from their Keychain named Distribution, Mac Installer Distribution, and Developer ID Application. They can do so by opening Keychain Access, right clicking on the desired certificate, and clicking Export. This will ask them for a password and create a .p12 file. Once they send it to you, you can import this .p12 file into your Keychain and use the password they created.
Once they are added to your Keychain, you should also see them by logging into your Apple Developer account in Xcode under Account > Manage Certificates. You may need to restart your computer for these certificates to become valid.
Finally, add an .env file to build/mac with the following variables, replacing the placeholders in brackets with your information:
SIGNING_CERTIFICATE="Developer ID Application: <entity_name> (<team_id>)"
TEAM_ID="<team_id>"
APPLE_ID="<apple_id>"
APPLE_ID_PASSWORD="<password>"
You can generate an app-specific password by logging into account.apple.com and going to Sign-In and Security > App-Specific Passwords.
3. Building the app#
The Mac App Store uses two version numbers: the version in your package.json (which is the user-facing version) and the buildVersion in your build configuration file. The build version must increase with each submission.
Your Mac build configuration should have already been added to your package.json here. After running yarn build (this may take a while), you should see a <app_name>-mac-universal.pkg file in the dist folder.
4. Testing and submitting the app#
We use the Transporter app (which you can download for free) to submit our application. Open the Transporter app and upload the <app_name>-mac-universal.pkg file. It will check for errors, and once it’s ready, you can click the Deliver button to send the app to your Apple Developer account.
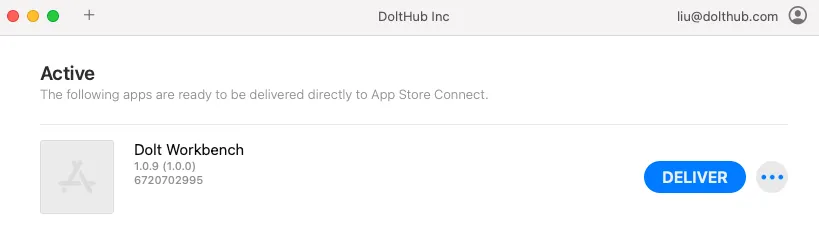
Once the app has been delivered, log in to App Store Connect and go to Apps. You should see your app there.
To test your app before submitting the new version, go to the TestFlight tab. Add your internal test group (make sure your email has been added to the test group) to the newly delivered version. Then install and open the TestFlight app, and you should be able to upgrade your application to the version you are testing.
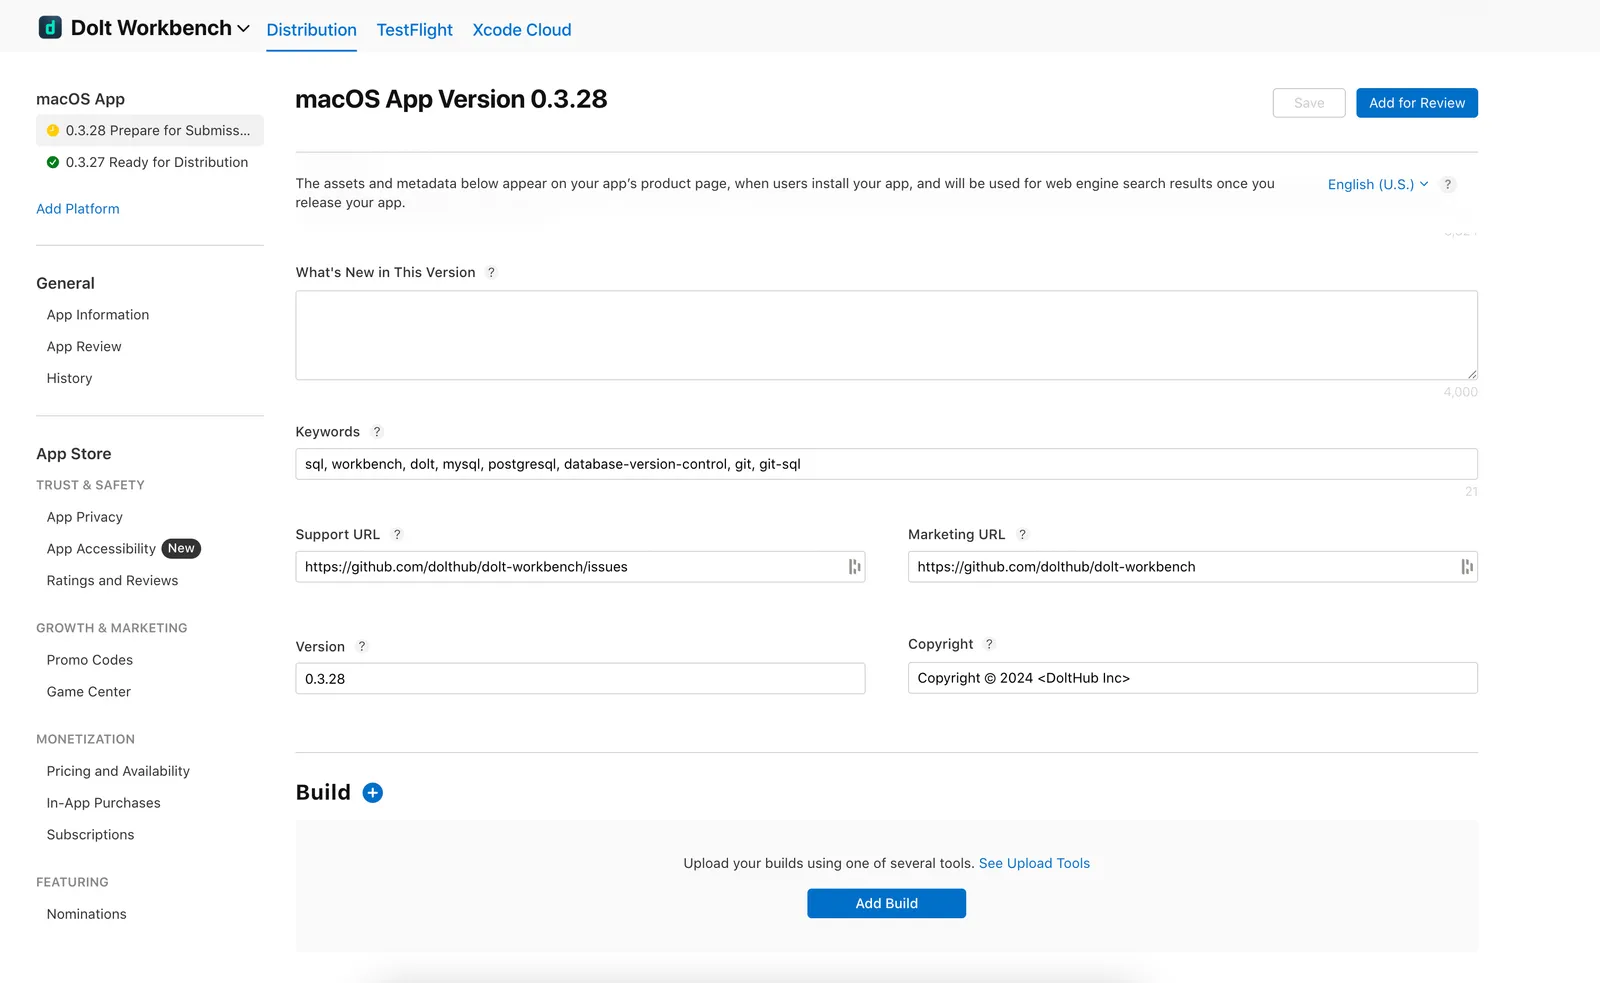
Once you have tested your new version, go back to the Distribution tab at App Store Connect and click the plus button on the left next to “macOS App”. Enter the version number that matches the new version in your package.json.
Fill out “What’s New in This Version” and select your newly delivered build using the Add Build button. Click the Submit for Review button when you are ready.
The Apple team will review your app and provide feedback if changes are needed before the new version can be released. Once approved, the new version will appear in the App Store.
Microsoft Store#
Publishing to the Microsoft Store requires access to Partner Center, building the APPX and Application files, and setup in the Microsoft Store dashboard.
1. Get added to the Partner Center#
To submit your application to Microsoft Partner Center initially, one of your teammates should have created a Microsoft Developer account. Ask them to add you to Microsoft Partner Center with permissions to edit and publish your application. Make sure you use an email associated with a Microsoft account.
2. Build the application#
You must use a Windows computer to build your application. For Mac users, we provision a remote Windows desktop on AWS to build and submit the Windows version of our application.
Update the buildVersion field in your Electron YAML configuration for Windows and run yarn build. Your Windows build configuration should have already been added to your package.json here.
After running yarn build and the build completes, you should see both an APPX and Application file in your dist folder. We use the Application file for our releases on GitHub and the APPX file to submit to Microsoft Partner Center.
3. Submit via Partner Center#
First, navigate to the app in the Partner Center dashboard.
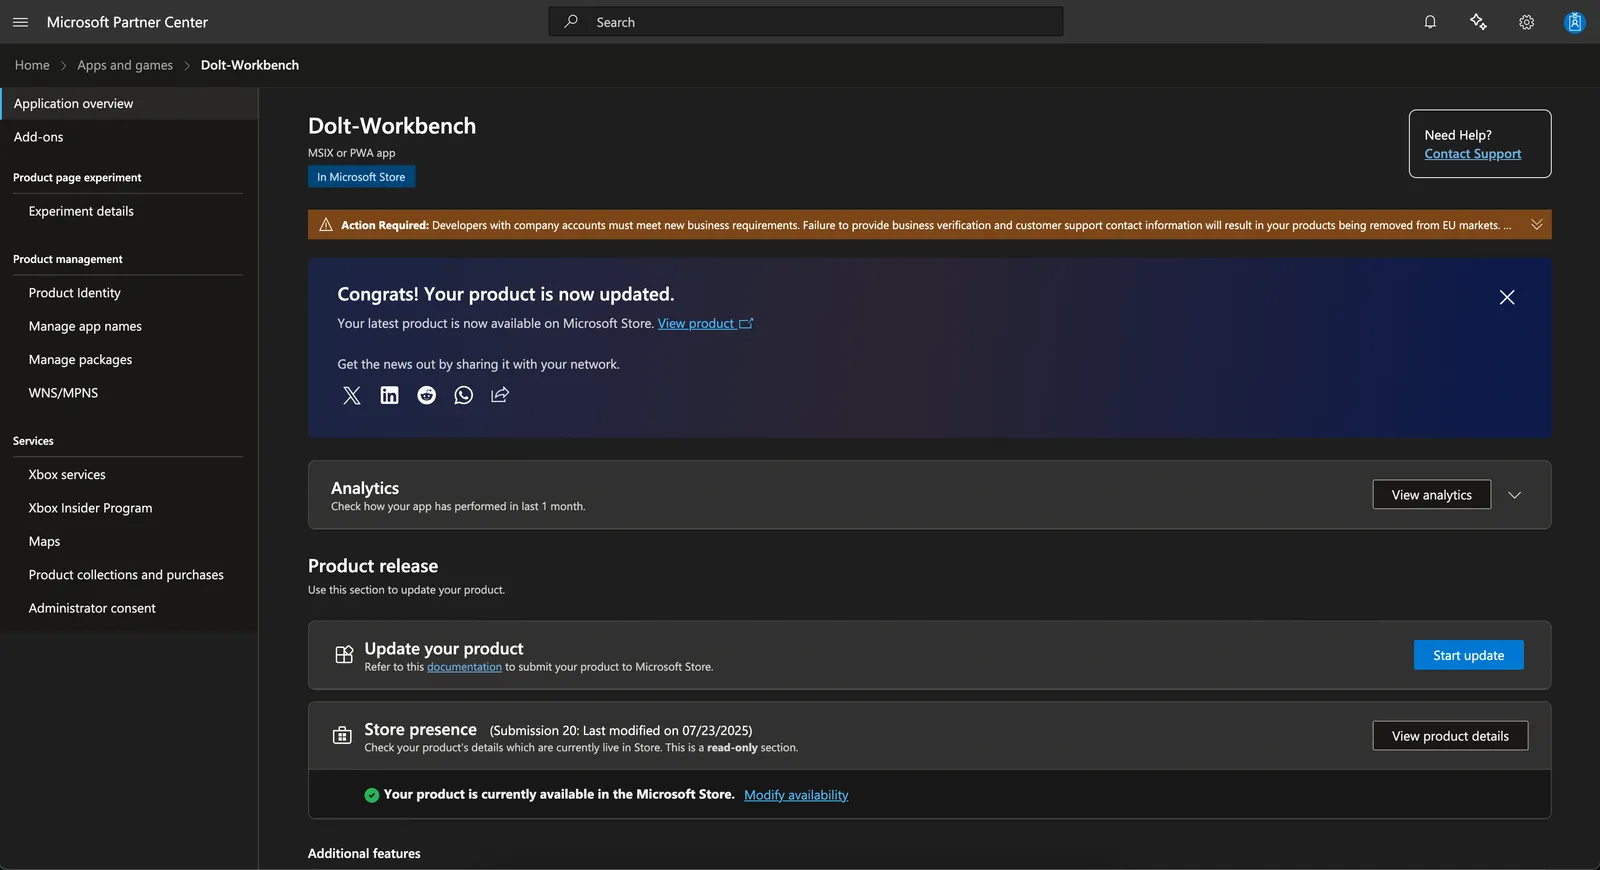
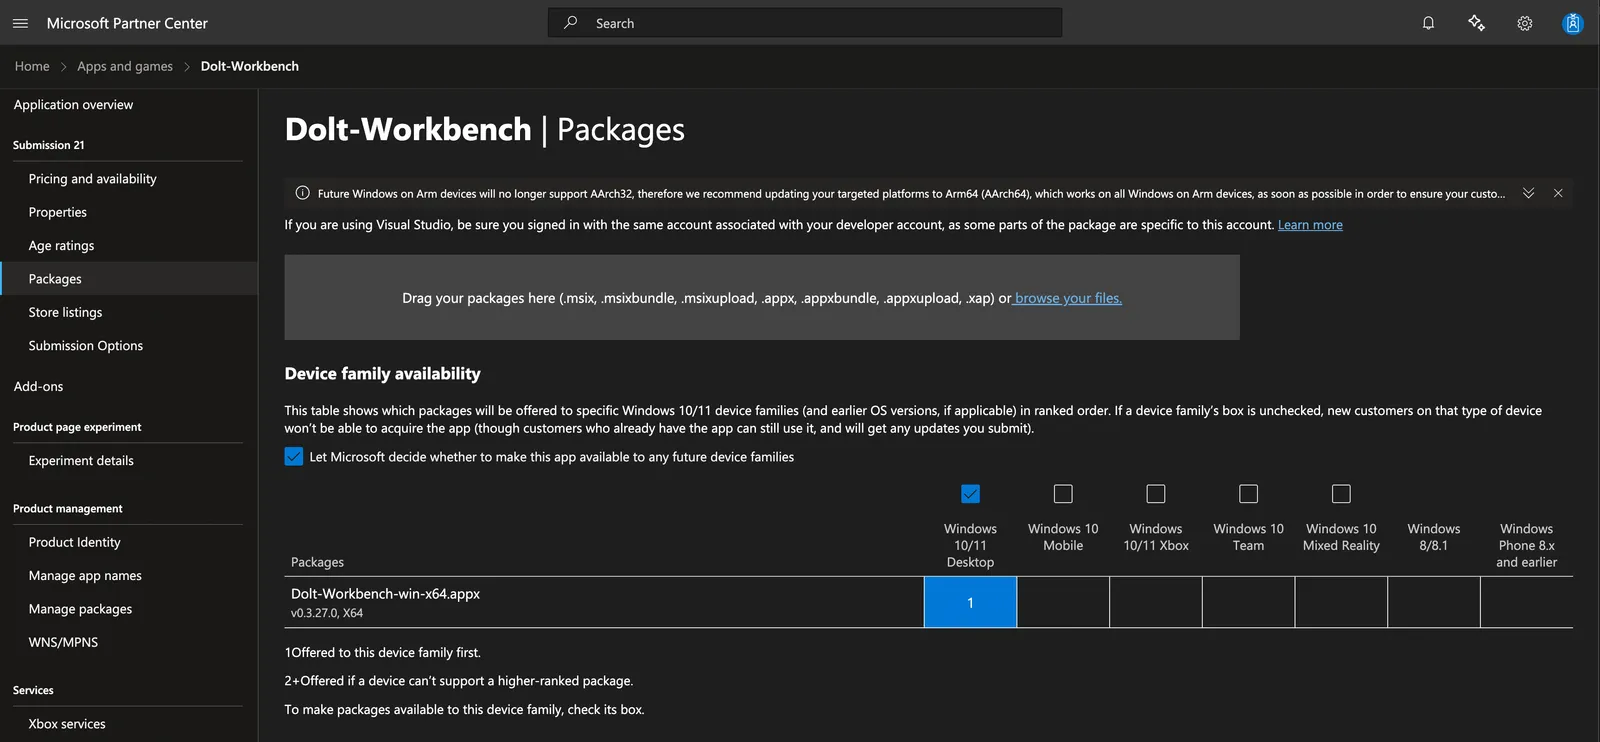
Click Start Update. In Product Update > Packages, drag your APPX file from the most recent build and click Save.
If you’d like to update what’s new in this release, you can do so in Product Update > Store listings. Click on a language and fill out “What’s new in this version”.

Then click Submit for certification and wait for Microsoft to approve the update.
Conclusion#
This guide covers the process for releasing new desktop application versions to both the Mac App Store and Microsoft Store. It walks through gaining access, setting up credentials, building the applications, and submitting through App Store Connect and Microsoft Partner Center respectively.
If you have questions about the Dolt Workbench, join our Discord or create an issue on GitHub.