
It’s an eventful week for the Dolt Workbench. Yesterday we announced that the workbench is now available as a desktop application on both Mac and Windows. Today we’re excited to announce that the Dolt Workbench now supports Doltgres, Postgres for Dolt.
Doltgres was released in Alpha in November 2023 and we plan on releasing Doltgres Beta in Q1 2025. Workbench compatibility is an important part of our path to a beta release and the Dolt Workbench is the best SQL workbench for Doltgres, as it comes with version control features like branches, commit logs, tags, and pull requests.
Getting started#
This getting started guide will walk you through how to configure Doltgres in the Dolt Workbench, add data to a branch, create a commit, view logs and diffs, and merge a pull request.
Installation#
We have a few different ways to install the Dolt Workbench:
- Download the desktop application for Mac or Windows-x64
- Pull the Docker Hub image
- Build from source
You will also need to install Doltgres. The Dolt Workbench works with Doltgres versions >=0.13.0.
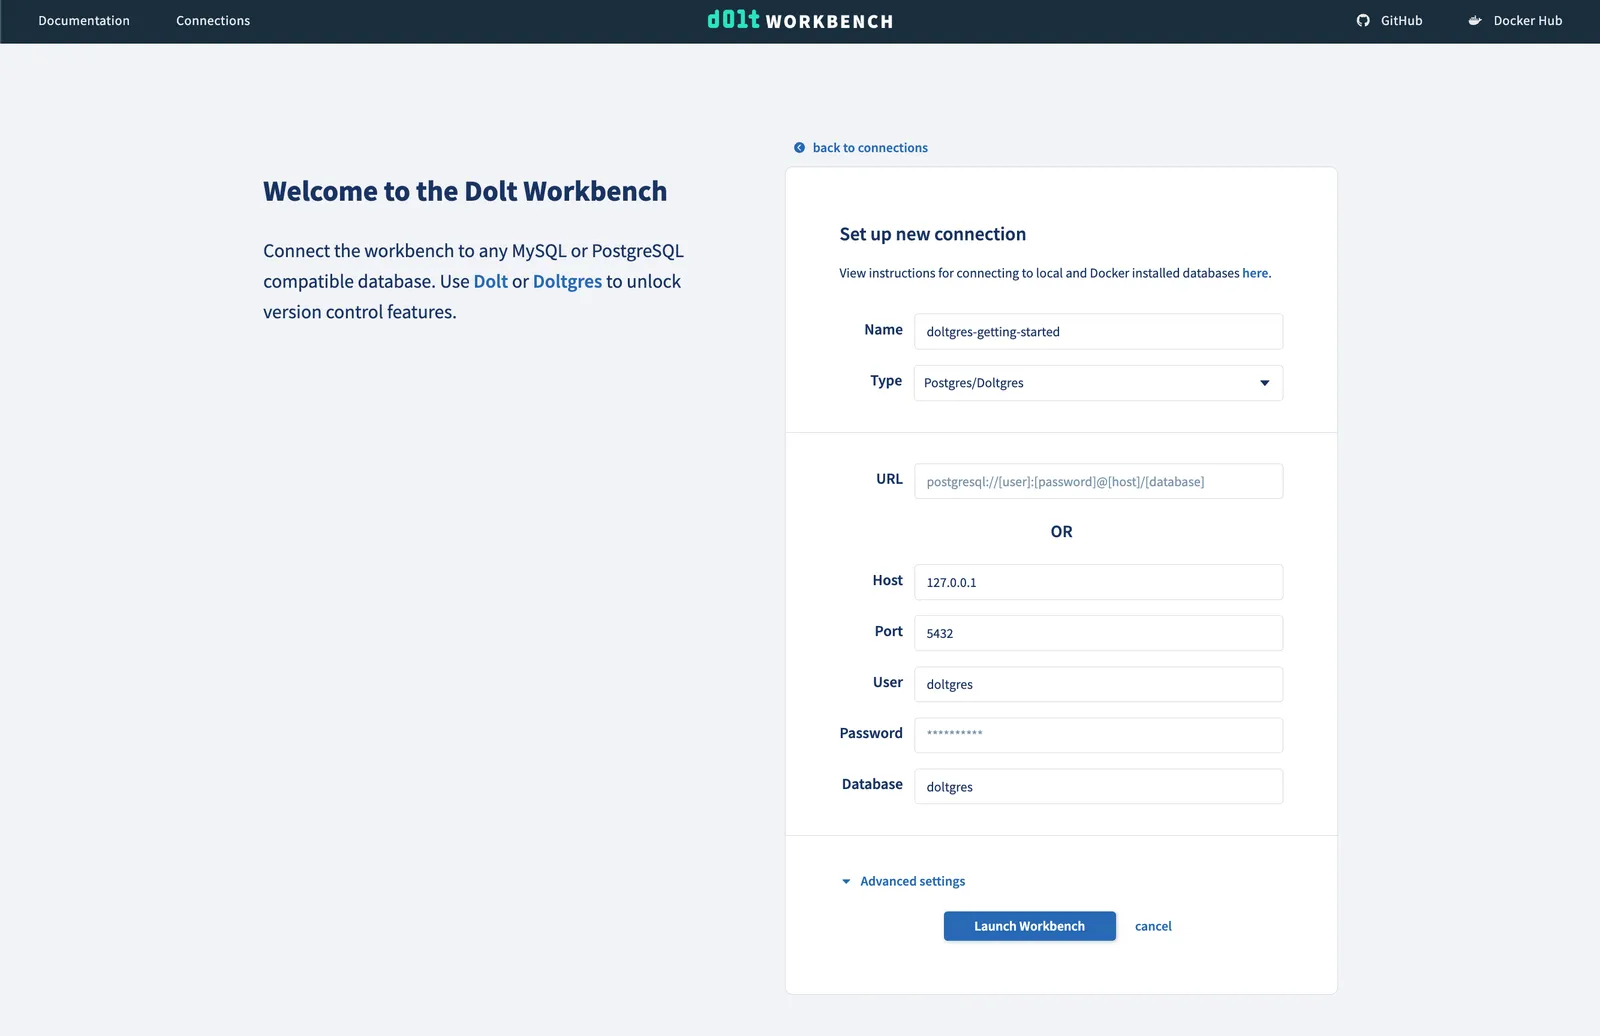
Connecting to Doltgres#
Once you have Doltgres installed, running doltgres creates a doltgres user and a
doltgres database and starts a server running on localhost port 5432.
$ doltgres
Successfully initialized dolt data repository.
Starting server with Config HP="localhost:5432"|T="28800000"|R="false"|L="info"|S="/tmp/mysql.sock"
You can enter this connectivity information from the workbench UI.
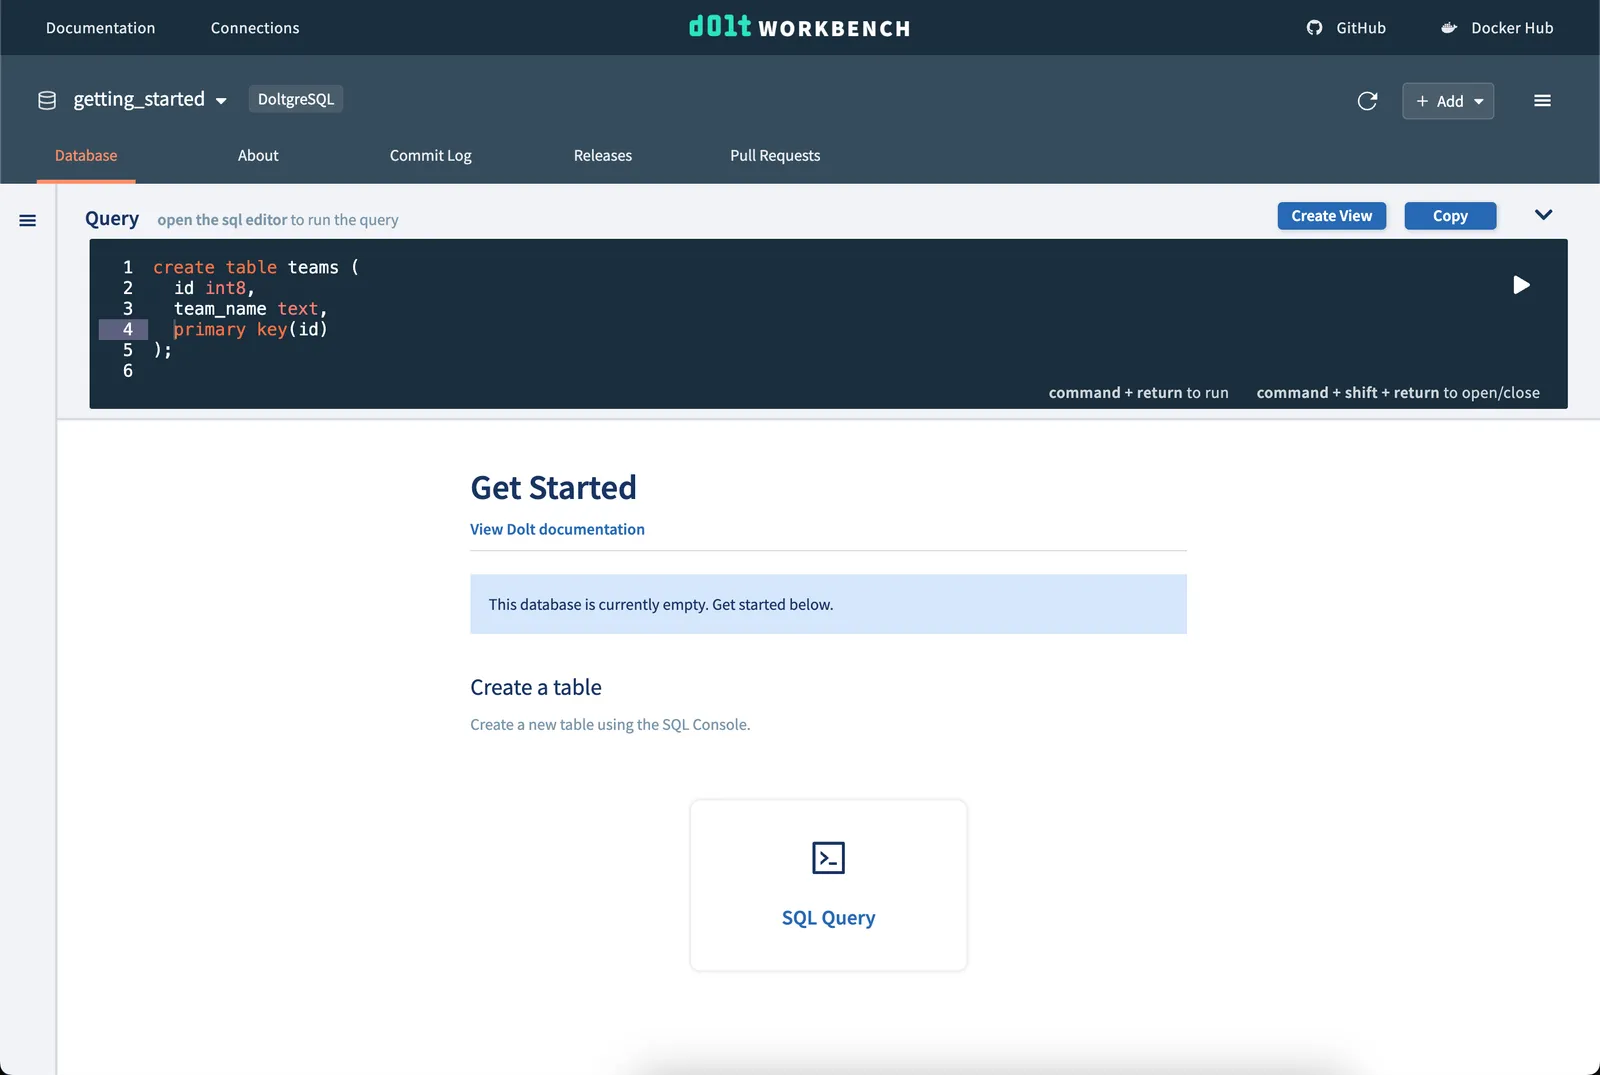
Creating some tables#
Once you have successfully connected to our Doltgres database, we create a new database
called getting_started and add some tables using the SQL console. We’ll use the
example from the Doltgres Getting Started
Guide.
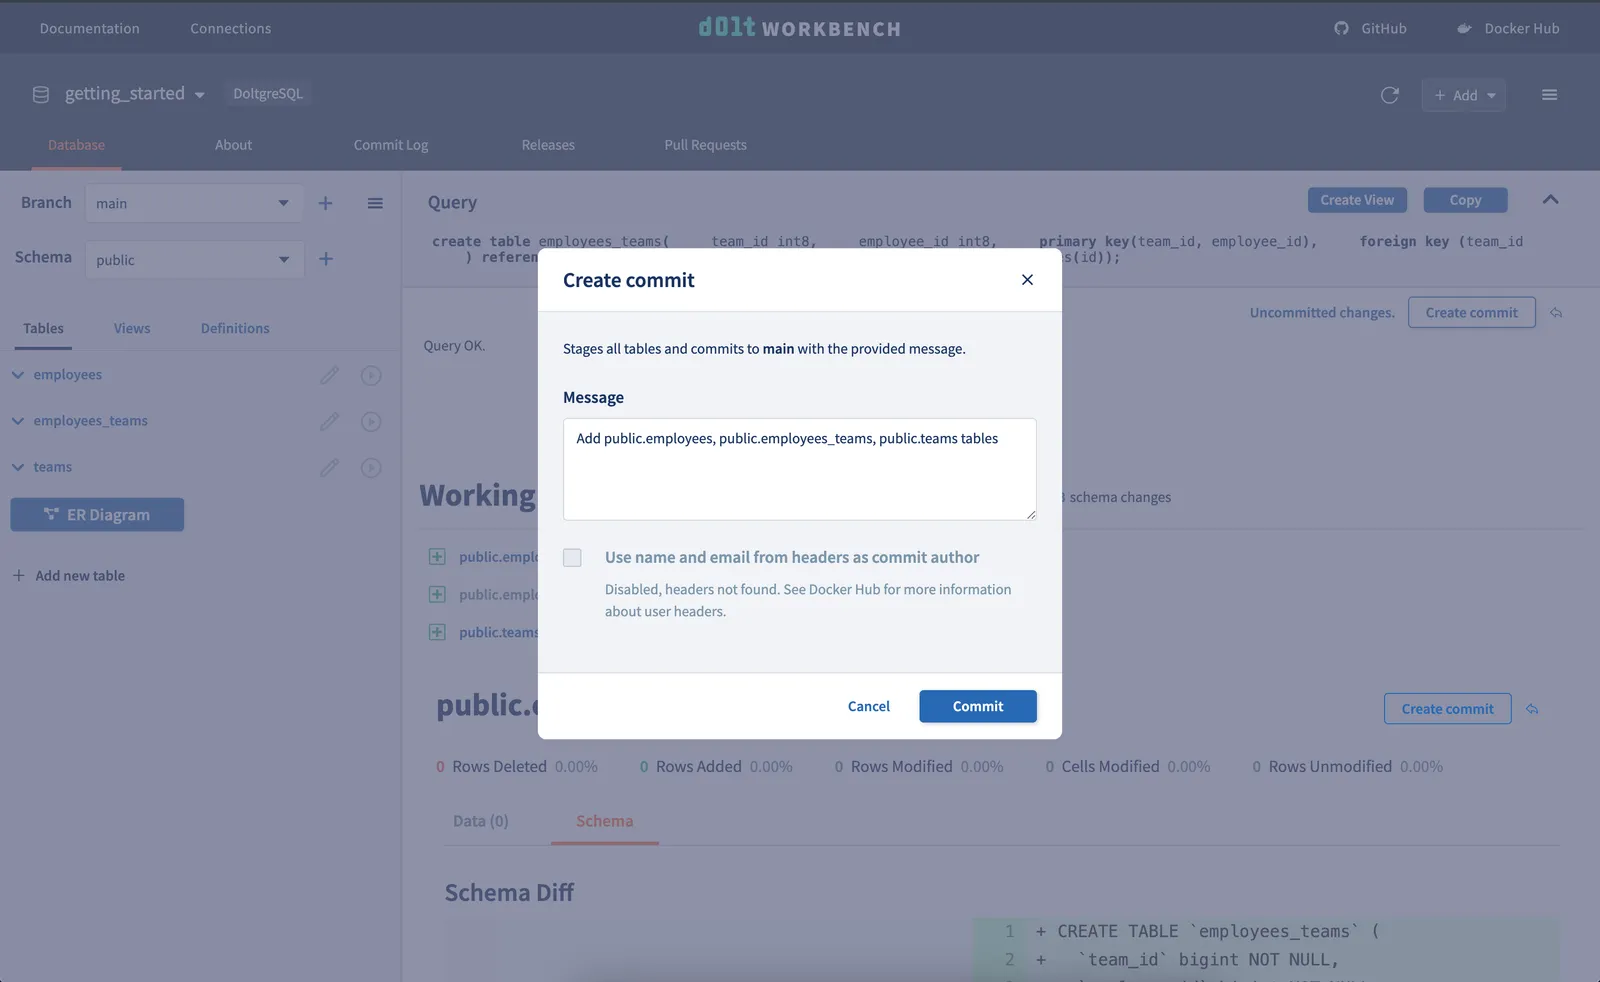
Making a commit#
Now that we have our three tables, we’ll use the Create commit button on the right to
create a commit on our main branch.
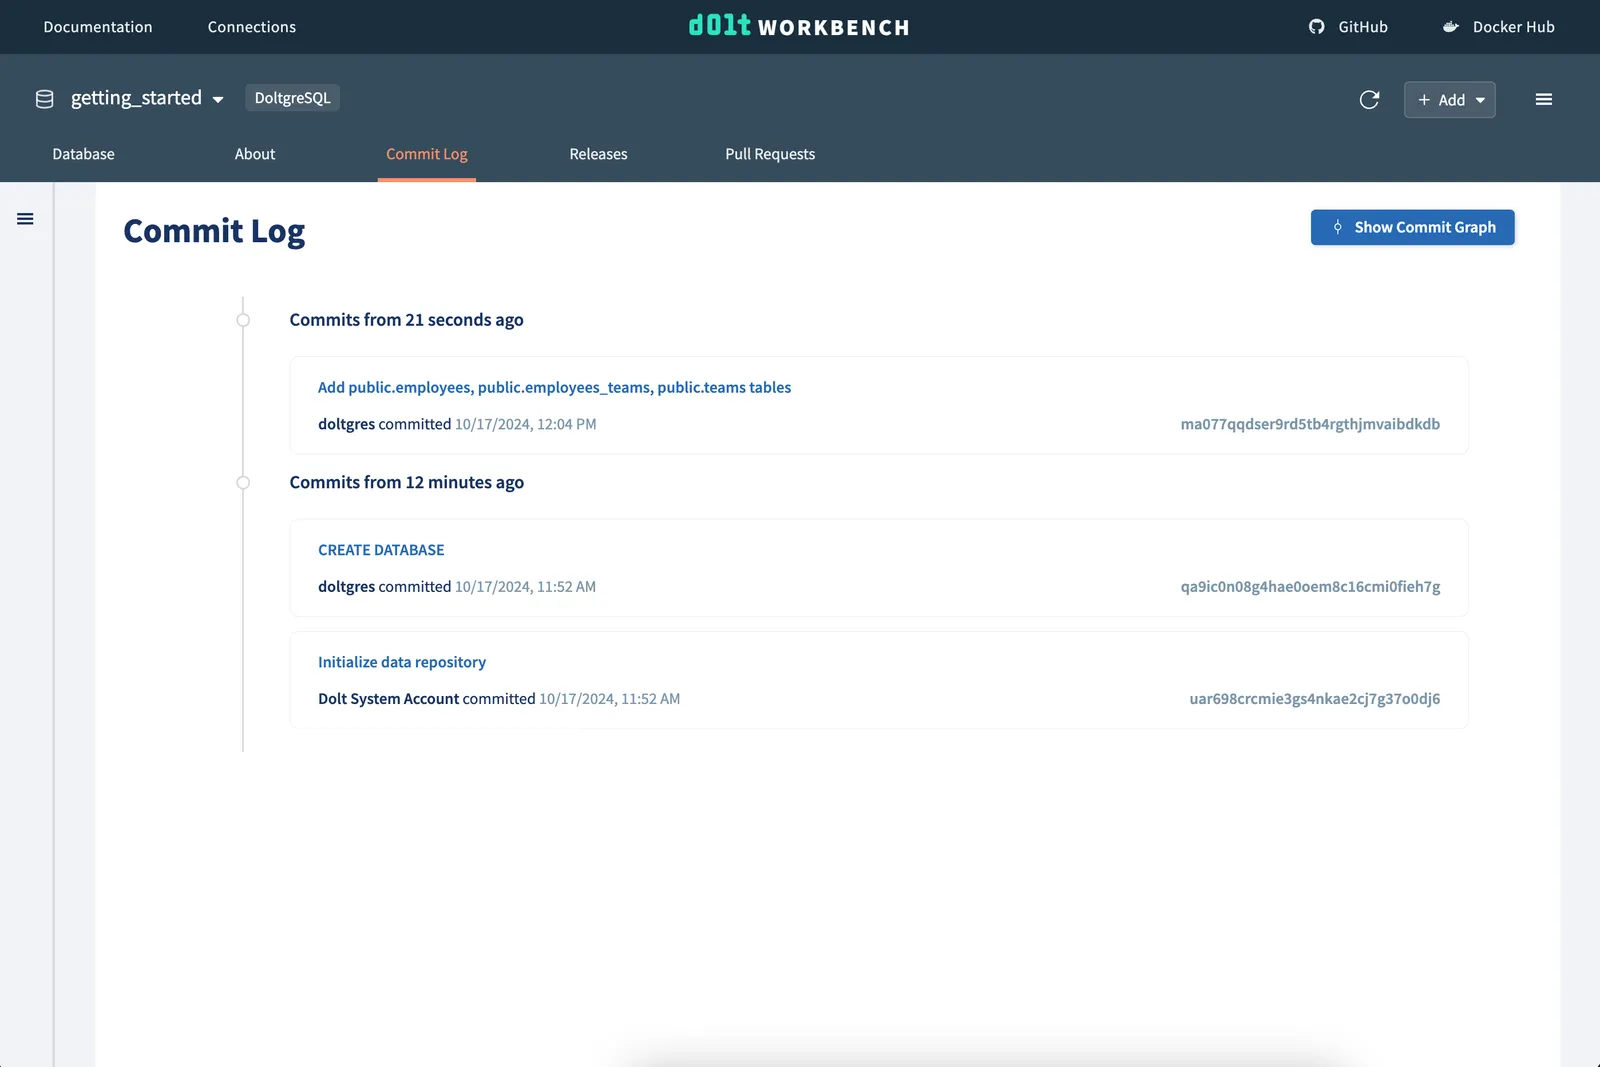
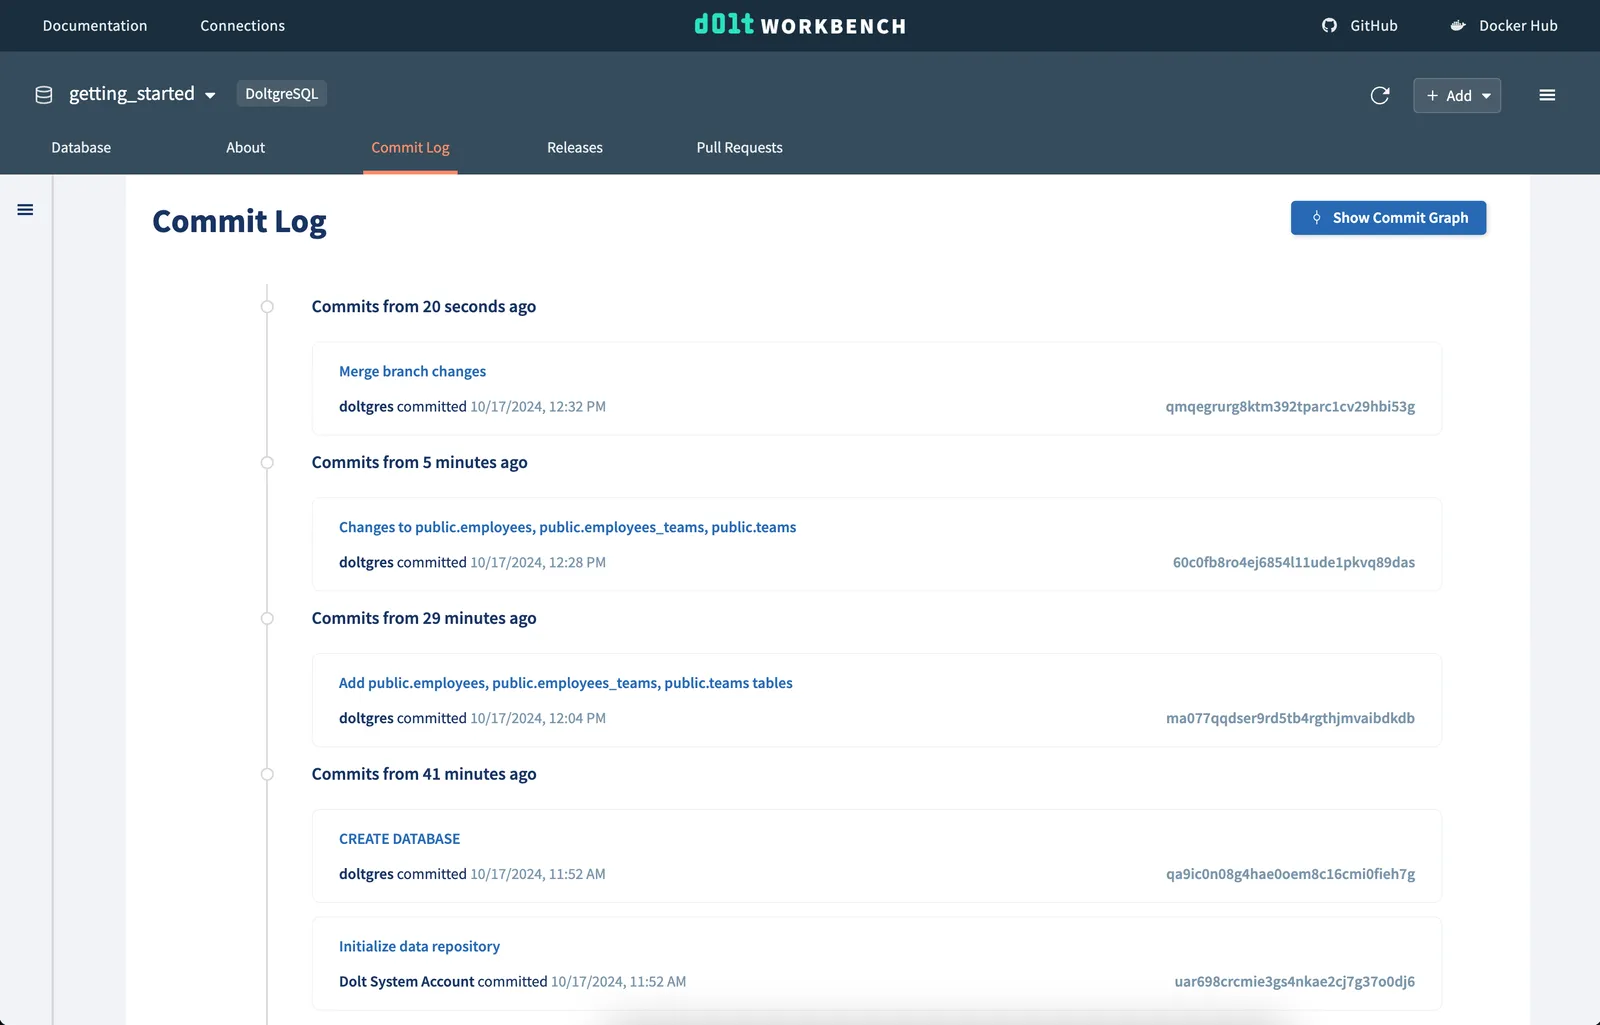
Viewing the commit logs#
And we will see our commit in the logs.
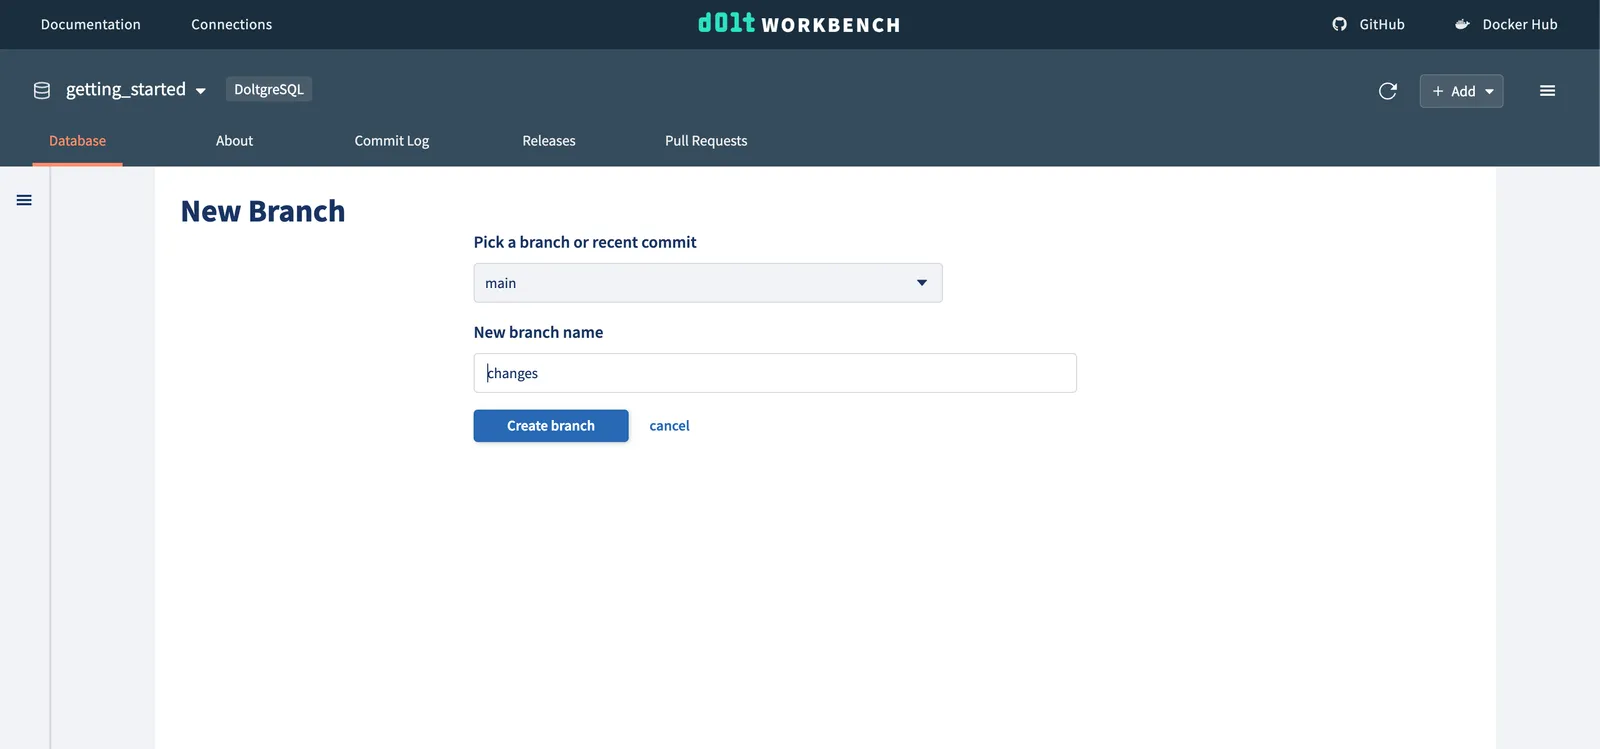
Making a change on a branch#
Now we want to make an isolated change on a new branch. First, use the + button next to
the branch dropdown in the left navigation to create a new branch from main.
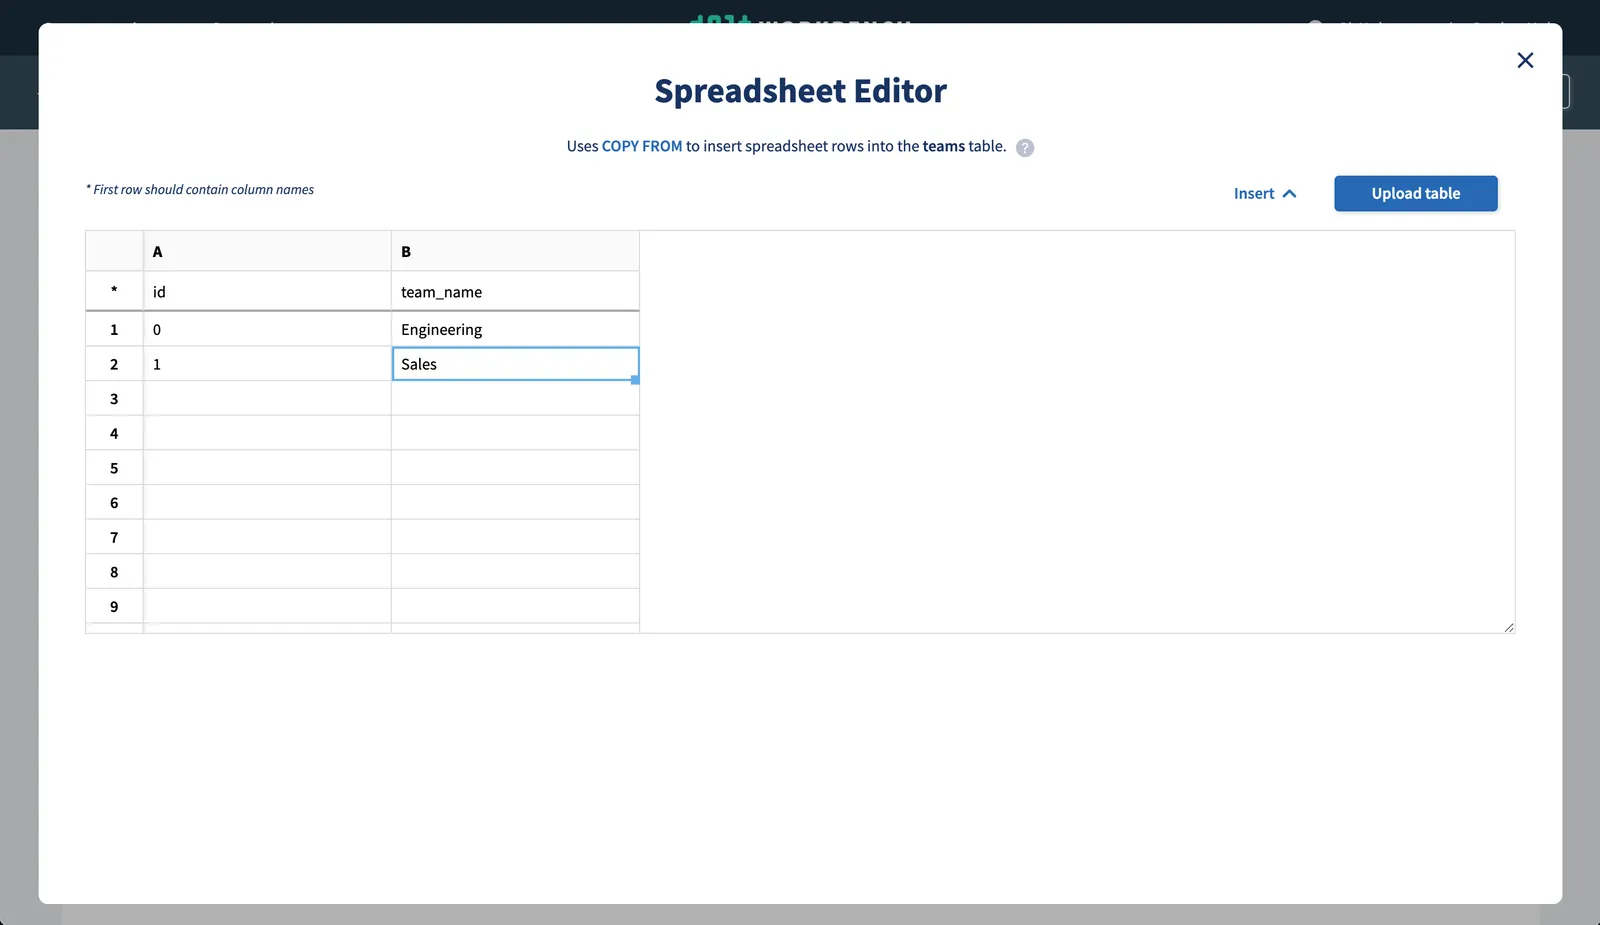
Next, we’ll insert some data. We can use the SQL console, file upload, or the spreadsheet editor to add data to our tables.
Using the SQL console:

Using the spreadsheet editor:
We’ll again commit our changes, but this time the commit will be created on our changes branch.
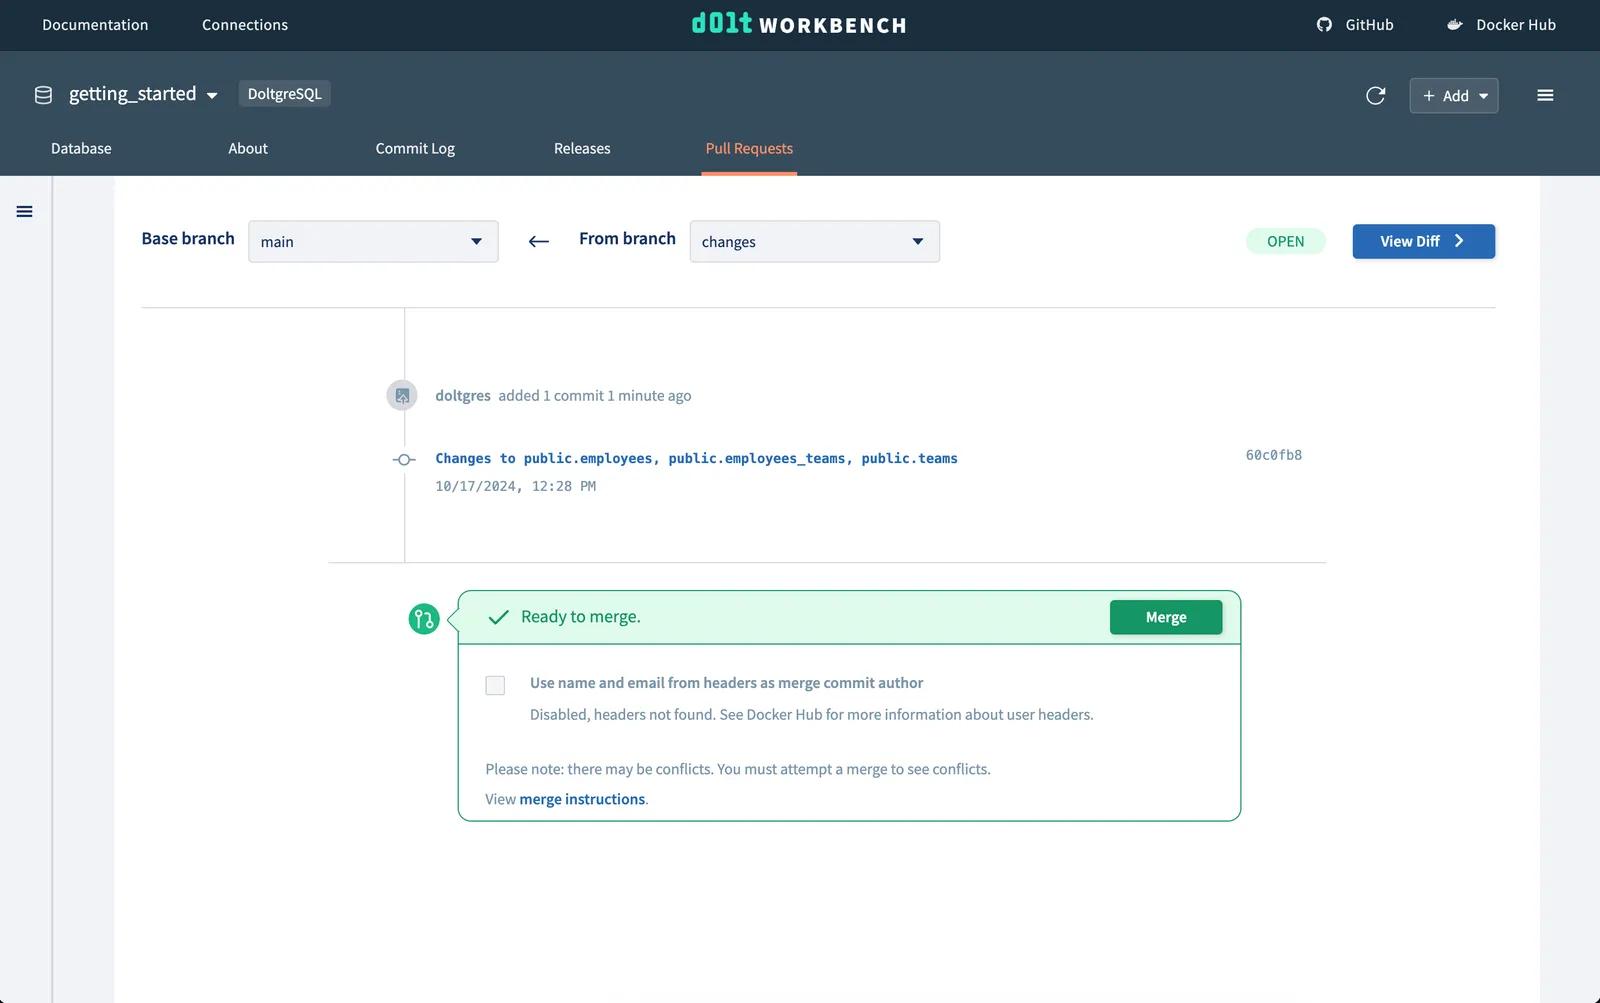
Viewing the pull request#
We want to see the changes that we made on our branch changes to make sure all the data
we added looks correct before we merge it to our main branch. We can do this by
navigating to the Pull Requests tab and choosing base branch main and from branch
changes.
We can see the one commit we made on the changes branch, which we are proposing to merge
into the main branch.
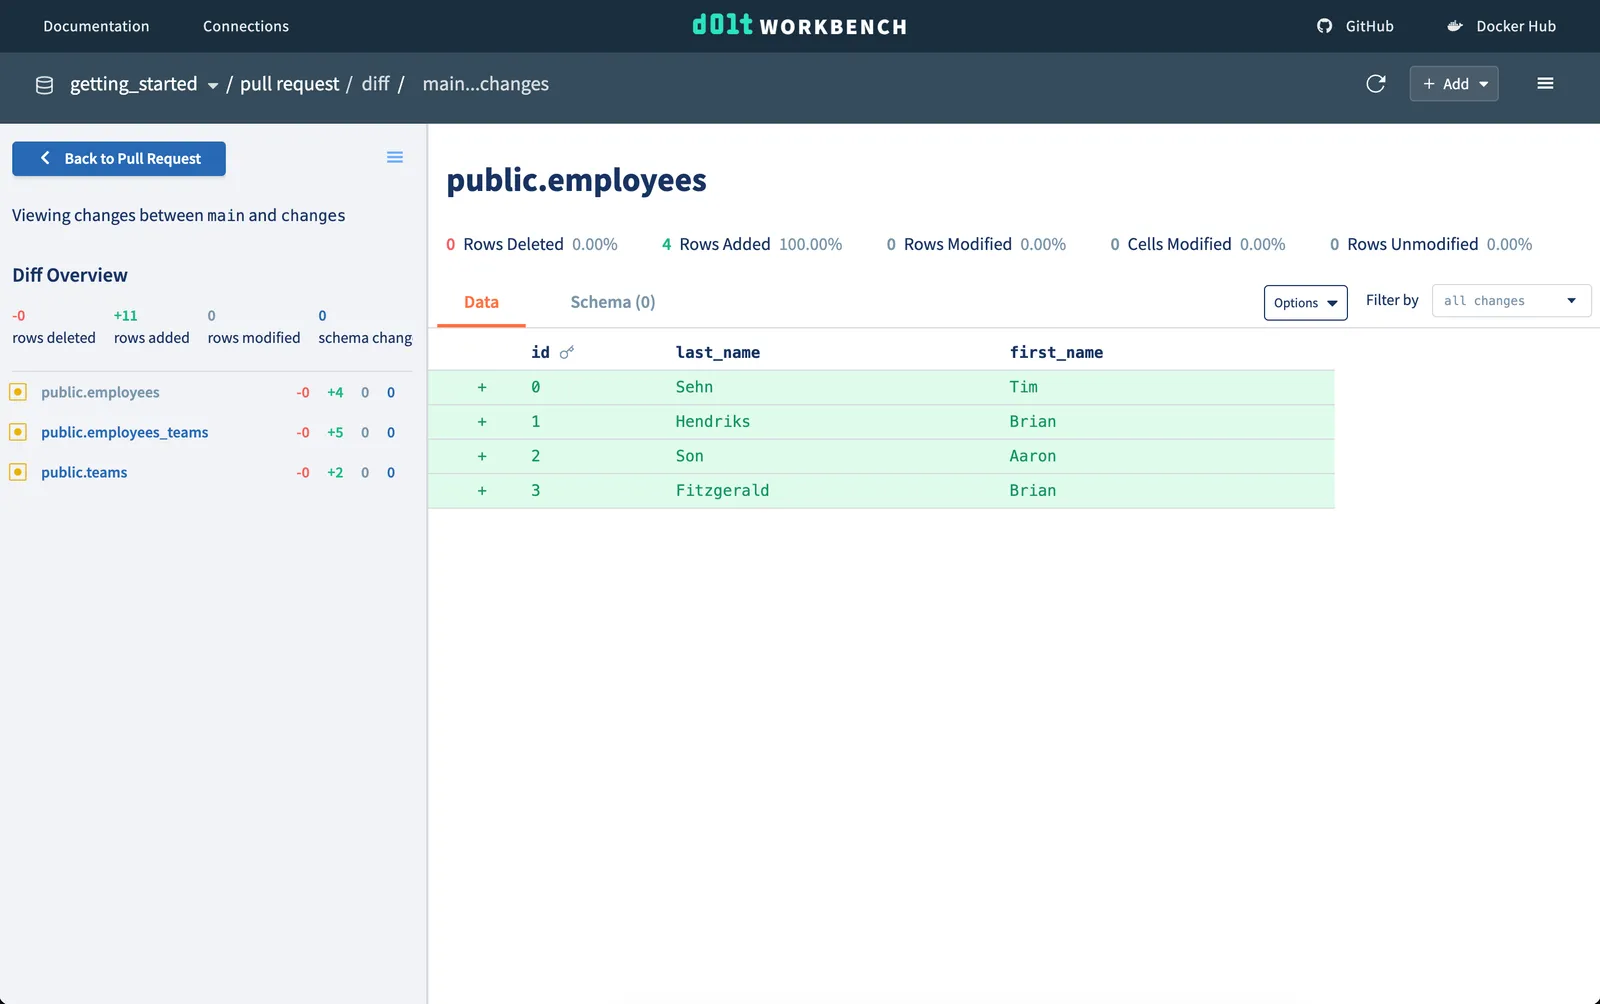
If we click on View Diff, we can see the summary of changes, as well as the cell-level
changes we made to each of our tables.
Merging#
Once we have reviewed all our changes, we can merge our branch into main using the
Merge button on the pull request page. If successful, we’ll see our commit from our
changes branch in the commit log for the main branch.
You have now added data to your Doltgres database using a Git-like version controlled workflow!
Conclusion#
We’re working hard to launch Doltgres Beta in a few months, and workbench support is a step toward that goal. The Dolt Workbench is the best SQL workbench for Doltgres, so try it out and see how Doltgres can add powerful version control to your application. Let us know what you think in our Discord or file an issue for Doltgres or the Dolt Workbench if there are any additional features you’d like to see.